Tag: Holiday Decor

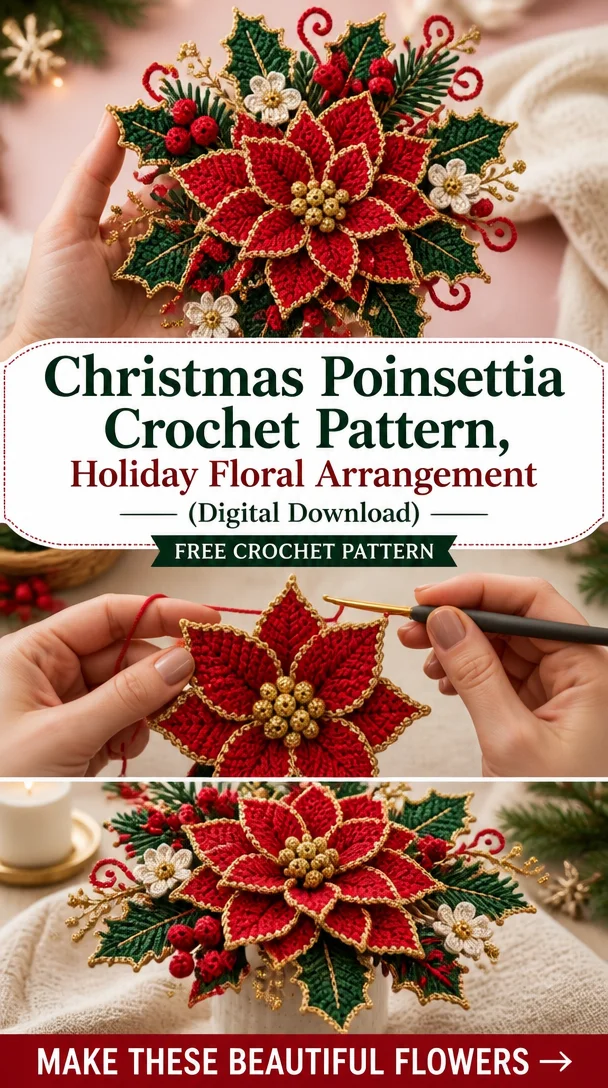
  • Christmas Poinsettia Crochet Pattern, Holiday Floral Arrangement (Digital Download)

    Christmas Poinsettia Crochet Pattern, Holiday Floral Arrangement (Digital Download)

    Christmas Poinsettia Crochet Pattern, Holiday Floral Arrangement (Digital Download)

    Create a stunning handmade Christmas decoration with our exquisite Christmas Poinsettia Crochet Pattern! This detailed PDF guide offers a 13-page pattern that shows you how to craft a festive floral arrangement featuring vibrant red crochet poinsettia flowers, lush green holly leaves, and decorative pine sprigs dotted with berries. The enchanting design is perfect not only as a holiday ornament but also as a delightful gift or a beautiful addition to your home decor. Suitable for crocheters of various skill levels, this incredible project allows you to express your creativity while enjoying the soothing practice of crochet.

    Crochet Flower Pattern Overview

    • Skill Level: Intermediate
    • Finished Flower Size: Approximately 6-8 inches in diameter
    • Crochet Hook Size: G (4.0 mm)
    • Yarn Type: Worsted weight yarn
    • Yarn Weight: 4
    • Main Colors: Red, green, white, gold
    • Petal Construction: Individual crochet petals
    • Flower Center Construction: Fabricated from yarn and decorative accents
    • Stems or Leaves Included: Yes, with additional foliage details
    • Construction Method: Worked in rounds
    • Approximate Completion Time: 4-6 hours
    • Beginner-Friendly: Some prior experience recommended
    • Working Method: Rounded petals worked separately and then assembled

    Materials You’ll Need

    • Worsted weight yarn in red, green, white, and gold
    • G (4.0 mm) crochet hook
    • Yarn needle for weaving in ends
    • Stitch markers for keeping track of rounds
    • Scissors
    • Floral wire (if specified)
    • Decorative elements like faux berries and small branches

    Crochet Abbreviations

    • MR = magic ring
    • ch = chain
    • sc = single crochet
    • hdc = half double crochet
    • dc = double crochet
    • tr = treble crochet
    • sl st = slip stitch
    • inc = increase
    • dec = decrease
    • st = stitch
    • sp = space
    • rep = repeat

    Before You Start

    Before diving into the crochet pattern, ensure you have a comfortable workspace. Familiarize yourself with working in rounds, as this project requires constructing individual petals and stems. Maintain an even tension throughout your work to keep your petals symmetrical and visually appealing. Additionally, prepare all the yarn colors you plan to use and ensure you have adequate amounts to complete the project.

    Free Crochet Flower Pattern

    Foundation or Magic Ring

    To begin, make a magic ring to form the center of your poinsettia flower. This method allows for a tightly closed center.

    Flower Center

    1. In the magic ring, ch 2, then work 12 dc into the ring.
    2. Pull the ring tight and join with a sl st to the top of the first dc.

    First Petal Round

    1. Start the first petal: ch 4, dc in 2nd ch from hook, hdc in next ch, sc in last ch. Skip 1 st on the base, sl st to attach.
    2. Repeat this step for a total of 5 petals.

    Additional Petal Rounds

    For the second and third rounds, add more petals as needed, ensuring the count matches with your design preferences.

    Individual Petals

    Follow the same steps to create any additional individual petals you desire, layering them for a fuller effect.

    Shaping the Petals

    Gently stipple the edges of the petals for a more natural shape using a needle or your fingers.

    Leaves

    1. Using green yarn, create leaves using a similar process to the petals, modifying the shape as needed for your design.
    2. Add leaf veins with contrasting yarn if desired.

    Stem

    If desired, attach a floral wire to the base for sturdiness, securing it by wrapping yarn around the stem.

    Joining the Pieces

    Carefully arrange your petals and leaves. Use the yarn needle to sew everything together securely.

    Assembling the Flower

    Layer your assembled petals in the chosen order, and attach the leaves securely at the base.

    Finishing Details

    Weave in all loose ends, and consider adding gold accents or decorative berries to complete your stunning poinsettia project.

    How to Use Your Crochet Flowers

    Your handmade Christmas Poinsettia can be utilized in numerous delightful ways, including:

    • Creating a beautiful holiday bouquet
    • Decorating your dining table as a centerpiece
    • Adding charm to gift wrapping
    • Using as embellishments for hats or bags
    • Immersing in winter decorations around your home

    Tips for a Better Result

    • Maintain consistent yarn tension for even petals.
    • Ensure all petals are of similar size for uniformity.
    • Use stitch markers to track complicated sections.
    • Shape your leaves and petals after they’re completed for a more vibrant look.

    Crochet Flower Customization Ideas

    Consider the following customizations to personalize your poinsettia:

    • Experiment with different yarn colors for a unique touch.
    • Add contrasting colors for flower centers and leaves.
    • Adjust the size of the petals based on your desired effect.
    • Create seasonal variations to reflect different themes.

    Common Problems and Troubleshooting

    • Uneven Petals: Check your stitch count at each round.
    • Curling Petals: Ensure even tension while crocheting.
    • Loose Stitches: Use a smaller hook size if needed.

    Care and Maintenance

    To keep your crochet flowers looking fresh, follow the care instructions based on the yarn materials used. For delicate petals, gentle cleaning with a damp cloth is best. Ensure any wire or decorative pieces are securely placed, and store them in a dry, cool area.

    Frequently Asked Questions

    1. Is this crochet flower pattern beginner-friendly?

      • This pattern is intermediate level and better suited for those with some crochet experience.
    2. What yarn is best for crochet flowers?

      • Worsted weight acrylic or cotton yarn is commonly recommended for durability.
    3. How long does it take to crochet this flower?

      • Expect to spend about 4-6 hours to complete the entire arrangement.
    4. Can I make the flower larger or smaller?

      • Yes, you can adjust the hook size and yarn quantity to modify the flower’s size.
    5. How do I keep crochet petals in shape?

      • Shape them gently after they’re complete and store them carefully to maintain their form.

    Conclusion

    The Christmas Poinsettia Crochet Pattern is a charming and festive project that brings warmth and color to your holiday celebrations. It’s enjoyable to make, fulfilling to gift, and stunning to display. Give this delightful crochet flower a try and watch your home bloom with holiday cheer!


    SEO Title: Christmas Poinsettia Crochet Pattern | Holiday Decoration

    Meta Description: Create stunning holiday decorations with our Christmas Poinsettia Crochet Pattern. Enjoy step-by-step instructions for beautiful handmade arrangements!

    URL Slug: christmas-poinsettia-crochet-pattern

    Primary Keyword: Christmas Poinsettia Crochet Pattern

    Secondary Keywords: crochet flower pattern, crochet flowers, easy crochet flower, crochet floral decoration

    Image 1 Alt Text: Handmade crochet poinsettia flowers arranged in a festive decoration.

    Image 2 Alt Text: Close-up of crochet leaves and decorative berries alongside the poinsettia flowers.
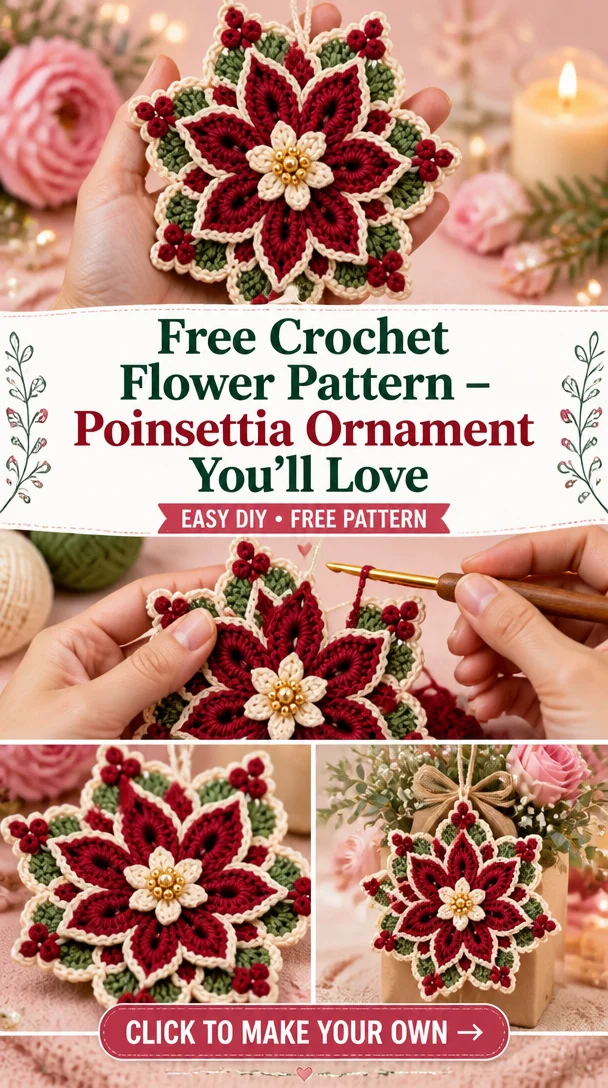
  • Free Crochet Flower Pattern – Poinsettia Ornament You’ll Love

    Free Crochet Flower Pattern – Poinsettia Ornament You’ll Love

    Crochet Poinsettia Christmas Ornament | Holiday Crochet Pattern

    Add a festive touch to your holiday decor with this beautiful Crochet Poinsettia Christmas Ornament. Featuring layered red petals, vibrant green leaves, and delicate cream edging, this ornament is a true embodiment of the season. The addition of elegant gold bead details gives it an extra sparkle that’s perfect for capturing the warmth and joy of Christmas. This ornament is not just a captivating decoration for your Christmas tree; it also makes a thoughtful handmade gift for loved ones. Whether you’re a seasoned crocheter or a beginner eager to learn, this pattern provides a delightful and rewarding project.

    Crochet Flower Pattern Overview

    • Skill Level: Intermediate
    • Finished Size: Approximately 5 inches in diameter
    • Crochet Hook Size: G (4.0 mm)
    • Yarn Type: Acrylic yarn
    • Yarn Weight: Medium
    • Main Colors: Red, green, cream, gold
    • Petal Construction: Layered design
    • Flower Center Construction: Beaded detailing
    • Includes Leaves: Yes
    • Construction Method: Worked in rounds
    • Approximate Completion Time: 3-4 hours
    • Beginner-Friendly: Some experience recommended
    • Work structure: Rounds for petals and leaves

    Materials You’ll Need

    • Red acrylic yarn
    • Green acrylic yarn
    • Cream acrylic yarn
    • Gold beads (for decoration)
    • G (4.0 mm) crochet hook
    • Yarn needle
    • Scissors
    • Stitch markers (optional)

    Crochet Abbreviations

    • MR = magic ring
    • ch = chain
    • sc = single crochet
    • hdc = half double crochet
    • dc = double crochet
    • sl st = slip stitch
    • inc = increase
    • dec = decrease
    • st = stitch
    • sp = space
    • rep = repeat

    Before You Start

    Before diving into this project, ensure you’re comfortable with basic crochet stitches, including single and double crochet. This pattern involves working in rounds and layering sections, so maintaining even tension is crucial for the petals to lay flat and symmetrical. It’s also helpful to familiarize yourself with the color changes between the red petals and cream edging to achieve the best visual effect.

    Free Crochet Flower Pattern

    Foundation or Magic Ring

    1. Start with a magic ring.
    2. Ch 2 (does not count as a stitch), then work 10 dc into the ring. Pull the ring tight and join with a sl st to the top of the first dc.

    Flower Center

    1. Round 1: Ch 1, then work 2 sc in each st around (20 sc). Join with a sl st.
    2. Cut a long tail for sewing the flower center to the petals.

    First Petal Round

    1. Round 2: Attach red yarn to any stitch. Ch 3 (counts as first dc), then work 2 more dc in the same st for the first petal.
    2. Skip 1 st, sl st in the next. Repeat for 5 petals.

    Additional Petal Rounds

    1. Round 3: For each petal made, work a petal (3 dc, ch 1, 3 dc) into the top of each petal from the previous round. Join with a sl st.

    Individual Petals

    • Repeat for a total of 5 petals.

    Shaping the Petals

    1. Gently shape the petals by pinching them at the base and curling the ends slightly for a more natural look.

    Leaves

    1. Attach green yarn.
    2. Work a small leaf by chaining 6, hdc in the second chain from the hook, dc in the next 2 chains, hdc in the last chain, then sl st to the starting point. Leave a long tail for sewing.

    Flower Assembly

    1. Sew the flower center to the base of the petals.
    2. Attach the leaves on either side of the flower.

    Finishing Details

    • Add gold beads to the flower center for a festive touch.
    • Secure all ends and weave in any loose yarn tails.

    How to Use Your Crochet Flowers

    This Crochet Poinsettia Christmas Ornament can be beautifully displayed as:

    • A stunning addition to your Christmas tree.
    • A unique, handmade gift for family and friends.
    • Decorative accents for holiday table settings.
    • An eye-catching piece for seasonal wreaths or garlands.

    Tips for a Better Result

    • Maintain even tension throughout to avoid uneven petals.
    • When layering petals, ensure they are evenly spaced for a balanced look.
    • Secure all pieces tightly to ensure the flower holds its shape.

    Crochet Flower Customization Ideas

    • Experiment with different yarn colors for a unique twist.
    • Create contrasting centers using beads of various colors.
    • Adjust the size of the petals and leaves for a dynamic bouquet.

    Common Problems and Troubleshooting

    • Uneven petals: Ensure the same stitch count in each petal round.
    • Petals curling: Use slightly larger yarn to create a looser weave.
    • Difficulty attaching leaves: Use matching thread to secure them effectively without visible stitches.

    Care and Maintenance

    To keep your handmade crochet poinsettia ornament looking its best, gently hand wash it in cold water. Lay flat to dry and avoid direct sunlight to prevent fading. Ensure to store it in a dry place after the holiday season.

    Frequently Asked Questions

    • Is this crochet flower pattern beginner-friendly?
      While the pattern is more suitable for intermediates, beginners with basic skills may find it approachable.

    • What yarn is best for crochet flowers?
      Medium-weight acrylic yarn works beautifully for vibrant colors and flexibility.

    • How long does it take to crochet this flower?
      Expect to spend approximately 3-4 hours completing this ornament.

    • Can I make the flower larger or smaller?
      Yes, simply adjust your hook size or use thicker yarn for a larger effect.

    • How do I keep crochet petals in shape?
      Shape them gently and ensure they are securely attached to maintain their form.

    • Can I use different yarn colors?
      Absolutely! Different color palettes can yield stunning and unique results.

    • How do I attach a stem to a crochet flower?
      Sew a green yarn piece for a stem or create a floral wire wrapped in yarn for added sturdiness.

    Conclusion

    This Crochet Poinsettia Christmas Ornament is not only an eye-catching decoration, but it also makes a heartfelt handmade gift that embodies the festive spirit of the holidays. With its layered petals and sparkling details, this ornament is sure to bring joy to your holiday celebrations and create lasting memories for years to come.


    SEO Title: Crochet Poinsettia Christmas Ornament Pattern
    Meta Description: Create a stunning crochet poinsettia ornament with layered petals and elegant details! Ideal for holiday decor and gifts.
    URL Slug: crochet-poinsettia-christmas-ornament
    Primary Keyword: Crochet Poinsettia Christmas Ornament
    Secondary Keywords: Crochet Christmas Ornaments, Christmas Crochet Patterns, Crochet Flower Ornament, DIY Christmas Ornaments, Crochet Holiday Decorations
    Image 1 Alt Text: A vibrant red crochet poinsettia ornament with green leaves and gold beads.
    Image 2 Alt Text: Detailed close-up of layered crochet petals with cream edging and gold bead embellishments.

  • Find trending holiday home decor at Kohl’s.

    Find trending holiday home decor at Kohl’s.

    Find Trending Holiday Home Decor at Kohl’s

    Creating beautiful crochet flowers can add a vibrant touch to your holiday decor, enhancing the festive spirit of your home. With their intricate designs and cheerful colors, these crochet flowers can serve as delightful decorations, thoughtful gifts, or unique embellishments for various projects. Imagine crafting exquisite roses, tulips, or daisies that capture the essence of the season. Not only do they make a great addition to any bouquet, but they can also be used as stunning appliques or accents in other handmade creations. Suitable for crocheters of all skill levels, this crochet flower pattern will inspire you to celebrate the holidays with creativity and warmth.

    Crochet Flower Pattern Overview

    • Skill Level: Beginner to Intermediate
    • Finished Flower Size: Approximately 5-7 inches
    • Crochet Hook Size: G/6 (4.00 mm)
    • Yarn Type: Acrylic or cotton yarn
    • Yarn Weight: Worsted weight
    • Main Colors: Customizable—choose colors that reflect the holidays
    • Petal Construction: Layered petals with increasing rounds
    • Flower Center Construction: Decorative round center with a textured finish
    • Stems or Leaves Included: Optional
    • Construction Method: Worked in rounds
    • Approximate Completion Time: 2-3 hours
    • Beginner-Friendly: Yes
    • Worked in Rounds or Rows: Rounds

    Materials You’ll Need

    • Worsted weight yarn (colors of your choice)
    • G/6 (4.00 mm) crochet hook
    • Yarn needle
    • Scissors
    • Optional: Floral wire for stems
    • Optional: Stuffing for a 3D flower effect

    Crochet Abbreviations

    • MR = magic ring
    • ch = chain
    • sc = single crochet
    • hdc = half double crochet
    • dc = double crochet
    • sl st = slip stitch
    • inc = increase
    • st = stitch
    • rep = repeat

    Before You Start

    Before you dive into crocheting the flower, it’s essential to familiarize yourself with the pattern’s structure. This flower pattern is primarily worked in rounds, with individual petals crafted separately when applicable. Maintaining even yarn tension will ensure that your petals are symmetrical and unified. Plan for color changes if you want to create multicolored petals for added visual interest. Remember to check stitch counts after each round to keep your flower’s shape consistent.

    Free Crochet Flower Pattern

    Foundation or Magic Ring

    1. Start with a magic ring.
    2. Ch 2 (counts as first dc).
    3. Work 11 dc into the ring.
    4. Pull tight to close the ring. Join with sl st to first dc. (12 dc)

    Flower Center

    1. Round 1: Ch 1. Work 2 sc in each st around. Join with sl st. (24 sc)
    2. Round 2: Ch 1. Sc in next st, 2 sc in next st; repeat around and join. (36 sc)

    First Petal Round

    1. Round 3: Ch 1. Work 4 dc in the next st, skip 2 sts, sl st in the next st; repeat around. (12 petals)

    Additional Petal Rounds

    1. Round 4: For each petal, work Ch 1, dc in the same st to create a petal; continue for each petal and join to the first petal.

    Individual Petals

    1. Create additional petals separately, repeating the first petal structure from Round 3 until you have the desired quantity.

    Shaping the Petals

    1. Once completed, gently shape each petal by curling them slightly for dimension.

    Leaves (Optional)

    1. For leaves, create a simple leaf shape using a combination of dc, hdc, and sc stitches in the desired colors.

    Stem (Optional)

    1. Attach floral wire to add structure if desired.

    Joining the Pieces

    1. Sew the leaves and petals securely to the flower center using the yarn needle.

    Assembling the Flower

    1. Position the petals around the center and secure in place with thread or yarn. Add stuffing for a 3D effect if chosen.

    Flower Construction and Assembly

    To assemble your crochet flower, start by joining each petal to the flower center, ensuring they are evenly spaced. Once attached, position any leaves beneath the flower, sewing them securely to the base. Finally, if you opted for a stem, secure it with floral tape or additional yarn.

    Petal Shaping and Finishing Details

    To finish your flower beautifully, gently shape the petals outward for a fuller appearance. You can add decorative edging around the petals with contrasting yarn colors for a unique flair. Make sure to secure all yarn ends to prevent unraveling.

    How to Use Your Crochet Flowers

    There are endless possibilities for displaying your finished crochet flowers! Use them to create a stunning handmade flower bouquet, adorn a gift with a creative touch, or let them shine as unique home decorations. They can also make beautiful seasonal accents or embellishments for hair accessories and bags.

    Tips for a Better Result

    • Keep your tension consistent to avoid uneven petals.
    • When shaping your petals, focus on maintaining symmetry.
    • Make neat color changes by joining yarn securely.
    • Pay attention to the placement of petals for balanced visuals.

    Crochet Flower Customization Ideas

    To personalize your crochet flower, feel free to explore various yarn colors and textures, mix and match petals with contrasting centers, or experiment with different leaf styles. Consider adapting the pattern for seasonal themes as well!

    Common Problems and Troubleshooting

    • Uneven petals: Check your tension and stitch counts.
    • Curling petals: Block the flower after completion.
    • Loosely joined petals: Make tighter stitches or sew securely.
    • Difficulty attaching leaves: Reinforce with additional yarn for stability.

    Care and Maintenance

    To maintain your crochet flowers, follow the yarn manufacturer’s cleaning instructions. For flowers with delicate decorations, hand wash gently and allow to air dry.

    Frequently Asked Questions

    • Is this crochet flower pattern beginner-friendly?
      Yes, it’s suitable for beginners with basic crochet skills.

    • What yarn is best for crochet flowers?
      Worsted weight acrylic or cotton yarn works well for texture and durability.

    • How long does it take to crochet this flower?
      Expect to spend about 2-3 hours on this project.

    • Can I make the flower larger or smaller?
      Yes, adjust your hook size and yarn weight for desired dimensions.

    • How do I keep crochet petals in shape?
      Consider blocking your flowers after finishing for best results.

    Conclusion

    Crocheting your own flowers is a delightful way to bring a touch of handmade charm to your holiday festivities. Whether you use them in a bouquet, as unique gift decorations, or as standalone pieces, these crochet flowers reflect creativity and love that enhance your seasonal decor. Get started today and enjoy the process of crafting these beautiful blooms!


    SEO Title: Crochet Flowers for Holiday Decor: Free Pattern Guide
    Meta Description: Discover a delightful crochet flower pattern perfect for your holiday decor. Create beautiful flowers for bouquets or gifts with our step-by-step guide!
    URL Slug: crochet-flowers-holiday-decor
    Primary Keyword: crochet flower pattern
    Secondary Keywords: free crochet flower pattern, crochet flowers, easy crochet flower, crochet flower bouquet, DIY crochet flowers
    Image 1 Alt Text: A vibrant collection of crocheted flowers in various colors.
    Image 2 Alt Text: Close-up of a beautifully crafted crochet flower with layered petals.

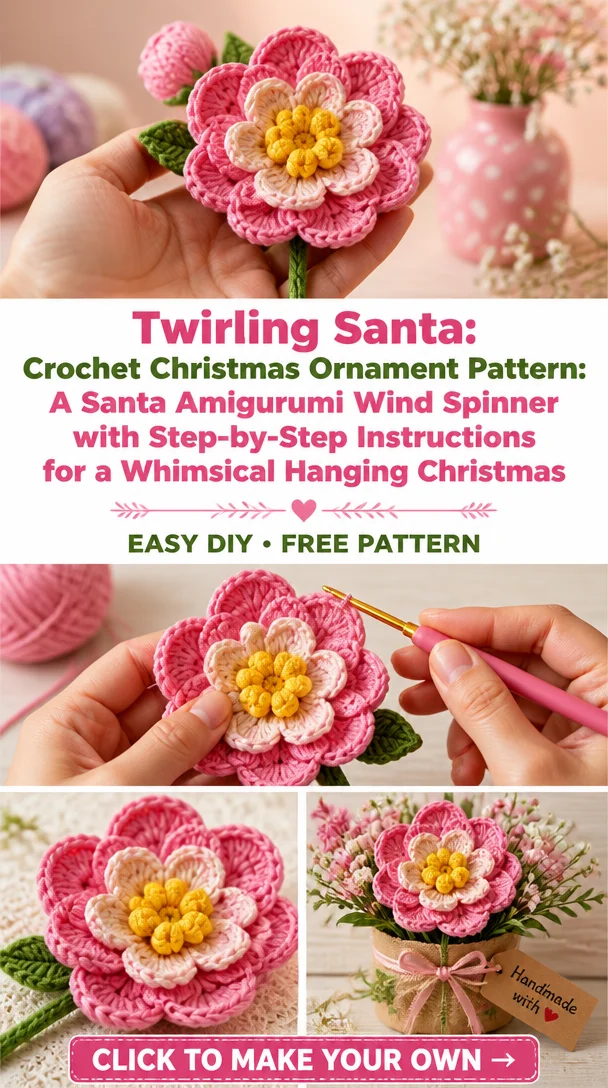
  • Twirling Santa: Crochet Christmas Ornament Pattern: A Santa Amigurumi Wind Spinner with Step-by-Step Instructions for a Whimsical Hanging Christmas

    Twirling Santa: Crochet Christmas Ornament Pattern: A Santa Amigurumi Wind Spinner with Step-by-Step Instructions for a Whimsical Hanging Christmas

    Twirling Santa: Crochet Christmas Ornament Pattern: A Santa Amigurumi Wind Spinner with Step-by-Step Instructions for a Whimsical Hanging Christmas

    Get into the holiday spirit with this delightful Twirling Santa crochet ornament! This charming project features a whimsical Santa amigurumi head attached to a spinning corkscrew wind spinner, making it a unique and captivating decoration for your home. Crocheting this ornament not only enhances your skills but also creates a festive handmade gift that friends and family will adore. Perfect for adding a cheerful touch to your Christmas tree or hanging in a window, this fun ornament can also be a wonderful conversation starter. While this pattern is designed for intermediate-level crocheters, it’s approachable for anyone looking to expand their crocheting repertoire.

    Crochet Flower Pattern Overview

    • Skill Level: Intermediate
    • Finished Size: Approximately 8 inches in length when fully assembled
    • Crochet Hook Size: G (4.0 mm)
    • Yarn Type: Worsted weight yarn
    • Yarn Weight: Medium (Category 4)
    • Main Colors: Red, white, and flesh for Santa; other colors as desired for embellishments
    • Construction Method: Worked in rounds and separate pieces
    • Approximate Completion Time: 4-6 hours
    • Petal Construction: N/A (focus on ornament assembly)
    • Stems/Leaves: Not included

    Materials You’ll Need

    • Worsted weight yarn in red, white, flesh, and optional colors
    • G (4.0 mm) crochet hook
    • Yarn needle for weaving in ends
    • Stitch markers
    • Scissors
    • Floral wire (for wind spinner)
    • Stuffing (for the Santa head)
    • Decorative elements (ribbons or additional embellishments as desired)

    Crochet Abbreviations

    • MR = magic ring
    • ch = chain
    • sc = single crochet
    • hdc = half double crochet
    • dc = double crochet
    • tr = treble crochet
    • sl st = slip stitch
    • inc = increase
    • dec = decrease
    • st = stitch
    • sp = space
    • rep = repeat

    Before You Start

    To ensure your Twirling Santa ornament turns out beautifully, be mindful of the following tips:

    • Work in consistent tension to keep the stitches uniform.
    • Pay close attention to stitch counts in each round for proper shaping.
    • When constructing the Santa head and spinner, take time to master the magic ring technique for a secure start.
    • Have your decorative yarn tassel and embellishments ready for the final touches.

    Free Crochet Flower Pattern

    Foundation or Magic Ring

    1. Begin with a magic ring.
    2. Ch 1.

    Santa Head

    • Round 1: 6 sc in the magic ring (6)
    • Round 2: Inc in each st around (12)
    • Round 3: Sc in next st; inc repeat around (18)
    • Round 4-6: Sc in each st around (18)
    • Round 7: Sc in next 4 st; dec repeat around (15)
    • Round 8: Sc in next 3 st; dec repeat around (12)
    • Round 9: Sc in next 2 st; dec repeat around (9)
    • Stuff the head and continue to Round 10.
    • Round 10: Sc in next st; dec repeat around (6)
    • Fasten off, leaving a long tail for sewing.

    Santa Hat

    1. With red yarn, start a magic ring.
    2. Round 1: 6 sc in the ring (6).
    3. Round 2: Inc in each st around (12).
    4. Round 3: Sc in next st; inc repeat around (18).
    5. Round 4-5: Sc in each st around (18).
    6. Add a white brim: switch to white and work in hdc for one round.
    7. Finish with a pom-pom on top.

    Beard and Mustache

    • For beard: Work a series of hdc across, tapering edges.
    • For mustache: Use white and work dc to create a wavy pattern.

    Wind Spinner

    1. Start a magic ring.
    2. Round 1: 6 sc in the ring (6).
    3. Round 2: Inc in each st around (12).
    4. Round 3: Work in spirals until desired length and shape is achieved.

    Assembling the Ornament

    1. Sew the Santa head to the top of the wind spinner securely.
    2. Attach the beard and mustache, placing them to frame the face.
    3. Secure the tapered hat on top, making sure the pom-pom faces up.

    Finishing Details

    • Add a yarn tassel for a decorative finish at the spinner’s end.
    • Weave in all loose ends to keep the ornament neat.

    How to Use Your Crochet Flowers

    This delightful Twirling Santa can serve multiple decorative purposes:

    • Perfect as a standalone ornament for your Christmas tree.
    • A whimsical addition to wreaths or garlands.
    • An enchanting piece to hang in windows, charming passersby.

    Tips for a Better Result

    • Maintain even tension to avoid uneven parts.
    • Keep your stitches tight at the magic ring for a neat finish.
    • Use a stitch marker to keep track of your rounds.

    Crochet Flower Customization Ideas

    • Change color schemes for a more modern look.
    • Use textured yarn for the hat for varied aesthetics.
    • Experiment with sizes by adjusting your hook size.

    Common Problems and Troubleshooting

    • If the Santa head appears too loose, ensure the magic ring is tightened securely.
    • To remedy uneven tensions, practice consistent stitch sizes across your project.

    Care and Maintenance

    For care, always refer to the yarn manufacturer’s instructions. Avoid harsh cleaning methods – spot clean gently if needed.

    Frequently Asked Questions

    • Is this crochet flower pattern beginner-friendly?

      • It is intended for intermediate crocheters but beginner-friendly with practice.
    • What yarn is best for crochet flowers?

      • Use worsted weight yarn for durability and a vibrant look.
    • How long does it take to crochet this flower?

      • Approximately 4-6 hours depending on skill level.
    • Can I make the flower larger or smaller?

      • Adjusting the hook size will change the overall size.
    • How do I keep crochet petals in shape?

      • Utilize stuffing and stitch tightly where necessary.

    Conclusion

    The Twirling Santa crochet ornament is a charming way to bring handmade holiday cheer to your home decor. Its whimsical design not only captures the festive spirit but also allows for creativity in color and embellishments. Gather your materials, follow the pattern, and enjoy crafting this delightful decoration that will surely become a holiday favorite!


    SEO Title: Twirling Santa Crochet Ornament Pattern
    Meta Description: Create a whimsical Twirling Santa crochet ornament with our step-by-step pattern, featuring a spinning wind spinner and amigurumi head.
    URL Slug: twirling-santa-crochet-ornament
    Primary Keyword: crochet christmas ornament pattern
    Secondary Keywords: crochet flower pattern, free crochet flower pattern, crochet flowers, 3D crochet flower, handmade crochet flowers
    Image 1 Alt Text: Twirling Santa crochet ornament with spinning wind spinner
    Image 2 Alt Text: Close-up of the Santa amigurumi head with details

  • Christmas Crochet Patterns for Handmade Holiday Decor: 11 Festive Projects Featuring Santa, Snowmen, Reindeer, a Christmas Tree, and Ornaments (

    Christmas Crochet Patterns for Handmade Holiday Decor: 11 Festive Projects Featuring Santa, Snowmen, Reindeer, a Christmas Tree, and Ornaments (

    Christmas Crochet Patterns for Handmade Holiday Decor: 11 Festive Projects Featuring Santa, Snowmen, Reindeer, a Christmas Tree, and Ornaments

    Get into the festive spirit and add a personal touch to your holiday decor with the delightful crochet flower patterns featured in "Christmas Crochet Patterns for Handmade Holiday Decor." One standout project is the charming poinsettia flower candle holder—a beautiful centerpiece that evokes the warmth and joy of the season. Crocheting this elegant floral design not only offers a satisfying experience for crafters but also results in a stunning decoration that can light up your home or make for a thoughtful handmade gift. This project is perfect for crocheters of various skill levels, making it an ideal activity to share with family and friends during the holidays.

    Crochet Flower Pattern Overview

    • Skill Level: Intermediate
    • Finished Flower Size: Approximately 6 inches in diameter
    • Crochet Hook Size: G/6 (4.0 mm)
    • Yarn Type: Worsted weight (medium)
    • Yarn Weight: #4
    • Main Colors: Red and green for the leaves; additional colors may be used for center decoration
    • Petal Construction: Layered petals to create depth
    • Flower Center Construction: A small, circular base with optional embellishments
    • Stems or Leaves Included: Yes, leaves are included to create the complete flower arrangement
    • Construction Method: Worked in rounds with joining sections
    • Approximate Completion Time: 2-4 hours
    • Beginner-Friendly: Some experience recommended
    • Worked in: Rounds

    Materials You’ll Need

    • Worsted weight yarn (red for petals, green for leaves, yellow for the center)
    • G/6 (4.0 mm) crochet hook
    • Yarn needle
    • Stitch markers
    • Scissors
    • Floral wire (optional for sturdiness)
    • Flower stems (if desired)
    • Stuffing (optional, for a 3D effect)

    Crochet Abbreviations

    • MR = magic ring
    • ch = chain
    • sc = single crochet
    • dc = double crochet
    • sl st = slip stitch
    • inc = increase
    • dec = decrease
    • st = stitch

    Before You Start

    Before diving into this beautiful crochet flower project, familiarize yourself with the assembly process. You’ll be working in rounds for the petals and leaves, which will require maintaining even tension throughout. Be sure to check your stitch counts, especially as you transition from the flower center to the petals. Additionally, have your floral wire handy if you wish to give your flower extra stability.

    Free Crochet Flower Pattern

    Foundation Ring

    1. Round 1: Create a magic ring and work 6 sc into the ring. Pull the ring tight to close.
    2. Round 2: Ch 1, inc in each st around (12 st).

    Flower Center

    1. Round 3: Ch 1, dc in next st, inc in next st, repeat from * to * around (18 st).
    2. Round 4: Ch 1, sc in next 2 st, inc in next st, repeat around (24 st). Fasten off and weave in ends.

    First Petal Round

    1. Attach red yarn to any st of the flower center.
    2. Round 1: Ch 1, (5 dc in the same st, sl st to next st) around.

    Additional Petal Rounds

    1. Round 2: Ch 1, sl st into the base of the first petal, ch 6, sl st into base of next petal (this gives a slight curl to the petals).

    Leaves

    1. Using green yarn, attach to the base of any petal.
    2. Row 1: Ch 5, sc in second ch from the hook, dc in next ch, hdc in last ch. Turn and repeat for desired leaf count.

    Assembling the Flower

    Join the petals to the flower center by positioning around equally. Adjust spacing as necessary for an even appearance.

    Finishing Details

    Optional: Create additional layers or embellishments in the flower’s center to enhance its festive look. Secure any loose ends and fluff the petals slightly for volume.

    How to Use Your Crochet Flowers

    The finished poinsettia flower can serve as a beautiful handmade bouquet, a holiday table centerpiece, or even as a special gift for loved ones. Consider incorporating it into your home décor to add a personal touch to your Christmas celebrations.

    Tips for a Better Result

    • Maintain even tension while working on the petals for uniformity.
    • Shape petals after finishing by gently bending them to add realism.
    • Secure stems tightly to ensure the flower holds its position.

    Crochet Flower Customization Ideas

    • Experiment with different colors for a unique vintage touch.
    • Use textured yarns for the petals and leaves for added interest.
    • Mix and match with other decorative elements like sparkling threads or beads.

    Common Problems and Troubleshooting

    • Uneven Petals: Adjust your tension and skip fewer stitches.
    • Loose Stitches: Double-check your stitch count after each round; consider tightening your tension.
    • Flower Losing Shape: Adding floral wire can help maintain the structure of petals.

    Care and Maintenance

    To preserve the beauty of your handmade crochet flower, gently wash with lukewarm water and mild soap. Avoid harsh cleaning methods, especially around delicate sections, such as the petals and decorative attachments.

    Frequently Asked Questions

    • Is this crochet flower pattern beginner-friendly?
      This pattern is best suited for those with some crochet experience.

    • What yarn is best for crochet flowers?
      Worsted weight yarn is ideal for a satisfying structure.

    • How long does it take to crochet this flower?
      Depending on experience, expect around 2-4 hours.

    • Can I make the flower larger or smaller?
      Adjusting your hook size or yarn thickness will alter the size.

    • How do I keep crochet petals in shape?
      Use floral wire and adjust using steam for shaping.

    • Can I use different yarn colors?
      Absolutely! Personalize it to match your holiday decor.

    • How do I attach a stem to a crochet flower?
      Simply secure a floral wire to the base of the flower with yarn.

    Conclusion

    Embrace the joy of crafting with this beautiful crochet poinsettia flower candle holder! It’s not just a decoration; it’s a heartfelt piece you can gift, use to beautify your own space, or add to a festive centerpiece. Turn yarn into a cherished holiday treasure that warms your home and heart.


    SEO Title: Crochet Poinsettia Flower Pattern for Festive Decor

    Meta Description: Create a stunning crochet poinsettia flower candle holder with our free pattern. Perfect for holiday decor or a thoughtful handmade gift!

    URL Slug: crochet-poinsettia-flower-pattern

    Primary Keyword: crochet flower pattern

    Secondary Keywords: free crochet flower pattern, crochet flowers for holidays, DIY crochet flowers, crochet floral decoration

    Image 1 Alt Text: Finished crochet poinsettia flower candle holder displayed on a festive table.

    Image 2 Alt Text: Close-up of crochet petals and leaves of a poinsettia flower in holiday decor setting.

  • Crochet Flower Christmas Ornament Pattern PDF, Layered Flower Ornament, Easy Holiday Tree Decor, Beginner Crochet Pattern, Instant Download

    Crochet Flower Christmas Ornament Pattern PDF, Layered Flower Ornament, Easy Holiday Tree Decor, Beginner Crochet Pattern, Instant Download

    Crochet Flower Christmas Ornament Pattern PDF, Layered Flower Ornament, Easy Holiday Tree Decor, Beginner Crochet Pattern, Instant Download

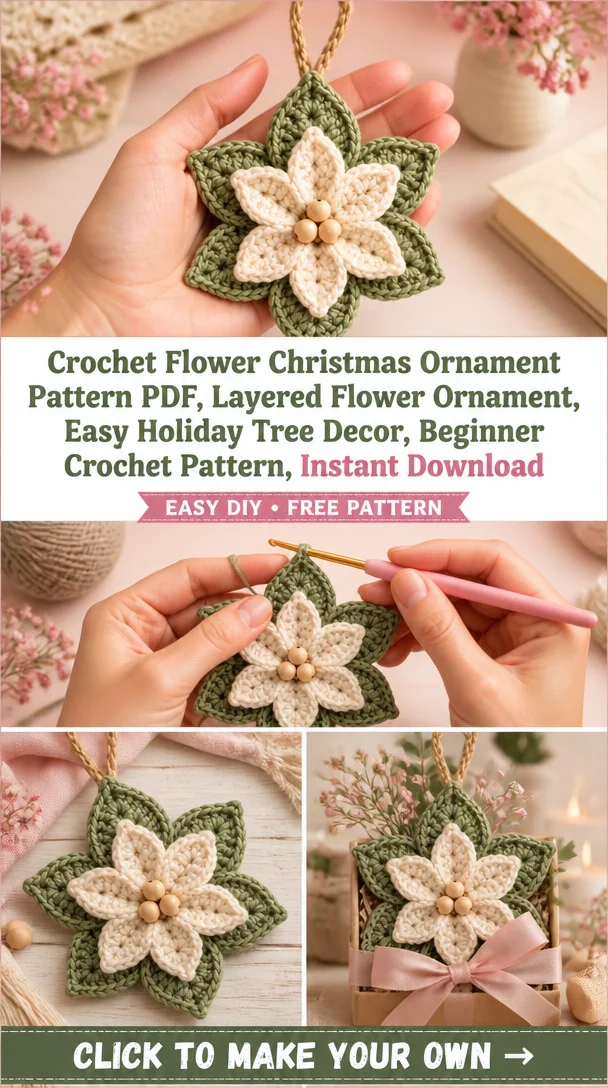
    Bring the holiday spirit into your home with a beautiful handmade decoration using the Crochet Layered Flower Christmas Ornament Pattern PDF. This elegant ornament features muted sage green outer petals and warm ivory inner petals, creating a stunning visual contrast perfect for the festive season. Adorned with three natural wooden beads and a rustic jute hanging loop, this ornament is a delightful addition to any tree or holiday display. Suitable for beginners, it offers an engaging crafting experience, allowing you to create a unique gift or a beautiful accent for your home décor. Plus, it’s a wonderful opportunity to showcase your crochet skills!

    Crochet Flower Pattern Overview

    • Skill Level: Beginner
    • Finished Flower Size: Approximately 4 inches in diameter
    • Crochet Hook Size: H/8 (5 mm) crochet hook
    • Yarn Type: Medium weight (4) yarn
    • Yarn Weight: Worsted
    • Main Colors: Sage green and warm ivory
    • Petal Construction: Layered petals
    • Flower Center Construction: Natural wooden beads
    • Stems or Leaves: Not included
    • Construction Method: Worked in rounds
    • Approximate Completion Time: 2-3 hours
    • Beginning Friendly: Yes
    • Project Structure: Separate pieces for petals and flower center

    Materials You’ll Need

    • Medium weight (4) yarn in sage green and warm ivory
    • H/8 (5 mm) crochet hook
    • Yarn needle
    • Scissors
    • Three natural wooden beads (for the flower center)
    • Jute twine (for the hanging loop)

    Crochet Abbreviations

    • MR = magic ring
    • ch = chain
    • sc = single crochet
    • hdc = half double crochet
    • dc = double crochet
    • sl st = slip stitch
    • inc = increase
    • dec = decrease
    • st = stitch
    • sp = space

    Before You Start

    Before diving into the crochet project, ensure you’re familiar with the basic crochet techniques. This pattern involves working in rounds and assembling multiple layers, so it’s essential to maintain even tension and be mindful of stitch counts for a polished finish. Familiarizing yourself with the color changes between the sage green and ivory will help in achieving the desired layered effect.

    Free Crochet Flower Pattern

    Foundation or Magic Ring

    1. Create a magic ring to start your flower center.

    Flower Center

    1. In the magic ring, ch 1, work 6 sc into the ring. Pull the magic ring tight and join with a sl st to the first sc.

    First Petal Round

    1. Round 1: Ch 3, dc in same st, ch 1, sl st in next st; repeat from * to * around. Join and fasten off.

    Additional Petal Rounds

    1. Round 2: Attach sage green yarn. Ch 3, dc in same st, ch 1, sl st in next st; repeat from * to * around. Join and fasten off.
    2. Round 3: Attach warm ivory yarn. Ch 3, dc in same st, ch 2, sl st in next st; repeat from * to * around. Join and fasten off.

    Assembling the Flower

    1. Layer the petals, placing the sage green petals first, followed by the warm ivory ones.
    2. Joining: Sew the layers together by entering your yarn needle through the base of the petals.

    Finishing Details

    1. Attaching the Wooden Beads: Thread three wooden beads onto jute twine for the center of the flower. Tie securely and attach to the center.
    2. Create a jute twine loop and attach it to the top of the ornament for hanging purposes.

    How to Use Your Crochet Flowers

    This charming layered flower ornament can brighten any holiday tree, serve as a thoughtful gift, or even be used as a festive home décor piece. Consider using it in a handmade bouquet or as a unique decoration for a gift wrap.

    Tips for a Better Result

    • Maintain even tension to prevent curling of petals.
    • Ensure petals are symmetrical for a balanced appearance.
    • Use a yarn needle to secure all ends neatly.

    Crochet Flower Customization Ideas

    • Experiment with different yarn colors for unique seasonal themes.
    • Combine contrasting colors for vibrant flower centers.
    • Create variations in flower sizes by adjusting your yarn weight.

    Common Problems and Troubleshooting

    • If petals appear uneven, check your tension and stitch counts.
    • To fix curling petals, consider blocking the flower after completion.
    • Ensure secure attachment of the flower center to prevent detachment.

    Care and Maintenance

    To keep your crochet flower looking beautiful, store it in a dry place away from direct sunlight. If necessary, wash gently according to your yarn’s care instructions. Always handle floral wire with care to preserve your flower’s shape.

    Frequently Asked Questions

    • Is this crochet flower pattern beginner-friendly? Yes, it’s designed for beginners with clear instructions.
    • What yarn is best for crochet flowers? Medium weight yarn creates a sturdy flower.
    • How long does it take to crochet this flower? Around 2-3 hours.
    • Can I make the flower larger or smaller? Adjusting the yarn weight can alter the size.
    • How do I keep crochet petals in shape? Ensure even tension when crocheting.

    Conclusion

    Embrace the joy of crochet this holiday season with the Crochet Layered Flower Christmas Ornament Pattern PDF. With its elegant design and simple assembly, this ornament is perfect for spreading cheer and showcasing your crafting talents. Start your festive creations today!


    SEO Title: Crochet Layered Flower Christmas Ornament – Easy Pattern
    Meta Description: Discover how to make a beautiful layered flower Christmas ornament with our beginner-friendly crochet pattern. Ideal for holiday decor and gifts!
    URL Slug: crochet-layered-flower-ornament
    Primary Keyword: crochet layered flower Christmas ornament pattern
    Secondary Keywords: crochet flower pattern, easy crochet flower, crochet flowers, handmade crochet flowers, DIY crochet flowers
    Image 1 Alt Text: Sage green and ivory layered crochet flower ornament
    Image 2 Alt Text: Natural wooden beads on crochet flower ornament

  • Christmas Snowflake Ornament Pattern PDF, Beaded Crochet Decoration, Holiday Tree Decor

    Christmas Snowflake Ornament Pattern PDF, Beaded Crochet Decoration, Holiday Tree Decor

    Christmas Snowflake Ornament Pattern PDF, Beaded Crochet Decoration, Holiday Tree Decor

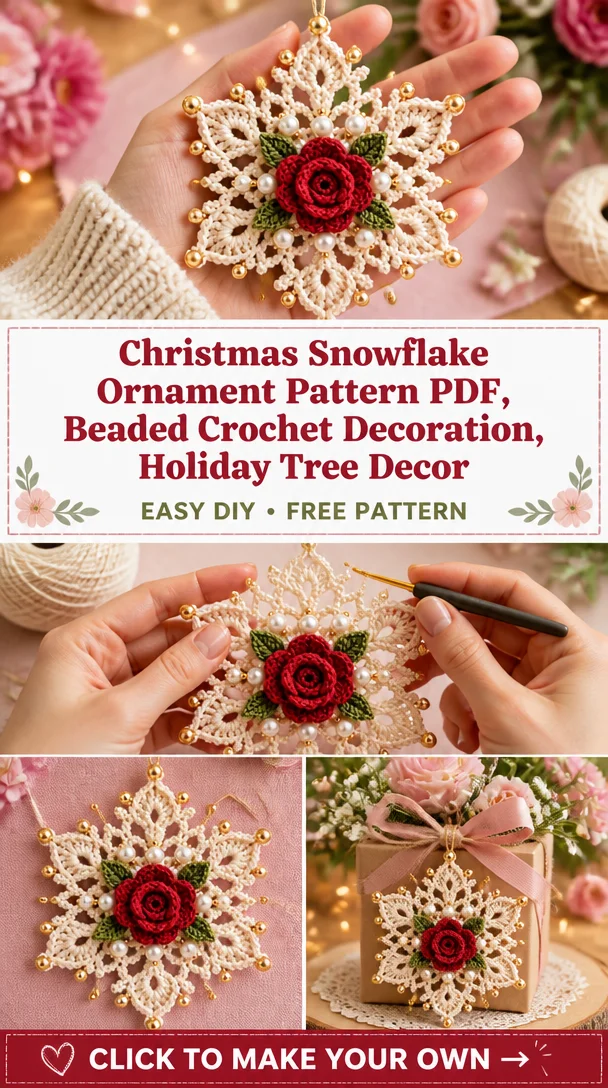
    Create a dazzling addition to your holiday decor with the Christmas Snowflake Ornament Pattern. This intricate crochet project combines a stunning white snowflake design paired with a vibrant red rose and delicate green leaves. With embellishments of pearls and gold beads, this ornament offers a luxurious touch to your Christmas tree or seasonal decorations. Perfect as a handmade gift for loved ones or as part of a DIY floral bouquet, this pattern is suitable for crocheters of various skill levels looking to enrich their festive atmosphere with beautiful handcrafted pieces.

    Crochet Flower Pattern Overview

    • Skill Level: Intermediate
    • Finished Size: Approximately 6 inches in diameter
    • Crochet Hook Size: G/6 (4.0 mm)
    • Yarn Type: Medium (worsted weight; 4)
    • Yarn Weight: 4
    • Main Colors: White for the snowflake; red for the rose; green for leaves; pearl and gold accents
    • Construction Method: Worked in rounds
    • Approximate Completion Time: 3-4 hours
    • Petal Construction: Includes layered petals for the rose and a flat design for the snowflake
    • Flower Center Construction: Built around a dimensional rose
    • Includes Leaves: Yes, decorative green leaves
    • Hanging Loop: Yes, for easy display

    Materials You’ll Need

    • Worsted weight yarn in white, red, and green
    • G/6 crochet hook (4.0 mm)
    • Yarn needle for sewing
    • Scissors
    • Stitch markers
    • Decorative pearls and gold beads
    • Floral wire (for additional structure, optional)

    Crochet Abbreviations

    • MR = magic ring
    • ch = chain
    • sc = single crochet
    • hdc = half double crochet
    • dc = double crochet
    • sl st = slip stitch
    • inc = increase
    • dec = decrease
    • st = stitch
    • sp = space
    • rep = repeat

    Before You Start

    Before beginning your snowflake ornament, it’s essential to ensure that you’re comfortable with basic crochet stitches, including working in rounds. This project involves layering different components, so maintaining even tension throughout your work will help create a uniform appearance. Prepare your yarn colors for easy access, especially when transitioning between the snowflake, rose, and leaves.

    Free Crochet Flower Pattern

    Foundation or Magic Ring

    1. Create a Magic Ring: Start with a magic ring, leaving a long tail for securing the final stages.

    Flower Center

    1. Round 1: Ch 3 (counts as 1 dc), work 11 dc into the ring. Pull the tail to tighten the ring and join with a sl st to the top of the ch 3 (12 sts).

    First Petal Round

    1. Round 2: Ch 1, 2 sc in each dc from the previous round. Join (24 sts).

    Additional Petal Rounds

    1. Round 3: Ch 1, (sc in next st, 2 sc in next st) around. Join (36 sts).

    Individual Petals

    1. Petal Creation: In the next round, work (1 dc, 1 hdc, 2 dc, 1 hdc, 1 dc) into the same stitch, creating the petal shape. Repeat for all petals, evenly spaced.

    Shaping the Petals

    1. Gently shape the petals by pulling lightly and using the yarn needle to secure any loose ends.

    Leaves

    1. Leaf Construction: Ch 10, sc into the second chain, hdc in the next, dc in the next 3 chains, hdc in the next, sc in the last sp. Fasten off and attach to the flower.

    Assembling the Flower

    1. Joining Petals: Position the rose center in the middle of the snowflake and sew the petals around securely.

    Finishing Details

    1. Embellishments: Attach pearls and gold beads using a thread, ensuring they are evenly spaced.

    Flower Construction and Assembly

    To assemble your elegant ornament, sew the layered petals securely to the snowflake base, ensuring that the rose is centered. Attach the decorative leaves and pearl embellishments for an added touch of elegance. Once everything is securely attached, create a hanging loop at the top for easy display on your Christmas tree.

    Petal Shaping and Finishing Details

    Once the pieces are assembled, take a moment to adjust your petals and leaves for a balanced appearance. Use steam blocking to set them in their desired shape, ensuring an appealing symmetry in your finished ornament.

    How to Use Your Crochet Flowers

    This beautiful snowflake ornament is perfect for hanging on your Christmas tree, adding a handmade flair to gifts, or displaying in windows to express your holiday spirit. Incorporate it into a floral arrangement or use it as part of a winter-themed decoration scheme.

    Tips for a Better Result

    • Maintain even tension throughout your project.
    • Secure all ends carefully to prevent unraveling.
    • Position your petals evenly for a balanced look.
    • Avoid twisting the petals by ensuring they are sewn in place correctly.

    Crochet Flower Customization Ideas

    Consider using different yarn colors for a unique take on the ornament. Mix and match contrasting center colors, or adjust the size of the snowflake and rose based on your personal preferences or the decor theme.

    Common Problems and Troubleshooting

    • Uneven petals: Ensure that your stitch count remains consistent throughout.
    • Curling petals: Steam block gently to shape them.
    • Loose stitches: Check tension while working.

    Care and Maintenance

    To maintain your crochet ornament, gently hand wash as needed, taking care to avoid excessive moisture in the embellishments.

    Frequently Asked Questions

    • Is this crochet flower pattern beginner-friendly? This pattern is recommended for those with some crochet experience.
    • What yarn is best for crochet flowers? Use medium worsted weight yarn for the best results.
    • Can I make the flower larger or smaller? Alter the yarn type and hook size to adjust the finished size.
    • How do I keep crochet petals in shape? Use steam blocking techniques to help shape them during assembly.
    • Can I use different yarn colors? Absolutely! Feel free to experiment with color combinations.

    Conclusion

    This Christmas Snowflake Ornament is a charming project that brings a touch of elegance to your holiday celebrations. Creating this crochet flower ornament allows you to express creativity while crafting cherished memories with handmade decorations.


    SEO Title: Elegant Christmas Snowflake Ornament Crochet Pattern
    Meta Description: Create a stunning Christmas snowflake ornament with our crochet pattern featuring a red rose and green leaves. Perfect for holiday decor!
    URL Slug: christmas-snowflake-ornament-crochet-pattern
    Primary Keyword: Christmas Snowflake Ornament Pattern
    Secondary Keywords: crochet flower pattern, easy crochet flower, crochet rose pattern, handmade crochet flowers

    Image 1 Alt Text: Christmas snowflake ornament with red rose and leaves
    Image 2 Alt Text: Close-up of pearl and gold bead embellishments on crochet ornament

  • Crochet Flowers Christmas Tree: Follow the Free Poinsettia Photo Tutorial

    Crochet Flowers Christmas Tree: Follow the Free Poinsettia Photo Tutorial

    Crochet Flowers Christmas Tree: Follow the Free Poinsettia Photo Tutorial

    Welcome to our festive crochet project where you can create a stunning Poinsettia bouquet! This beautiful crochet flower project captures the essence of the holiday season with its vibrant red and green colors, resembling the iconic Christmas plant. Crocheting these Poinsettias not only enhances your crafting skills but also allows you to create charming decorations, lovely floral appliques, or thoughtful handmade gifts. Plus, this project is versatile for any skill level, making it a perfect endeavor for both beginners and experienced crocheters alike. Ready to bring some holiday cheer into your home? Dive in and follow our free pattern and step-by-step photo tutorial!

    Crochet Flower Pattern Overview

    • Skill Level: Suitable for all skill levels
    • Finished Flower Size: Approximately 4 to 5 inches across
    • Crochet Hook Size: G/6 (4.0 mm)
    • Yarn Type: Cotton yarn
    • Yarn Weight: Worsted weight (Medium 4)
    • Main Colors: Red and green
    • Petal Construction: Worked in rounds for petals
    • Flower Center Construction: Simple rounds
    • Includes Stems & Leaves: Yes, stems and leaves are included
    • Construction Method: Worked in rounds
    • Approximate Completion Time: 3–4 hours
    • Beginner-Friendly: Yes, with basic techniques
    • Worked: In separate pieces combining petals and leaves

    Materials You’ll Need

    • Red cotton yarn for petals
    • Green cotton yarn for leaves and stem
    • G/6 (4.0 mm) crochet hook
    • Yarn needle for weaving ends
    • Scissors
    • Floral wire for shaping (if desired)

    Crochet Abbreviations

    • MR = magic ring
    • ch = chain
    • sc = single crochet
    • hdc = half double crochet
    • dc = double crochet
    • sl st = slip stitch
    • inc = increase
    • dec = decrease
    • st = stitch
    • sp = space
    • rep = repeat

    Before You Start

    Before you begin crafting your Poinsettia, familiarize yourself with working in rounds. It’s important to maintain even tension to ensure uniform petals. Pay attention to the stitch counts and know when to change colors if you’re adding depth to your flower center. Prepare your petals first, and then we’ll attach leaves and stems towards the end to create a cohesive flower.

    Free Crochet Flower Pattern

    Foundation or Magic Ring

    1. Start with a magic ring.
    2. Chain 3 (counts as first dc).
    3. Work 11 dc into the ring. Pull the ring tight.
    4. Join with a sl st to the top of the initial ch-3. (12 dc)

    Flower Center

    1. Round 1: Ch 1, sc in next st, ch 2, dc in same st, repeat from * around. Join with a sl st.
    2. Round 2: Slip stitch into the ch-2 space, ch 3, dc in same sp, ch 2, sl st in same sp, repeat from * around. Finish off.

    First Petal Round

    1. Begin your petal: Use the red yarn.
    2. In same st as the last sl st, ch 3, dc in the next 3 sts, ch 2, sl st to the base of the petals. Repeat for the number of petals required.

    Additional Petal Rounds

    1. Work additional rows of petals by repeating the previous steps for more volume.
    2. You may want 5-6 petals total.

    Shaping the Petals

    Gently shape your petals using your fingers or a shaping tool for a more natural look.

    Leaves

    1. Using green yarn, ch 10.
    2. Work in rows for the leaves, shaping with hdc and finishing with a slip stitch to secure.
    3. Make 2 leaves for the bouquet.

    Stem

    1. Chain to your desired length for the stem.
    2. Work a foundation row of sc along the chain to create thickness.

    Assembling the Flower

    1. Sew the petals to the flower center using your yarn needle.
    2. Attach the leaves to the base of the stem.
    3. Secure everything in place.

    Finishing Details

    Weave in all ends securely. You can lightly block the petals if desired for a better shape.

    How to Use Your Crochet Flowers

    These crocheted Poinsettias can be used in various ways, including:

    • Creating a stunning handmade flower bouquet.
    • Decorating your table or home for the holidays.
    • Using as appliqués on clothing or bags.
    • Making personalized gift decorations for friends and family.

    Tips for a Better Result

    • Maintain even tension for symmetrical petals.
    • Consider leaving some petals slightly more open for a natural look.
    • Check that you are consistent with your stitch size for better results.

    Crochet Flower Customization Ideas

    • Experiment with different shades of red or other colors for a unique look.
    • Add glitter or beads to the center for extra flair.
    • Use textured yarn for a different visual effect.

    Common Problems and Troubleshooting

    • Uneven petals: Double-check that you are using consistent tension with each petal.
    • Curling edges: Gently block your petals to ensure they sit flat.
    • Loose stitches: Make sure to not skip stitches between rounds.

    Care and Maintenance

    To keep your crocheted Poinsettias looking fresh, check the yarn care instructions. Hand wash if necessary, avoiding harsh detergents. Air dry to maintain their shape.

    Frequently Asked Questions

    • Is this crochet flower pattern beginner-friendly?
      Yes, this pattern is perfect for beginners looking to learn.

    • What yarn is best for crochet flowers?
      Cotton yarn works beautifully for floral designs.

    • Can I use different yarn colors?
      Absolutely! Feel free to play with colors for personalization.

    • How do I keep crochet petals in shape?
      Gentle blocking can help maintain shape after crocheting.

    • Can I attach a stem to a crochet flower?
      Yes, you can easily incorporate a stem as detailed in the pattern.

    Conclusion

    Crocheting your own Poinsettia is a delightful way to add a personal touch to your holiday decorations or gifts! This charming flower captures the spirit of the season and can brighten up your home or make a memorable gift for loved ones. Get your crochet hooks ready and start your festive journey!


    SEO Title: Free Poinsettia Crochet Flower Pattern for Christmas
    Meta Description: Create a festive crocheted Poinsettia bouquet with our free step-by-step pattern and photo tutorial. Perfect for holiday decorations!
    URL Slug: crochet-poinsettia-flower-pattern
    Primary Keyword: crochet flower pattern
    Secondary Keywords: free crochet flower pattern, crochet flowers, crochet floral decoration, DIY crochet flowers, handmade crochet flowers.
    Image 1 Alt Text: Beautiful crocheted red Poinsettia flowers arranged for Christmas decoration.
    Image 2 Alt Text: Step-by-step photo tutorial of crocheting Poinsettia petals and leaves.

  • Poinsettia Tealight Holder Crochet Pattern – Christmas Flower Decor

    Poinsettia Tealight Holder Crochet Pattern – Christmas Flower Decor

    Poinsettia Tealight Holder Crochet Pattern – Christmas Flower Decor

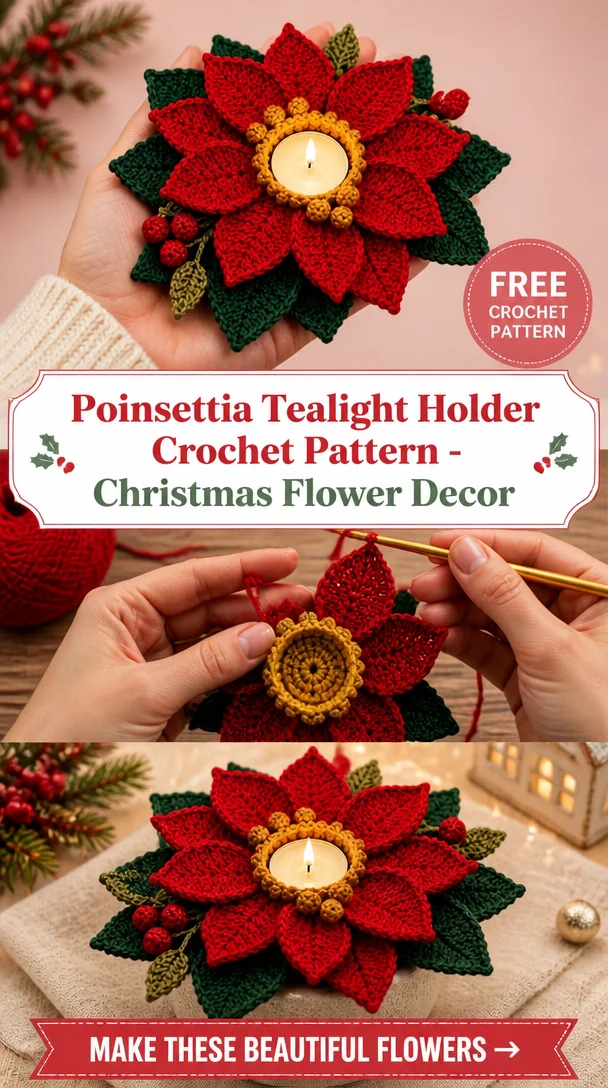
    Create a beautiful handmade Christmas centerpiece with this Poinsettia Tealight Holder Crochet Pattern! 🎄🌺 This charming design features dimensional layered red petals and lush green leaves, bringing the holiday spirit to life. The warm holiday glow from the tealight adds a cozy touch, making it an ideal decoration for Christmas tables, mantels, or as a heartfelt handmade gift. Suitable for advanced beginners to intermediate crocheters, this festive project offers a delightful way to showcase your crochet skills while enhancing your holiday decor. Let’s dive into the details of this captivating crochet flower design!

    Crochet Flower Pattern Overview

    • Skill Level: Advanced beginner to intermediate
    • Finished Flower Size: Approximately 9–11 inches across
    • Crochet Hook Size: Not specified
    • Yarn Type: Not specified
    • Yarn Weight: Not specified
    • Main Colors: Red (for petals), dark green (for leaves), with optional accents in gold and red for berries
    • Petal Construction: Layered
    • Flower Center Construction: Not specifically detailed
    • Leaves Included: Yes
    • Construction Method: Worked in rounds and notable shaping techniques
    • Approximate Completion Time: Not specified
    • Project Friendliness for Beginners: Suitable for those with some experience in crocheting
    • Work Type: The flower is primarily worked in rounds

    Materials You’ll Need

    To complete your Poinsettia Tealight Holder, gather the following materials:

    • Yarn in red, dark green, and optional gold for embellishments
    • Appropriate crochet hook
    • Yarn needle
    • Scissors
    • Stitch markers (optional for organization)
    • Floral wire (if specified in your choice of construction)

    Crochet Abbreviations

    Here are the common crochet abbreviations used in this pattern:

    • MR = magic ring
    • ch = chain
    • sc = single crochet
    • hdc = half double crochet
    • dc = double crochet
    • sl st = slip stitch
    • inc = increase
    • dec = decrease
    • st = stitch
    • sp = space
    • rep = repeat

    Before You Start

    Before you begin, it’s helpful to understand that this pattern incorporates layered petals and may require maintaining even tension throughout. Familiarize yourself with the petal repeats and plan your color changes, particularly if you want to add contrasting accents. Make sure to check stitch counts as you progress, which will help in ensuring that your petals maintain symmetry.

    Free Crochet Flower Pattern

    Foundation or Magic Ring

    Start your poinsettia by creating a magic ring.

    Flower Center

    You can create a small circle using a series of single crochets, which will serve as the base for your petals.

    First Petal Round

    Round 1: Begin attaching your first layer of petals, working around the center.

    Additional Petal Rounds

    Continue building layers, ensuring each is shaped correctly for a fuller look.

    Individual Petals

    Each petal will be crafted separately, giving you control over the shaping.

    Shaping the Petals

    Use slight shaping techniques to curl and dimensionally enhance each petal.

    Leaves

    Crochet leaves using dark green yarn, positioning them in a way that complements the vibrant red petals.

    Flower Bud

    (Optional based on design; if included, follow similar instructions for petal rounding.)

    Joining the Pieces

    Use a yarn needle to secure petals, leaves, and additional decorative elements.

    Assembling the Flower

    Position each layer carefully for the desired aesthetic.

    Finishing Details

    Add embellishments such as red berries or gold accents as a finishing touch.

    Flower Construction and Assembly

    Assemble your crochet flower by carefully positioning and sewing the petals to the base. Attach leaves securely, ensuring they enhance the overall look of your flower. When adding accents, think about balance so that no part overshadows another, creating a harmonious appearance.

    Petal Shaping and Finishing Details

    To achieve the finished poinsettia look, make sure to shape and adjust the petals for uniformity. Consider using a shape-holding spray for additional styling, and secure any loose yarn ends to keep your flower neat.

    How to Use Your Crochet Flowers

    Your crochet poinsettia serves various purposes:

    • As a dazzling centerpiece for holiday dining
    • Included in a handmade flower bouquet
    • Act as seasonal home decor
    • Great for gifting to friends and family

    Tips for a Better Result

    To ensure a beautiful and balanced flower:

    • Maintain even tension throughout your work
    • Keep petals symmetrical for a polished look
    • Secure yarn ends to prevent unraveling

    Crochet Flower Customization Ideas

    Personalize your flower with:

    • Different shades of red or contrasting colors
    • Gold or silver yarn for the center or accents
    • Shaping petals differently for a unique edge

    Common Problems and Troubleshooting

    Here are some potential issues that may arise:

    • Uneven petals can be adjusted by checking stitch counts.
    • Curling petals might require gentle reshaping.
    • Ensure all layers are aligned during assembly for a neat finish.

    Care and Maintenance

    Handmade crochet flowers can typically be spot cleaned, but it’s advisable to check the yarn manufacturer’s instructions for specific cleaning methods. If you used wire or other decorative elements, handle these with care.

    Frequently Asked Questions

    • Is this crochet flower pattern beginner-friendly?

      • It’s best suited for advanced beginners and up due to complexity.
    • What yarn is best for crochet flowers?

      • Use light, soft yarn that holds shape well, typically acrylic or cotton blends.
    • How long does it take to crochet this flower?

      • Completion times will vary but expect several hours of work.
    • Can I make the flower larger or smaller?

      • Adjusting the hook size and yarn weight can change the size accordingly.
    • How do I keep crochet petals in shape?

      • Shaping petals with a slight curve helps maintain form.
    • Can I use different yarn colors?

      • Yes! Feel free to explore various colors for creative versions of this flower.
    • How do I attach a stem to a crochet flower?

      • Securely stitch the stem in the desired location after assembling the flower.

    Conclusion

    Embrace the joy of the season by creating this stunning Poinsettia Tealight Holder crochet pattern. Its layered petals and festive appeal make it a perfect addition to your holiday decor. Gather your materials and start crocheting – your warm, inviting centerpiece awaits!


    SEO Title: Poinsettia Tealight Holder Crochet Pattern for Christmas

    Meta Description: Create a beautiful crochet poinsettia tealight holder for your Christmas decor. Perfect as a centerpiece or gift this holiday season!

    URL Slug: poinsettia-tealight-holder-crochet-pattern

    Primary Keyword: Poinsettia Tealight Holder Crochet Pattern

    Secondary Keywords: crochet flower pattern, easy crochet flower, crochet floral decoration, handmade crochet flowers

    Image 1 Alt Text: Crochet Poinsettia Tealight Holder in festive colors with glowing LED light

    Image 2 Alt Text: Layered crochet petals and leaves of a poinsettia displayed as a Christmas centerpiece

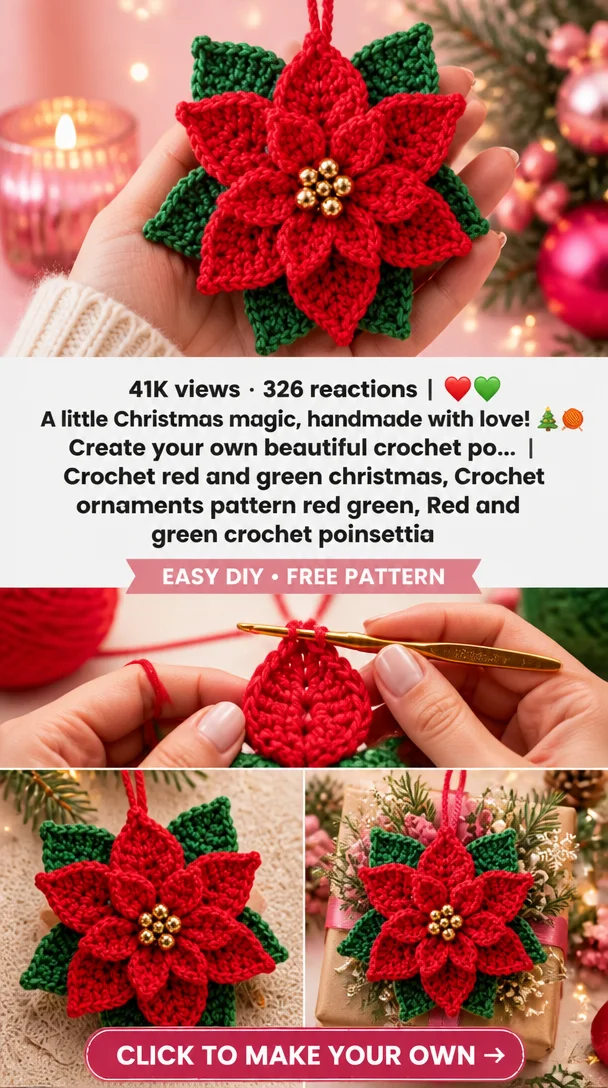
  • 41K views · 326 reactions | ❤️💚 A little Christmas magic, handmade with love! 🎄🧶 Create your own beautiful crochet po… | Crochet red and green christmas, Crochet ornaments pattern red green, Red and green crochet poinsettia

    41K views · 326 reactions | ❤️💚 A little Christmas magic, handmade with love! 🎄🧶 Create your own beautiful crochet po… | Crochet red and green christmas, Crochet ornaments pattern red green, Red and green crochet poinsettia

    Create Your Own Beautiful Crochet Poinsettia Ornament

    Embrace the festive spirit with a beautiful crochet poinsettia ornament that adds a handmade touch to your Christmas decorations. This delightful project showcases the traditional red and green colors associated with the holiday season, making it an eye-catching addition to wreaths, gift wraps, or even as standalone ornaments. Whether you’re an experienced crocheter or a beginner looking to enhance your skills, this pattern is perfect for you. Crocheting a poinsettia offers not just a creative outlet but also a heartfelt gift option that will surely bring joy to friends and family. Let’s get started on crafting this lovely crochet flower that embodies the magic of Christmas!

    Crochet Flower Pattern Overview

    • Skill Level: Easy
    • Finished Flower Size: Approximately 5 inches across
    • Crochet Hook Size: 4.0 mm (G)
    • Yarn Type: Cotton yarn
    • Yarn Weight: Medium (Worsted)
    • Main Colors: Red for the petals, yellow for the center, and green for the leaves
    • Petal Construction: Worked in rounds
    • Flower Center Construction: Separate piece with a round shape
    • Includes: Leaves and stems
    • Approximate Completion Time: 1-2 hours
    • Beginner-Friendly: Yes
    • Worked In: Rounds

    Materials You’ll Need

    • Yarn: Red, green, and yellow cotton yarn
    • Crochet Hook: 4.0 mm (G)
    • Yarn Needle: For weaving in ends
    • Stitch Markers: Optional, for marking rounds
    • Scissors: For cutting yarn
    • Floral Wire: Optional for added stability
    • Glue: If adding embellishments to the flower center

    Crochet Abbreviations

    • MR: Magic Ring
    • ch: Chain
    • sc: Single Crochet
    • hdc: Half Double Crochet
    • dc: Double Crochet
    • sl st: Slip Stitch
    • inc: Increase
    • dec: Decrease
    • st: Stitch
    • sp: Space
    • rep: Repeat

    Before You Start

    Before diving into the crochet pattern, familiarize yourself with the foundation of the flower. The poinsettia is constructed by creating a series of petals that will be layered around the central flower core. Understanding how to maintain even tension and stitch count will ensure a uniform appearance, giving your finished flower a flawless look. Be ready to switch yarn colors for the petals and the center, and don’t hesitate to use stitch markers to maintain the rounds neatly.

    Free Crochet Flower Pattern

    Foundation or Magic Ring

    1. Round 1: Create a magic ring, ch 3 (counts as first dc), then crochet 11 dc into the ring. Pull the yarn tail to tighten. Join with a sl st to the top of the ch 3.

    Flower Center

    1. Round 2: Sl st into the next dc, ch 2, then work 2 hdc in the same stitch. (1 hdc in the next dc, then 2 hdc in the next) repeat until all stitches are completed. Join to top of first ch 2.

    First Petal Round

    1. Round 3: Ch 5 (counts as first dc + ch 2), skip next st, and work 1 dc in the next stitch. (1 sl st in next, ch 5, skip next st, 1 dc in the next) repeat until completed. Join with a sl st.

    Additional Petal Rounds

    1. Round 4: For the second petal round, work a similar method but alternate colors if desired to create a more vibrant flower.
    2. Repeat Round 4 until you’ve created 6 petals total.

    Leaves

    1. Leaf Construction: Using green yarn, ch 10, then hdc along the chain. Shape the leaf by decreasing at the ends.

    Assembling the Flower

    1. Sew the petals onto the center, layering them evenly.
    2. Attach the leaves to the base of the flower at even intervals.
    3. Use floral wire for the stem if you desire a more stable hold.

    Finishing Details

    • Secure all loose ends and weave them in.
    • Adjust the shape of petals and leaves for a lifelike appearance.

    How to Use Your Crochet Flowers

    These lovely crochet poinsettias can be used in various ways:

    • Create a festive bouquet for your home.
    • Use them as unique holiday gift decorations.
    • Adorn Christmas tree branches as ornaments.
    • Craft a stunning centerpiece for your holiday dining table.

    Tips for a Better Result

    • Maintain consistent tension to avoid uneven petals.
    • Check stitch counts after every round to ensure accuracy.
    • Shape petals lightly while they’re still pliable.

    Crochet Flower Customization Ideas

    To personalize your poinsettia:

    • Experiment with different yarn textures for unique feels.
    • Try various color palettes for a modern twist.
    • Create smaller or larger flowers based on your needs.

    Common Problems and Troubleshooting

    • Uneven petals: Always check your stitch counts and tension.
    • Flower losing shape: Use a floral wire to help maintain structure.
    • Difficulty attaching stems: Make sure the base is well secured and integrate the stem during assembly.

    Care and Maintenance

    Handmade crochet flowers should be treated delicately. Cleaning methods vary based on yarn type—usually, a gentle hand wash can suffice. Ensure that you pay attention to any embellishments or wires that might require specific care.

    Frequently Asked Questions

    • Is this crochet flower pattern beginner-friendly?
      • Yes, this pattern is great for beginners.
    • What yarn is best for crochet flowers?
      • Medium-weight cotton yarn works well.
    • Can I make the flower larger or smaller?
      • Adjust the yarn and hook size for different flower sizes.
    • How do I keep crochet petals in shape?
      • Using floral wire can help maintain their structure.
    • Can I use different yarn colors?
      • Absolutely! Feel free to explore your color combinations.

    Conclusion

    Creating your own crochet poinsettia ornament is a fantastic way to spread holiday cheer and enhance your festive decor. With this easy pattern, you’ll find joy not only in crocheting but also in the smiles your handmade ornaments bring to loved ones. Get your crochet hooks ready and enjoy the process!


    SEO Title: Crochet Poinsettia Ornament Pattern for Christmas

    Meta Description: Discover an easy crochet pattern for a festive poinsettia ornament, perfect for Christmas decorations and handmade gifts.

    URL Slug: crochet-poinsettia-ornament-pattern

    Primary Keyword: crochet poinsettia ornament

    Secondary Keywords: crochet flower pattern, handmade crochet flowers, easy crochet flower, DIY crochet flowers

    Image 1 Alt Text: Completed crochet poinsettia ornament with red petals and yellow center.

    Image 2 Alt Text: Close-up of a crochet poinsettia ornament showcasing crisp details of the petals.

Easy Crochet Flower

Your free crochet ebook

Leave your email address to request your free crochet ebook.

Your email address will be used to handle your ebook request.