Tag: crochet tutorial

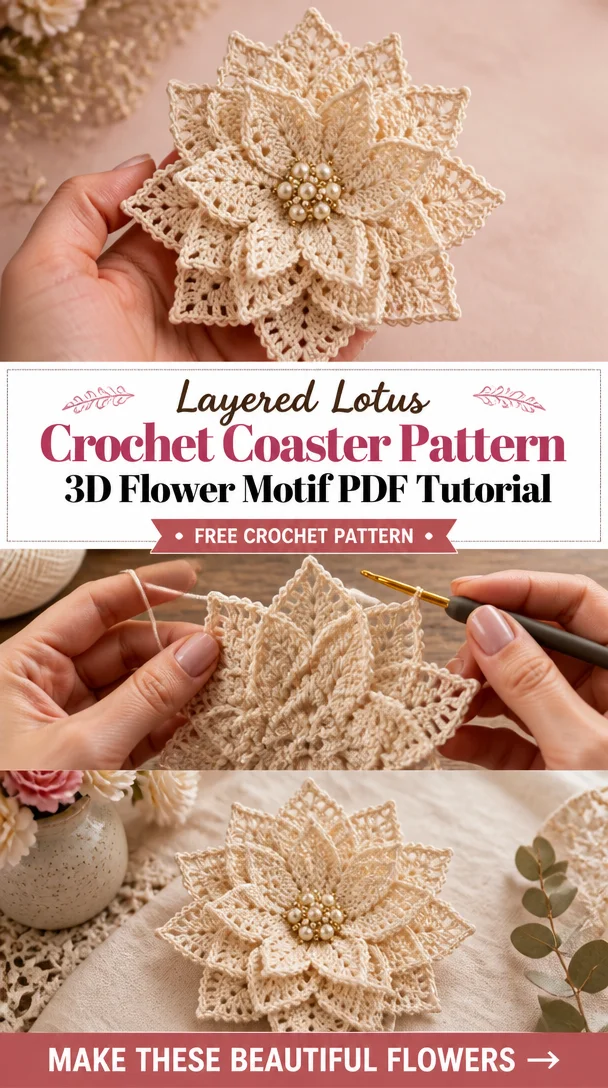
  • Layered Lotus Crochet Coaster Pattern, 3D Flower Motif PDF Tutorial

    Layered Lotus Crochet Coaster Pattern, 3D Flower Motif PDF Tutorial

    Layered Lotus Crochet Coaster Pattern, 3D Flower Motif PDF Tutorial

    Creating beautiful crochet flowers can transform any space, and this Layered Lotus Crochet Coaster Pattern is no exception! With its exquisite 3D layered design and elegant pearl-embellished center, this flower ornament serves multiple purposes, whether it’s gracing your table as a coaster, or hanging elegantly as wall decor. It’s a delightful addition to handmade bouquets or can be used as an eye-catching appliqué for various crafts. This pattern is ideal for confident beginners and intermediate crocheters, providing a fun challenge while delivering stunning results. Embrace your creativity and enjoy this delightful project!

    Crochet Flower Pattern Overview

    • Skill Level: Intermediate / Confident Beginner
    • Finished Size: Approximately 6 inches in diameter (exact size may vary by yarn and tension)
    • Crochet Hook Size: E-4 (3.5 mm)
    • Yarn Type: 100% cotton yarn
    • Yarn Weight: DK (Light Worsted)
    • Main Colors: Varies — choose your favorite shades!
    • Petal Construction: Layered petals for a 3D effect
    • Flower Center Construction: Pearl-embellished center
    • Stems or Leaves: Not included in this pattern
    • Construction Method: Worked in rounds
    • Approximate Completion Time: 3-5 hours
    • Beginner-Friendly: Slightly advanced due to layered construction
    • Work Style: Worked in rounds

    Materials You’ll Need

    • Yarn (100% cotton recommended)
    • E-4 (3.5 mm) crochet hook
    • Yarn needle
    • Stitch markers
    • Scissors
    • Decorative pearls (for the center)

    Crochet Abbreviations

    • MR = magic ring
    • ch = chain
    • sc = single crochet
    • hdc = half double crochet
    • dc = double crochet
    • sl st = slip stitch
    • inc = increase
    • st = stitch
    • sp = space
    • rep = repeat

    Before You Start

    Before diving into the pattern, it’s essential to familiarize yourself with maintaining an even tension while crocheting, especially when creating layered petals. Be prepared to practice your magic ring technique, as this is crucial for a tight flower center. Planning your color changes and ensuring you’re comfortable working in rounds will make your crocheting experience smoother.

    Free Crochet Flower Pattern

    Foundation or Magic Ring

    • Start with a magic ring.

    Flower Center

    • Round 1: Ch 3 (counts as 1 dc), 11 dc in the ring. Pull the ring tight and join with sl st to the top of the starting ch-3. (12 dc)

    First Petal Round

    • Round 2: Ch 1, (sc in next st, hdc in next st, dc in next 3 sts, hdc in next st, sc in next st, skip 1 st). Repeat from * to * around. Join with sl st to the first sc.

    Additional Petal Rounds

    • Round 3: Repeat the previous petal round, ensuring petals align with the previous round.

    Shaping the Petals

    • Gently shape each petal by adjusting with your fingers to create a more natural appearance.

    Finishing Details

    • Add decorative pearls to the center of the flower using your yarn needle to secure them in place.

    How to Use Your Crochet Flowers

    These beautiful crochet flowers are incredibly versatile! Use them to create a stunning handmade flower bouquet, add flair to gifts as decorations, or even use them as unique wall art. They can also be incorporated as crochet appliqués for garments, bags, and home decor projects.

    Tips for a Better Result

    • Maintain an even tension to keep your petals symmetrical.
    • Use stitch markers to help track your rows, especially during the petal construction.
    • Shape your petals evenly after completing the rounds for a professional look.

    Crochet Flower Customization Ideas

    • Choose vibrant or pastel colors to match seasonal decor.
    • Experiment with different yarn textures for a unique finish.
    • Combine multiple flowers to create a layered bouquet.

    Common Problems and Troubleshooting

    • If petals are uneven, check your stitch count after each round.
    • Curling petals can be smoothed with gentle shaping; a light steam (if yarn allows) may help set the shape.

    Care and Maintenance

    Care for your crochet flower by hand washing gently, if necessary, according to yarn manufacturer guidelines. Avoid harsh chemicals and direct sunlight to preserve the yarn’s integrity.

    Frequently Asked Questions

    • Is this crochet flower pattern beginner-friendly?

      • While it’s suitable for confident beginners, the layered design may require some practice.
    • What yarn is best for crochet flowers?

      • A DK weight cotton yarn is ideal for durability and stitch definition.
    • Can I make the flower larger or smaller?

      • Yes, adjust your hook size or yarn weight for larger or smaller flowers.
    • How do I keep crochet petals in shape?

      • Gently shape them while completing the flower, and consider a light steaming if the yarn permits.
    • Can I use different yarn colors?

      • Absolutely! Personalize your flower with any color palette you love.

    Conclusion

    This Layered Lotus Crochet Coaster Pattern is not only a fun project but also a beautiful way to showcase your crochet skills. With its dimensional design and versatility, crafting these elegant flowers will impress your friends and family. Dive into your crochet journey today and spread some floral cheer!


    SEO Title: Layered Lotus Crochet Coaster Pattern – Free PDF Tutorial
    Meta Description: Create a stunning 3D layered crochet flower coaster with our free pattern. Perfect for decor and gifts!
    URL Slug: layered-lotus-crochet-coaster-pattern
    Primary Keyword: Layered Lotus Crochet Coaster Pattern
    Secondary Keywords: 3D crochet flower, crochet coasters, crochet floral decoration, handmade crochet flowers
    Image 1 Alt Text: Layered Lotus Crochet Coaster in vibrant colors
    Image 2 Alt Text: Close-up of the crochet flower center with pearls

  • Crochet Flowers Christmas Tree: Follow the Free Poinsettia Photo Tutorial

    Crochet Flowers Christmas Tree: Follow the Free Poinsettia Photo Tutorial

    Crochet Flowers Christmas Tree: Follow the Free Poinsettia Photo Tutorial

    Welcome to our festive crochet project where you can create a stunning Poinsettia bouquet! This beautiful crochet flower project captures the essence of the holiday season with its vibrant red and green colors, resembling the iconic Christmas plant. Crocheting these Poinsettias not only enhances your crafting skills but also allows you to create charming decorations, lovely floral appliques, or thoughtful handmade gifts. Plus, this project is versatile for any skill level, making it a perfect endeavor for both beginners and experienced crocheters alike. Ready to bring some holiday cheer into your home? Dive in and follow our free pattern and step-by-step photo tutorial!

    Crochet Flower Pattern Overview

    • Skill Level: Suitable for all skill levels
    • Finished Flower Size: Approximately 4 to 5 inches across
    • Crochet Hook Size: G/6 (4.0 mm)
    • Yarn Type: Cotton yarn
    • Yarn Weight: Worsted weight (Medium 4)
    • Main Colors: Red and green
    • Petal Construction: Worked in rounds for petals
    • Flower Center Construction: Simple rounds
    • Includes Stems & Leaves: Yes, stems and leaves are included
    • Construction Method: Worked in rounds
    • Approximate Completion Time: 3–4 hours
    • Beginner-Friendly: Yes, with basic techniques
    • Worked: In separate pieces combining petals and leaves

    Materials You’ll Need

    • Red cotton yarn for petals
    • Green cotton yarn for leaves and stem
    • G/6 (4.0 mm) crochet hook
    • Yarn needle for weaving ends
    • Scissors
    • Floral wire for shaping (if desired)

    Crochet Abbreviations

    • MR = magic ring
    • ch = chain
    • sc = single crochet
    • hdc = half double crochet
    • dc = double crochet
    • sl st = slip stitch
    • inc = increase
    • dec = decrease
    • st = stitch
    • sp = space
    • rep = repeat

    Before You Start

    Before you begin crafting your Poinsettia, familiarize yourself with working in rounds. It’s important to maintain even tension to ensure uniform petals. Pay attention to the stitch counts and know when to change colors if you’re adding depth to your flower center. Prepare your petals first, and then we’ll attach leaves and stems towards the end to create a cohesive flower.

    Free Crochet Flower Pattern

    Foundation or Magic Ring

    1. Start with a magic ring.
    2. Chain 3 (counts as first dc).
    3. Work 11 dc into the ring. Pull the ring tight.
    4. Join with a sl st to the top of the initial ch-3. (12 dc)

    Flower Center

    1. Round 1: Ch 1, sc in next st, ch 2, dc in same st, repeat from * around. Join with a sl st.
    2. Round 2: Slip stitch into the ch-2 space, ch 3, dc in same sp, ch 2, sl st in same sp, repeat from * around. Finish off.

    First Petal Round

    1. Begin your petal: Use the red yarn.
    2. In same st as the last sl st, ch 3, dc in the next 3 sts, ch 2, sl st to the base of the petals. Repeat for the number of petals required.

    Additional Petal Rounds

    1. Work additional rows of petals by repeating the previous steps for more volume.
    2. You may want 5-6 petals total.

    Shaping the Petals

    Gently shape your petals using your fingers or a shaping tool for a more natural look.

    Leaves

    1. Using green yarn, ch 10.
    2. Work in rows for the leaves, shaping with hdc and finishing with a slip stitch to secure.
    3. Make 2 leaves for the bouquet.

    Stem

    1. Chain to your desired length for the stem.
    2. Work a foundation row of sc along the chain to create thickness.

    Assembling the Flower

    1. Sew the petals to the flower center using your yarn needle.
    2. Attach the leaves to the base of the stem.
    3. Secure everything in place.

    Finishing Details

    Weave in all ends securely. You can lightly block the petals if desired for a better shape.

    How to Use Your Crochet Flowers

    These crocheted Poinsettias can be used in various ways, including:

    • Creating a stunning handmade flower bouquet.
    • Decorating your table or home for the holidays.
    • Using as appliqués on clothing or bags.
    • Making personalized gift decorations for friends and family.

    Tips for a Better Result

    • Maintain even tension for symmetrical petals.
    • Consider leaving some petals slightly more open for a natural look.
    • Check that you are consistent with your stitch size for better results.

    Crochet Flower Customization Ideas

    • Experiment with different shades of red or other colors for a unique look.
    • Add glitter or beads to the center for extra flair.
    • Use textured yarn for a different visual effect.

    Common Problems and Troubleshooting

    • Uneven petals: Double-check that you are using consistent tension with each petal.
    • Curling edges: Gently block your petals to ensure they sit flat.
    • Loose stitches: Make sure to not skip stitches between rounds.

    Care and Maintenance

    To keep your crocheted Poinsettias looking fresh, check the yarn care instructions. Hand wash if necessary, avoiding harsh detergents. Air dry to maintain their shape.

    Frequently Asked Questions

    • Is this crochet flower pattern beginner-friendly?
      Yes, this pattern is perfect for beginners looking to learn.

    • What yarn is best for crochet flowers?
      Cotton yarn works beautifully for floral designs.

    • Can I use different yarn colors?
      Absolutely! Feel free to play with colors for personalization.

    • How do I keep crochet petals in shape?
      Gentle blocking can help maintain shape after crocheting.

    • Can I attach a stem to a crochet flower?
      Yes, you can easily incorporate a stem as detailed in the pattern.

    Conclusion

    Crocheting your own Poinsettia is a delightful way to add a personal touch to your holiday decorations or gifts! This charming flower captures the spirit of the season and can brighten up your home or make a memorable gift for loved ones. Get your crochet hooks ready and start your festive journey!


    SEO Title: Free Poinsettia Crochet Flower Pattern for Christmas
    Meta Description: Create a festive crocheted Poinsettia bouquet with our free step-by-step pattern and photo tutorial. Perfect for holiday decorations!
    URL Slug: crochet-poinsettia-flower-pattern
    Primary Keyword: crochet flower pattern
    Secondary Keywords: free crochet flower pattern, crochet flowers, crochet floral decoration, DIY crochet flowers, handmade crochet flowers.
    Image 1 Alt Text: Beautiful crocheted red Poinsettia flowers arranged for Christmas decoration.
    Image 2 Alt Text: Step-by-step photo tutorial of crocheting Poinsettia petals and leaves.

  • Free Crochet Flower Pattern – A Beautiful Poinsettia for Seasonal Decor

    Free Crochet Flower Pattern – A Beautiful Poinsettia for Seasonal Decor

    Crochet Poinsettia Home Decor Free Patterns That Look Elegant & Seasonal

    The crochet poinsettia is a stunning floral piece perfect for seasonal decorations and handmade gifts. With its intricate petals and rich colors, this flower captures the essence of the holidays, making it an appealing project for both beginner and experienced crocheters. Not only does it serve as an elegant addition to your home decor, but it can also be used in various creative ways, such as decorative appliques, centerpieces, or as part of a beautiful bouquet. Whether you’re looking to brighten up a festive gathering or create a heartfelt gift, the crochet poinsettia is a delightful choice that can be enjoyed year-round.

    Crochet Flower Pattern Overview

    • Skill Level: Easy
    • Finished Flower Size: Approximately 6 inches in diameter
    • Crochet Hook Size: 4mm (G)
    • Yarn Type: Worsted weight acrylic yarn
    • Yarn Weight: Medium (4)
    • Main Colors: Red, green, and yellow (for the center)
    • Petal Construction: Worked in rounds
    • Flower Center Construction: Includes a simple round
    • Leave Included: Yes
    • Construction Method: Multiple rounds joined together
    • Approximate Completion Time: 2-3 hours
    • Beginner-Friendly: Yes

    Materials You’ll Need

    • Worsted weight acrylic yarn (red, green, and yellow)
    • 4mm crochet hook
    • Yarn needle
    • Stitch markers
    • Scissors
    • Floral wire (optional for sturdiness)
    • Floral tape (optional for stems)
    • Glue (if using decorative elements)

    Crochet Abbreviations

    • MR = magic ring
    • ch = chain
    • sc = single crochet
    • hdc = half double crochet
    • dc = double crochet
    • sl st = slip stitch
    • inc = increase
    • st = stitch
    • sp = space
    • rep = repeat

    Before You Start

    Before diving into your crochet poinsettia, here are some tips to help you navigate the project successfully:

    • Work in Rounds: The petals and flower center are both constructed using rounds, so familiarize yourself with this method.
    • Understand Petal Construction: Pay attention to the number of petals you will create; this pattern typically features multiple layers for fullness.
    • Even Tension: Maintain consistent tension throughout your work to ensure that petals are evenly shaped.
    • Color Planning: Decide on your color scheme before starting to streamline your project and avoid any mid-work changes.

    Free Crochet Flower Pattern

    Flower Center

    1. Round 1: Start with a magic ring, ch 3 (counts as first dc), then work 11 dc into the ring. Pull tight to close the ring. (12 dc)
    2. Round 2: Ch 3, dc in same space, 2 dc in next st, repeat from * around. Join with sl st. (24 dc)

    First Petal Round

    1. Round 3: Ch 1, sc in the same stitch as join, ch 2, sk 2 dc, sc in next dc., Repeat from * around. (12 ch-2 spaces)

    Additional Petal Rounds

    1. Round 4: In each ch-2 sp work a [hdc, dc, tr, dc, hdc] to create a petal shape. Join when complete.

    Individual Petals

    • Repeat the additional petal construction around the flower center.

    Shaping the Petals

    • Gently shape the petals using your fingers or blocking techniques to create a natural look.

    Leaves

    • Leaf Pattern: Ch 10, hdc in 3rd ch from hook, dc in next 4 ch, hdc in next 3 ch. Fasten off. Make 2 leaves.

    Flower Construction and Assembly

    1. Joining Petals: Attach the petals to the flower center using a yarn needle, sewing securely.
    2. Attaching Leaves: Position the leaves behind the flower and sew in place.
    3. Securing Ends: Weave in all yarn ends for a neat finish.

    Petal Shaping and Finishing Details

    • Adjust the shape of the petals to ensure they sit evenly.
    • If desired, add embellishments or a decorative bead at the center for added flair.

    How to Use Your Crochet Flowers

    • Create a stunning handmade bouquet for seasonal decor.
    • Use them as decorative table centerpieces for holiday gatherings.
    • Incorporate into a wreath or as an applique on clothing and bags.

    Tips for a Better Result

    • Maintain consistent tension for symmetrical petals.
    • Shape the flower carefully to maintain its elegance.
    • Make neat color changes to avoid loose threads.

    Crochet Flower Customization Ideas

    • Experiment with different yarn colors to achieve unique looks.
    • Use textured yarn for a more tactile design.
    • Adjust the size by using different hook sizes or yarn weights.

    Common Problems and Troubleshooting

    • Uneven Petals: Ensure your tension is consistent and check your stitch counts.
    • Curling Petals: Block petals gently to shape them before final assembly.
    • Stems Not Holding Shape: Consider using floral wire for added support.

    Care and Maintenance

    To maintain the beauty of your crochet poinsettia, follow the care instructions based on the yarn manufacturer’s guidelines. Keep in mind materials such as floral wire and embellishments might require special care when cleaning.

    Frequently Asked Questions

    • Is this crochet flower pattern beginner-friendly? Yes, the pattern is easy to follow and perfect for beginners.
    • What yarn is best for crochet flowers? Worsted weight acrylic yarn works wonderfully for vibrant, durable flowers.
    • How long does it take to crochet this flower? Approximately 2-3 hours, depending on your skill level.
    • Can I make the flower larger or smaller? Yes, adjust your hook size or yarn weight for size customizations.
    • How do I keep crochet petals in shape? Gently block the petals after completion and adjust accordingly.
    • Can I use different yarn colors? Absolutely! Various colors enhance the flower’s appearance.
    • How do I attach a stem to a crochet flower? Sew or glue a decorative stem directly to the base of the flower.

    Conclusion

    Crochet poinsettias are a delightful way to add a personal touch to your holiday decorations or gifts. With their vibrant colors and elegant design, they are sure to bring joy and warmth to any space. Enjoy the process and let your creativity shine as you craft these beautiful flowers!


    SEO Title: Elegant Crochet Poinsettia Home Decor Pattern
    Meta Description: Discover this easy crochet poinsettia pattern—perfect for seasonal décor and handmade gifts. Create beautiful crochet flowers today!
    URL Slug: crochet-poinsettia-pattern
    Primary Keyword: crochet poinsettia
    Secondary Keywords: free crochet flower pattern, crochet flower, easy crochet flower, crochet flower for beginners, crochet floral decoration

    Image 1 Alt Text: Finished crochet poinsettia flower in vibrant red and green colors
    Image 2 Alt Text: Step-by-step crochet tutorial image showing the flower assembly process

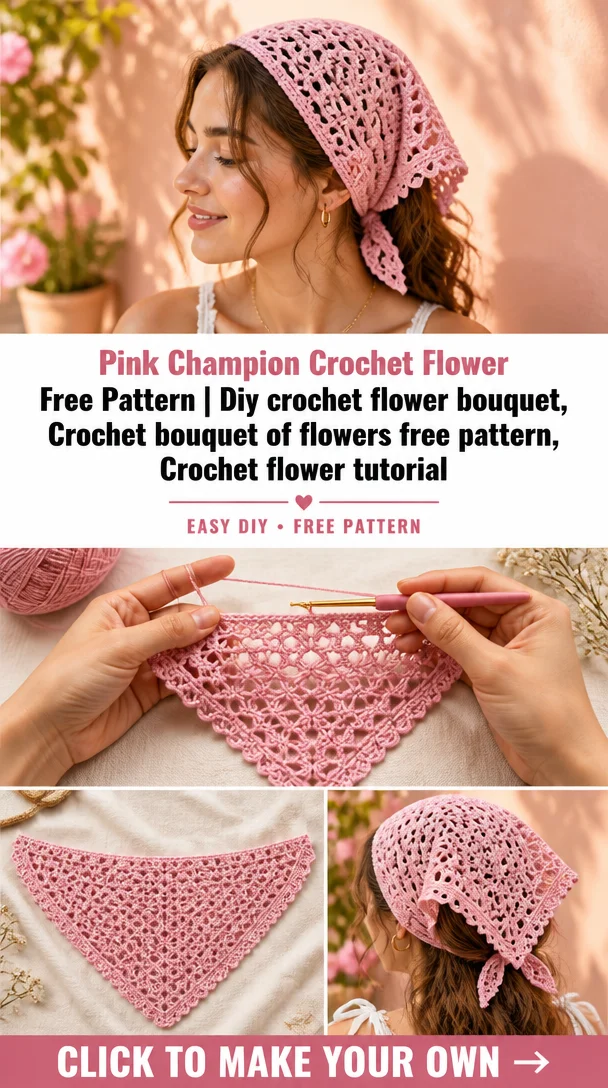
  • Pink Champion Crochet Flower Free Pattern | Diy crochet flower bouquet, Crochet bouquet of flowers free pattern, Crochet flower tutorial

    Pink Champion Crochet Flower Free Pattern | Diy crochet flower bouquet, Crochet bouquet of flowers free pattern, Crochet flower tutorial

    Pink Champion Crochet Flower Free Pattern | Diy crochet flower bouquet, Crochet bouquet of flowers free pattern, Crochet flower tutorial

    Creating beautiful crochet flowers can be a delightful and rewarding project, and the Pink Champion Crochet Flower is no exception. This charming flower boasts a vibrant design perfect for brightening up any space. Not only does it make a stunning centerpiece for your handmade crochet bouquet, but it can also be used as a lovely applique or decorative element in various projects. Crocheting this flower is suitable for all skill levels, making it the perfect creative endeavor, whether you’re just beginning your crochet journey or looking to expand your floral collection.

    Crochet Flower Pattern Overview

    • Skill Level: Easy
    • Finished Flower Size: Approximately 5 inches in diameter
    • Crochet Hook Size: H/8 (5.00 mm)
    • Yarn Type: Cotton or acrylic blend
    • Yarn Weight: Worsted weight (#4)
    • Main Colors: Shades of pink
    • Petal Construction: Worked in rounds
    • Flower Center Construction: Included
    • Stems or Leaves Included: Optional
    • Approximate Completion Time: 2-3 hours
    • Beginner-Friendly: Yes

    Materials You’ll Need

    • Worsted weight yarn in pink and green
    • H/8 (5.00 mm) crochet hook
    • Yarn needle
    • Stitch markers
    • Scissors
    • Floral wire (for stems, optional)
    • Floral tape (for wrapping stems, optional)

    Crochet Abbreviations

    • MR = magic ring
    • ch = chain
    • sc = single crochet
    • hdc = half double crochet
    • dc = double crochet
    • sl st = slip stitch
    • inc = increase
    • st = stitch
    • rep = repeat

    Before You Start

    Before diving into the pattern, ensure that you are comfortable working in rounds. Familiarize yourself with the petal repeat technique, as this will be crucial in maintaining an even pattern. Check your yarn tension to ensure that each petal has a uniform appearance. Don’t hesitate to use stitch markers to keep track of your rounds, particularly if you are new to crocheting flowers.

    Free Crochet Flower Pattern

    Foundation or Magic Ring

    1. Start with a magic ring (MR).
    2. Ch 2 (counts as the first dc), then work 11 dc into the ring.
    3. Pull the magic ring tight to close.

    Flower Center

    1. Sl st to the top of the first dc to join.
    2. Ch 1, then work 2 sc in each dc around (24 sc total).
    3. Sl st to join.

    First Petal Round

    1. Ch 3 (counts as dc), then work 2 dc in the same stitch for the first petal.
    2. Sk 1 sc, sl st in the next sc.
    3. Repeat the (ch 3, 2 dc in the same stitch, sk 1 sc, sl st in next sc) around 5 more times, ending with 5 petals.

    Additional Petal Rounds

    1. For each petal, work 2 dc, ch 1, and sl st back into the same base stitch to create a fluttering effect.

    Shaping the Petals

    1. Gently pull the base of each petal to shape it to your liking.
    2. Use your fingers to curl the edges of each petal outward for a natural look.

    Leaves (Optional)

    1. Ch 10, then sc in the 2nd ch from the hook and each ch across (9 sc).
    2. Ch 1 and turn. Use hdc in each sc on the next row.
    3. Twist slightly to shape, and use floral wire to attach.

    Assembling the Flower

    • Position leaves behind the flower base and secure with floral wire or adhesive if using.
    • Use floral tape to wrap the stem.

    Petal Shaping and Finishing Details

    To finish the flower, ensure that each petal is shaped to your preference while checking symmetry. You can adjust colors or add embellishments in the flower center using contrasting yarn for a more dynamic look.

    How to Use Your Crochet Flowers

    The Pink Champion Crochet Flower can be used in various ways:

    • Create a stunning handmade flower bouquet for gifting.
    • Use it as a decorative applique on bags or clothing.
    • Make it a centerpiece for home décor.
    • Incorporate it into seasonal decorations.

    Tips for a Better Result

    • Maintain even tension throughout your petals for uniformity.
    • Pinch and curl petals gently for a more natural look.
    • Secure all yarn ends neatly to keep your flower tidy.

    Crochet Flower Customization Ideas

    Consider customizing your Pink Champion flower by:

    • Using different yarn colors for varied aesthetics.
    • Changing yarn textures for unique effects.
    • Mixing and matching petal patterns to enhance complexity.

    Common Problems and Troubleshooting

    • Uneven petals: Ensure that you are maintaining consistent tension throughout.
    • Curling petals: Adjust shaping after finishing each petal.
    • Difficulty attaching stems: Consider using floral tape or additional yarn for secure connections.

    Care and Maintenance

    For cleaning your crochet flowers, check the yarn manufacturer’s recommendations. Be gentle during cleaning to retain the shape and texture of delicate petals, especially if wire or additional decorations are involved.

    Frequently Asked Questions

    1. Is this crochet flower pattern beginner-friendly?

      • Yes! This pattern is designed for all skill levels.
    2. What yarn is best for crochet flowers?

      • A cotton or acrylic blend works great for durability and color retention.
    3. How long does it take to crochet this flower?

      • Approximately 2-3 hours, depending on your skill level.
    4. Can I make the flower larger or smaller?

      • Yes, by adjusting your hook size or yarn weight.
    5. How do I keep crochet petals in shape?

      • Gently shape them while you crochet and adjust as needed.

    Conclusion

    The Pink Champion Crochet Flower is not only a fun and easy project to tackle, but it also provides a vibrant touch to any crafting endeavor. Whether you’re decorating your home or gifting a handmade bouquet, this crochet flower allows for creativity and personalization. Dive in and start creating your beautiful floral masterpiece today!


    SEO Title: Beautiful Pink Champion Crochet Flower Free Pattern
    Meta Description: Discover our free crochet flower pattern for the Pink Champion flower, perfect for DIY bouquets and floral decorations!
    URL Slug: pink-champion-crochet-flower-pattern
    Primary Keyword: crochet flower pattern
    Secondary Keywords: easy crochet flower, crochet floral decoration, crochet bouquet, DIY crochet flowers
    Image 1 Alt Text: Pink Champion Crochet Flower in a delicate handmade bouquet
    Image 2 Alt Text: Crochet Flower Petals showcasing detailed shaping

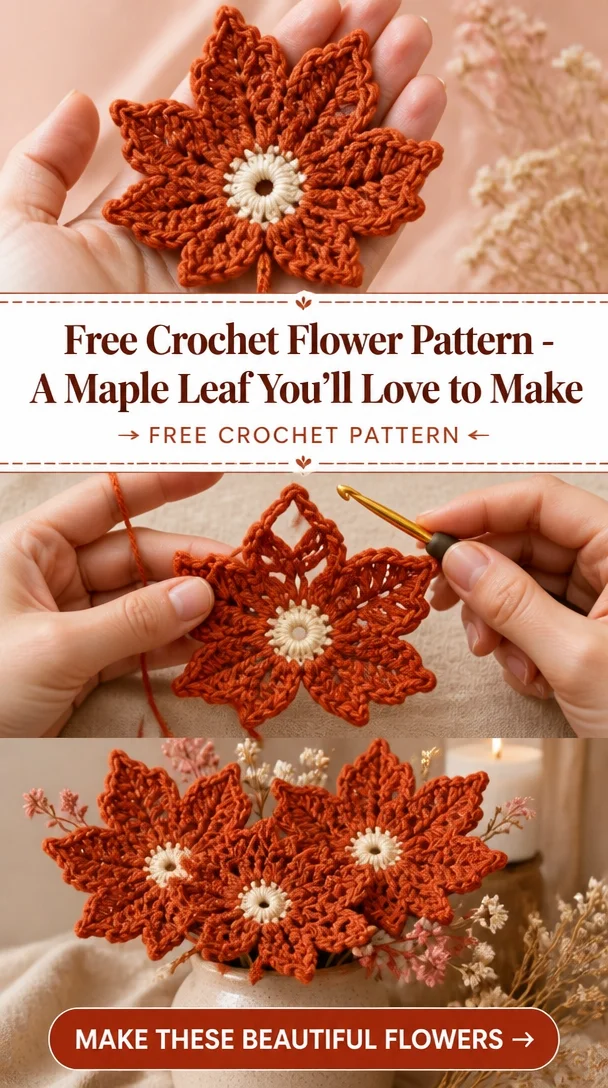
  • Free Crochet Flower Pattern – A Maple Leaf You’ll Love to Make

    Free Crochet Flower Pattern – A Maple Leaf You’ll Love to Make

    🍁 Free Maple Leaf Crochet Pattern – Easy Fall DIY for Home & Gifts | Free easy fall crochet patterns simple leaves, Free crochet patterns for small leaves, Crochet leaf free pattern

    As the crispness of fall blankets the scenery, there’s no better way to capture the essence of the season than by crocheting a beautiful maple leaf. This free maple leaf crochet pattern not only serves as a delightful introduction to crocheting leaf motifs, but it also brings a splash of color and warmth to your home decor. With its vibrant hues and unique design, this crochet leaf is perfect for decorating tables, crafting DIY wreaths, or personalizing gifts. Whether you’re an experienced crocheter or just starting out, this easy pattern allows you to create lovely accents to celebrate the fall season in style.

    Crochet Flower Pattern Overview

    • Skill Level: Beginner
    • Finished Flower Size: Approximately 4 inches
    • Crochet Hook Size: H/8 (5mm)
    • Yarn Type: Worsted Weight
    • Yarn Weight: Medium #4
    • Main Colors: Orange, Red, Yellow (fall-themed)
    • Petal Construction: Simple layered rounds
    • Flower Center Construction: Not applicable
    • Included Pieces: Leaves only
    • Construction Method: Worked in rounds
    • Approximate Completion Time: 1 hour
    • Beginners: Yes, this pattern is suitable for those new to crochet.

    Materials You’ll Need

    • Worsted weight yarn in desired fall colors
    • Crochet hook (H/8, 5mm)
    • Yarn needle for weaving in ends
    • Scissors
    • Stitch markers (optional)

    Crochet Abbreviations

    • MR = magic ring
    • ch = chain
    • sc = single crochet
    • hdc = half double crochet
    • dc = double crochet
    • sl st = slip stitch
    • inc = increase
    • dec = decrease
    • st = stitch
    • sp = space
    • rep = repeat

    Before You Start

    Before diving into your crochet project, ensure you have a comfortable workspace with good lighting. Familiarize yourself with the magic ring technique, as it is essential for starting the maple leaf. Aim to keep an even tension throughout your stitches to maintain a consistent shape. If you’re using multiple colors, plan your color transitions carefully to create that beautiful fall effect in your leaves.

    Free Crochet Flower Pattern

    Foundation or Magic Ring

    1. Create a magic ring.

    First Round

    1. Ch 3 (counts as first dc), then make 11 dc into the ring.
    2. Pull the magic ring to close and join with a sl st in the top of the beginning ch-3 (12 dc total).

    Second Round

    1. Ch 3, dc in the same st (this is your first inc).
    2. *2 dc in the next st, 1 dc in the next st; repeat from * around.
    3. Join with a sl st (18 sts total).

    Third Round

    1. Ch 3, dc in the same st (first inc).
    2. *2 dc in the next st, 2 dc in the next st; repeat from * around.
    3. Join with a sl st (24 dc total).
    4. Fasten off, leaving a long tail for sewing.

    Flower Construction and Assembly

    1. Starting from the tip, fold the leaves slightly and sew the sides to give them a more natural shape.
    2. Position the leaves together as desired for a lush effect.
    3. Secure with a few stitches at the base to ensure they hold their shape.
    4. Weave in any ends and trim excess yarn.

    Petal Shaping and Finishing Details

    To finalize your maple leaf, gently shape the tips using your fingers or a blocking method. This will help each leaf stand out with a beautiful curl, reminiscent of natural leaves. You can use a fabric stiffener for added structure if desired.

    How to Use Your Crochet Flowers

    These adorable maple leaves can be turned into a stunning centerpiece for your dining table, used as embellishments on fall-themed gifts, or even strung together to create a charming garland. They also make delightful additions to wreaths or can be featured in seasonal home decor projects.

    Tips for a Better Result

    • Maintain Even Tension: Keep your stitches uniform for a polished look.
    • Shape Carefully: Take the time to shape your leaves well; this makes a big difference in presentation.
    • Secure Ends: Ensure all yarn ends are woven in securely to avoid unraveling.

    Crochet Flower Customization Ideas

    Experiment with different yarn colors to match your existing decor. You could also try adding some glitter or embroidery to your leaves for a sparkling effect. Smaller leaves can be made as embellishments on hats or bags.

    Common Problems and Troubleshooting

    • Uneven Leaves: Make sure to maintain consistent tension.
    • Curling Tips: Block the leaves by dampening them and pinning them down while they dry.
    • Difficulty with the Ring: Practice the magic ring technique if it’s your first time; it gets easier with practice.

    Care and Maintenance

    To keep your crocheted leaves looking their best, hand wash them gently in cool water and lay flat to dry. Avoid harsh cleaning products that may damage the yarn. If you’ve used floral wire or other decorative items, check their durability according to their material instructions.

    Frequently Asked Questions

    • Is this crochet flower pattern beginner-friendly?
      Yes, it is perfect for beginners looking to practice basic crochet stitches.

    • What yarn is best for crochet flowers?
      Worsted weight yarn is recommended for softness and structure.

    • How long does it take to crochet this flower?
      Approximately 1 hour, making it a quick project.

    • Can I make the flower larger or smaller?
      Yes, adjusting your hook size or yarn weight can change the size.

    • How do I keep crochet petals in shape?
      Use a blocking method after finalizing your piece.

    • Can I use different yarn colors?
      Absolutely! Feel free to customize with any colors you like.

    • How do I attach a stem to a crochet flower?
      You can crochet a simple stem separately and sew it to the base of the leaves.

    • Can I use this crochet flower in a bouquet?
      Yes, these leaves work beautifully in bouquets or arrangements.

    Conclusion

    Crocheting a maple leaf is an enjoyable project that captures the essence of fall. Whether you’re making them for yourself or as gifts, these lovely leaves will brighten up any space with their warm colors and unique texture. Dive into this project and bring a touch of autumn into your home with your handmade creations!


    SEO Title: Free Maple Leaf Crochet Pattern for Fall Home Decor
    Meta Description: Create charming crochet maple leaves with this easy pattern! Perfect for fall crafts and seasonal decorations.
    URL Slug: free-maple-leaf-crochet-pattern
    Primary Keyword: free crochet flower pattern
    Secondary Keywords: easy crochet flower, crochet flower for beginners, DIY crochet flowers, handmade crochet flowers
    Image 1 Alt Text: Crocheted maple leaf in vibrant fall colors on a wooden table
    Image 2 Alt Text: A bouquet of crocheted leaves arranged in a rustic vase

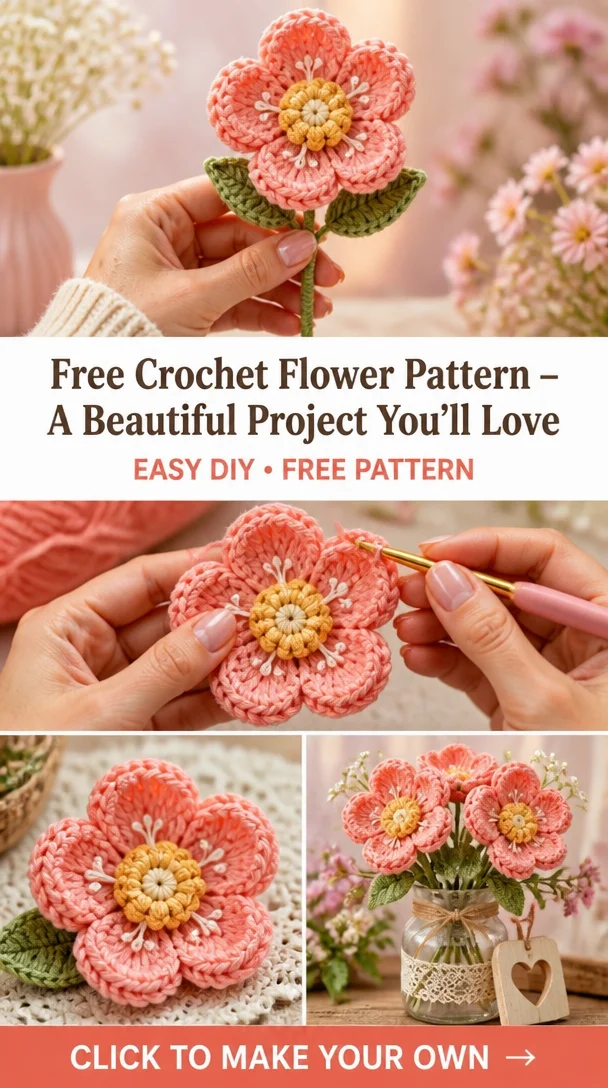
  • Free Crochet Flower Pattern – A Beautiful Project You’ll Love

    Free Crochet Flower Pattern – A Beautiful Project You’ll Love

    How to Crochet a Flower: Step-by-Step Guide for Beginners

    Crocheting flowers is a delightful and creative way to enhance your DIY projects! In this guide, you will learn how to create a beautiful crochet flower that can be used in a variety of ways. This flower design features lovely, intricate petals and a charming center, making it perfect for embellishing clothing, crafting floral appliqués, or designing stunning handmade bouquets. Not only is this project great for beginners, but it also provides a relaxing and enjoyable way to embrace the art of crochet. Join us as we embark on this floral journey, and add a personal touch to your crafts!

    Crochet Flower Pattern Overview

    • Skill Level: Beginner
    • Finished Flower Size: Approximately 4 inches in diameter
    • Crochet Hook Size: G (4.0 mm)
    • Yarn Type: Medium-weight acrylic yarn
    • Yarn Weight: Worsted weight
    • Main Colors: Choose your favorite colors!
    • Petal Construction: Worked in rounds
    • Flower Center Construction: Simple center stitch
    • Includes: No stems or leaves
    • Construction Method: Round-by-round assembly
    • Approximate Completion Time: 1-2 hours
    • Beginner-Friendly: Yes
    • Work in Rounds/Rows: Yes, worked in rounds

    Materials You’ll Need

    • Medium-weight acrylic yarn (in your choice of colors)
    • G (4.0 mm) crochet hook
    • Yarn needle
    • Stitch markers
    • Scissors

    Crochet Abbreviations

    • ch = chain
    • sc = single crochet
    • dc = double crochet
    • sl st = slip stitch
    • sp = space

    Before You Start

    Before diving into crafting your flower, it’s important to familiarize yourself with the pattern. You’ll be working in rounds to create the petals, so keep track of your stitch counts. To produce even petals, maintain consistent yarn tension, and don’t be afraid to consult a stitch marker to help mark your rounds. Take your time to enjoy the process, and have fun with your color choices!

    Free Crochet Flower Pattern

    Foundation

    Round 1: Start with a magic ring. Chain 3 (this counts as your first dc). Work 11 dc into the ring (total 12 dc). Pull the ring tight and join with a sl st to the top of the beginning ch-3.

    Flower Center

    Round 2: Ch 1, sc in the same st. In the next st, work 2 sc. Repeat this pattern around until you have 24 sc. Join with a sl st.

    First Petal Round

    Round 3: Ch 3 (counts as dc). In the next stitch, work 2 dc. In the next stitch, work 1 dc. Repeat this sequence around for a total of 12 petals (3-stitch groups). Join with a sl st to the top of the beginning ch-3.

    Additional Petal Rounds

    Round 4: For each petal, ch 3, dc, dc (2 dc in the first st) in the same petal space. Slip stitch in the middle of the petals to create a deeper shape. Repeat for each petal.

    Assembling the Flower

    To finish, secure all loose ends by weaving them into the back of the flower with your yarn needle. Your beautiful crochet flower is now ready!

    Flower Construction and Assembly

    Assemble the flower by layering the parts if desired. You can make multiple flowers and connect them for a delightful bouquet!

    Petal Shaping and Finishing Details

    To shape the petals, gently pull and adjust each petal to ensure they sit evenly. This will enhance the flower’s natural look. If you prefer, you can add decorative stitching around the edges for a more polished appearance.

    How to Use Your Crochet Flowers

    These crochet flowers are versatile! Use them as:

    • Decorative appliqués for clothing
    • Beautiful additions to home décor
    • Unique hair accessories
    • Lovely table centerpieces
    • Stunning gift embellishments

    Tips for a Better Result

    • Keep your tension even to avoid irregular shapes.
    • Make sure all petals are similarly shaped for a uniform appearance.
    • For a vibrant display, mix and match colors.

    Crochet Flower Customization Ideas

    Try customizing your flower:

    • Use different yarn colors for seasonal themes.
    • Experiment with textured yarns for added interest.
    • Create varied centerpieces with contrasting colors.

    Common Problems and Troubleshooting

    • Uneven petals: Check your stitch count and ensure consistent tension.
    • Loose stitches: Use a smaller hook size to tighten the stitches.

    Care and Maintenance

    To keep your crochet flowers in tip-top shape, follow the care instructions based on your yarn’s material. Generally, handwashing in cold water and laying flat to dry is best to maintain their beautiful shapes.

    Frequently Asked Questions

    • Is this crochet flower pattern beginner-friendly?
      Yes, it’s perfect for beginners wanting to develop their skills!

    • What yarn is best for crochet flowers?
      Medium-weight acrylic yarn works well due to its versatility and ease of use.

    • How long does it take to crochet this flower?
      Generally, 1-2 hours, depending on your skill level.

    • Can I make the flowers larger or smaller?
      Yes, by using different yarn weights or hook sizes you can adjust the size.

    • How do I keep the crochet petals in shape?
      Ensure you check your tension and use a proper yarn for your project.

    Conclusion

    Crocheting a flower is not only a fun and satisfying experience but also allows for countless creative opportunities. Once you master this pattern, you can expand your crochet repertoire to other flower varieties, like roses or sunflowers. So gather your materials and get started on crafting those lovely crochet flowers!


    SEO Title: Easy Step-by-Step Crochet Flower Guide for Beginners
    Meta Description: Learn how to crochet beautiful flowers with our beginner-friendly step-by-step guide. Perfect for embellishing garments and creating handmade gifts!
    URL Slug: crochet-flower-pattern
    Primary Keyword: crochet flower pattern
    Secondary Keywords: easy crochet flower, crochet flower for beginners, crochet floral decoration, DIY crochet flowers
    Image 1 Alt Text: A beautiful crochets flower made with colorful yarn.
    Image 2 Alt Text: Close-up of petals of a completed crochet flower design.

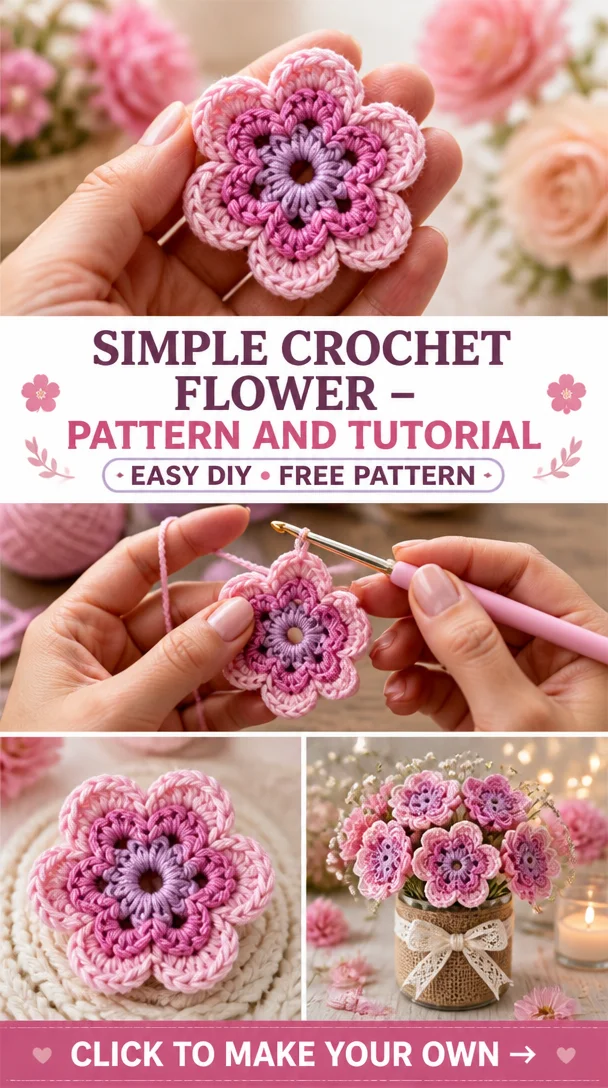
  • Simple Crochet Flower – Pattern and Tutorial

    Simple Crochet Flower – Pattern and Tutorial

    Simple Crochet Flower – Pattern and Tutorial

    Welcome to your next crochet adventure! Creating a simple crochet flower is an engaging project that not only showers you with the joy of crafting but also results in a beautiful decorative piece. These flowers showcase a delightful blend of colors and textures, making them an excellent option for embellishing various items or creating bespoke gifts. Whether you choose to use them in a handmade bouquet, as decorative appliqués, or in your crochet art projects, these flowers will add charm wherever they are placed. Suitable for crocheters of all skill levels, this pattern offers a wonderful opportunity for both beginners and seasoned crafters to refine their skills. Let’s dive in!

    Crochet Flower Pattern Overview

    • Skill Level: Beginner
    • Finished Flower Size: Approximately 4 inches in diameter
    • Crochet Hook Size: H/8 (5.0 mm)
    • Yarn Type: 100% Acrylic (or preferred yarn)
    • Yarn Weight: Worsted Weight (4)
    • Main Colors: Any two contrasting colors for petals and center
    • Petal Construction: Worked in rounds
    • Flower Center Construction: Made separately and attached
    • Leaves/Stems: Leaves can be included if desired
    • Approximate Completion Time: 1-2 hours
    • Construction Method: Worked in rounds
    • Beginner-Friendly: Yes

    Materials You’ll Need

    • Worsted weight yarn in two contrasting colors
    • H/8 (5.0 mm) crochet hook
    • Yarn needle for weaving in ends
    • Stitch markers (optional)
    • Scissors

    Crochet Abbreviations

    • MR = magic ring
    • ch = chain
    • sc = single crochet
    • hdc = half double crochet
    • dc = double crochet
    • sl st = slip stitch
    • inc = increase
    • dec = decrease
    • st = stitch
    • sp = space
    • rep = repeat

    Before You Start

    To get the best results from this crochet flower pattern, it’s crucial to maintain an even tension throughout your stitches. If you’re using multiple colors, plan out your color changes in advance to ensure smooth transitions. Start with a magic ring for the center, as this will keep the work tight and help form a neat, rounded look. When constructing the petals, remember to double-check your stitch counts, especially during increases or decreases. Preparing the petals ahead of time can streamline the assembly process later.

    Free Crochet Flower Pattern

    Foundation or Magic Ring

    1. Begin with a magic ring.
    2. Ch 2 (does not count as a stitch), then 10 dc in the ring.
    3. Pull tight to close the ring, sl st to the top of the first dc to join.

    Flower Center

    1. Round 1: Ch 2, 10 hdc in the ring, pull tight, sl st to join.
    2. Round 2: Ch 2, hdc in the first st, 2 hdc in the next; repeat from * to * around (15 hdc), sl st to join.

    First Petal Round

    1. Round 1: Ch 2, then dc in the same stitch. Ch 2, skip next st, dc in the next; repeat around. Sl st to join.

    Additional Petal Rounds

    1. Round 2: Ch 2, dc in the first sp, ch 2, dc in the same sp; repeat around. Sl st to join.
    2. You can add additional rounds per your desired fullness.

    Individual Petals

    1. Petals: Work petal instructions as follows for each petal:
      • 5 dc in the same st, ch 1, and sl st back into the same stitch to close the petal.

    Shaping the Petals

    To give dimension to the petals, lightly tug on them after you finish the last round to shape them into a natural curve or arch.

    Leaves (Optional)

    • Create simple leaves by chaining 12, then dc, hdc, sc in the first stitch and working back with sl st to the base of the chain.

    Assembling the Flower

    1. Position the flower center on the base of the petals and sew securely.
    2. If you made leaves, attach them to the bottom of the flower, securing with stitches.

    How to Use Your Crochet Flowers

    Your completed crochet flower can elevate countless projects:

    • Arrange them into a stunning handmade flower bouquet
    • Use as a decorative piece for home decor
    • Create a table centerpiece for special occasions
    • Embellish gift wrapping for a personal touch
    • Add them to hair accessories or bags for unique flair

    Tips for a Better Result

    • Ensure even tension to maintain consistent petal shapes.
    • Check for symmetry by viewing the flower head-on as you work.
    • Take your time with color changes to avoid uneven lines.
    • When assembling, use stitch markers to position each piece correctly.

    Crochet Flower Customization Ideas

    Consider these customization options to make your crochet flower uniquely yours:

    • Experiment with different yarn colors or textures
    • Create contrasting flower centers
    • Adjust petal lengths for varied designs
    • Use decorative beads or buttons for added flair

    Common Problems and Troubleshooting

    • If petals are uneven, check your stitch counts and ensure consistent tension.
    • For curly petals, block the shaped flower by lightly steaming or wetting it.
    • Misaligned layers may be fixed by re-sewing the base layers more tightly.

    Care and Maintenance

    To maintain your crochet flower’s appearance, gently hand wash as needed according to the yarn care instructions. Avoid heavy washing or exposing the flowers to moisture; if using wire, ensure it is secured well and out of sight.

    Frequently Asked Questions

    • Is this crochet flower pattern beginner-friendly?
      Yes, it is designed for beginners with easy-to-follow steps.

    • What yarn is best for crochet flowers?
      A worsted-weight acrylic yarn works well for vibrant and sturdy petals.

    • How long does it take to crochet this flower?
      Approximately 1-2 hours, depending on your speed.

    • Can I make the flower larger or smaller?
      Yes, by adjusting the number of rounds or using thicker yarn.

    • How do I keep crochet petals in shape?
      Lightly steam or block them after finishing to maintain structure.

    • Can I use different yarn colors?
      Absolutely! Choose your preferred color palette.

    • Can I use this crochet flower in a bouquet?
      Yes, they make beautiful additions to any floral arrangement!

    Conclusion

    Creating a simple crochet flower is not only a rewarding experience but also allows you to enhance various handmade items with your unique style. With endless possibilities for customization, this pattern provides a stunning introduction to the world of crocheted florals. Grab your yarn, and let the crafting begin!


    SEO Title: Simple Crochet Flower Pattern and Tutorial for Beginners

    Meta Description: Discover an easy and beautiful crochet flower pattern perfect for beginners! Create stunning floral decorations for gifts, home decor, and more.

    URL Slug: simple-crochet-flower-pattern

    Primary Keyword: simple crochet flower

    Secondary Keywords: free crochet flower pattern, crochet flower pattern, crochet flowers, easy crochet flower, crochet flower for beginners

    Image 1 Alt Text: Beautifully crafted simple crochet flower in pink and yellow colors.

    Image 2 Alt Text: Close-up of the crochet flower’s intricate petal details.

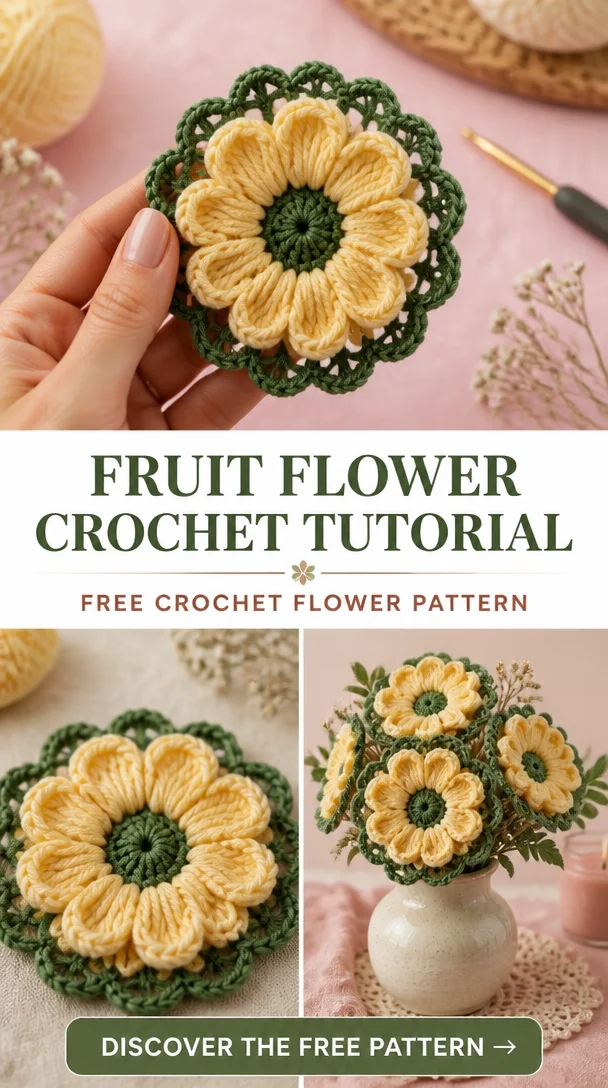
  • Fruit Flower Crochet Tutorial

    Fruit Flower Crochet Tutorial

    Fruit Flower Crochet Tutorial

    Welcome to the Fruit Flower Crochet Tutorial! This delightful crochet flower project is perfect for celebrating the freshness and vibrancy of spring. The Fruit Flower combines playful colors and intricate petal designs, making it a beautiful addition to any handmade creation. Crocheting this flower allows you to unleash your creativity while crafting a unique decoration that can adorn your home, serve as an applique, or even act as a thoughtful gift for loved ones. This pattern is suitable for crochet enthusiasts of all skill levels, so gather your materials and get ready to crochet a beautiful bloom that will bring joy to your day!

    Crochet Flower Pattern Overview

    • Skill Level: Beginner to Intermediate
    • Finished Flower Size: Approximately 4 inches in diameter
    • Crochet Hook Size: H (5.0 mm)
    • Yarn Type: Cotton yarn
    • Yarn Weight: Worsted (Medium)
    • Main Colors: Bright and vibrant hues, such as pinks, yellows, and greens
    • Petal Construction: Layered petals with varied stitches
    • Flower Center Construction: Round, textured center
    • Stems or Leaves Included: Optional
    • Construction Method: Worked in rounds
    • Approximate Completion Time: 2-3 hours
    • Beginner-Friendly: Yes, with basic stitches
    • Worked In: Rounds

    Materials You’ll Need

    • Yarn (medium weight cotton in various colors)
    • H (5.0 mm) crochet hook
    • Yarn needle for weaving ends
    • Stitch markers
    • Scissors
    • Floral wire (optional)
    • Flower stems (optional)

    Crochet Abbreviations

    • MR = magic ring
    • ch = chain
    • sc = single crochet
    • hdc = half double crochet
    • dc = double crochet
    • sl st = slip stitch
    • inc = increase
    • st = stitch
    • sp = space
    • rep = repeat

    Before You Start

    Before diving into the crochet pattern for the Fruit Flower, it’s important to understand a few key elements:

    • Work in rounds to create the flower properly.
    • Pay attention to the petal repeat for consistent appearance.
    • Maintain even tension throughout your stitches for a polished finish.
    • Be prepared for separate petal assembly if you’re making a larger arrangement or bouquet.

    Free Crochet Flower Pattern

    Foundation or Magic Ring

    1. Begin with a magic ring (MR) and secure it.
    2. Chain 2 (this counts as the first double crochet).

    Flower Center

    1. Round 1: Work 12 dc into the magic ring, pull tight to close.
    2. Slip stitch in the top of the first dc to join.

    First Petal Round

    1. Round 2: *Ch 3, 1 dc in next st, repeat from * around for 12 petals.
    2. Join with a sl st to the top ch of the first ch-3.

    Additional Petal Rounds

    1. Round 3: Ch 3, 1 dc in the same space, and then *2 dc in the next ch-3 space; repeat from * around.
    2. Join with a sl st.

    Individual Petals

    1. Round 4: In each petal space from previous round, work 1 hdc, 2 dc, 1 hdc, then sl st to next petal space to finish.

    Shaping the Petals

    • Lightly stretch and shape each petal by hand for a more defined look.

    Leaves (Optional)

    1. Chain 10, sc in the second ch from the hook, hdc, dc in next 7 stitches, then turn and work back down for a leaf shape.

    Stem (Optional)

    • Using floral wire, create a simple stem by wrapping the wire and securing it to the base of your flower.

    Flower Construction and Assembly

    1. Attach the flower center to the base of the petals using your yarn needle.
    2. If adding leaves, position them securely around the stem.
    3. Ensure all pieces are fastened securely and adjust as necessary for a balanced look.

    Petal Shaping and Finishing Details

    • Complete the flower by adjusting petal shapes and ensuring they are evenly distributed around the center.
    • Weave in all ends and ensure there are no loose stitches.

    How to Use Your Crochet Flowers

    These lovely crochet fruit flowers are perfect for:

    • Creating a handmade flower bouquet.
    • Serving as home decor accents.
    • Being included in seasonal decorations.
    • Acting as embellishments for gifts.
    • Using as a hair accessory or bag charm.

    Tips for a Better Result

    • Keep an eye on tension to prevent uneven petals.
    • Regularly check your counts to stay on track.
    • Use contrasting colors for flower centers for added visual interest.

    Crochet Flower Customization Ideas

    • Experiment with different yarn colors to match any occasion.
    • Try varying textures for unique petal effects.
    • Adjust flower size by using a different hook size.

    Common Problems and Troubleshooting

    • Uneven petals can be fixed by carefully reshaping and adjusting yarn tension.
    • If petals curl, blocking with steam can help shape them properly.
    • Misaligned layers can be corrected by carefully stitching them back together.

    Care and Maintenance

    For maintaining your crochet flowers, follow the yarn care instructions provided by the manufacturer. Gently hand wash and reshape delicate petals, especially if floral wire or heavier elements are included.

    Frequently Asked Questions

    • Is this crochet flower pattern beginner-friendly?
      Yes, it includes simple stitches and clear instructions.

    • What yarn is best for crochet flowers?
      Cotton yarns in various colors work best for their durability and color retention.

    • How long does it take to crochet this flower?
      Approximately 2-3 hours.

    • Can I make the flower larger or smaller?
      Yes, adjusting your yarn weight and hook size will help change the dimensions.

    • How do I keep crochet petals in shape?
      Lightly blocking or steaming them can help maintain their shape.

    • Can I use different yarn colors?
      Absolutely! Feel free to mix and match colors for personalized results.

    • How do I attach a stem to a crochet flower?
      You can securely attach it by wrapping floral wire or sewing it directly using a yarn needle.

    Conclusion

    We hope you enjoyed this detailed Fruit Flower Crochet Tutorial! The charming colors and intricate design make this flower a delightful addition to your crochet projects. Whether crafting a bouquet or a lovely gift, this crochet flower is sure to brighten any space. Happy crocheting!


    SEO Title: Fruit Flower Crochet Pattern: A Colorful Bloom
    Meta Description: Discover the fun Fruit Flower Crochet Tutorial! Create stunning, colorful flowers perfect for appliques, bouquets, and spring decorations.
    URL Slug: fruit-flower-crochet-tutorial
    Primary Keyword: Fruit Flower Crochet Tutorial
    Secondary Keywords: crochet flower pattern, crochet flower for beginners, easy crochet flower, handmade crochet flowers, DIY crochet flowers, crochet floral decoration
    Image 1 Alt Text: Beautifully crocheted fruit flower in vibrant colors
    Image 2 Alt Text: Close-up of the finished fruit flower crochet pattern

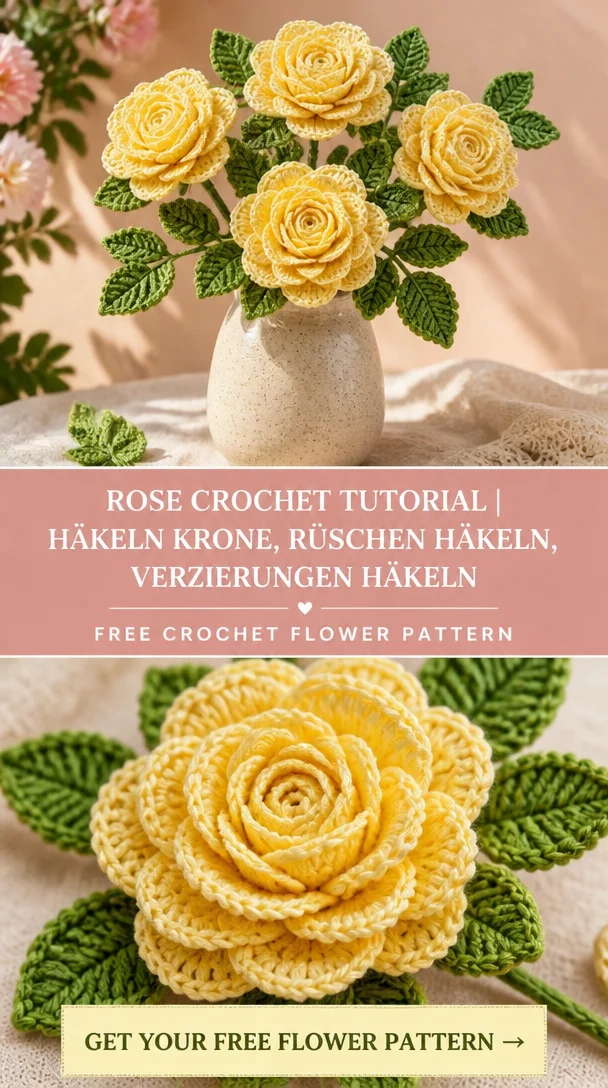
  • Rose Crochet Tutorial | Häkeln krone, Rüschen häkeln, Verzierungen häkeln

    Rose Crochet Tutorial | Häkeln krone, Rüschen häkeln, Verzierungen häkeln

    Rose Crochet Tutorial | Häkeln krone, Rüschen häkeln, Verzierungen häkeln

    Welcome to our delightful Rose Crochet Tutorial! This intricate crochet flower project is perfect for those who appreciate the beauty of roses. With its layered petals and charming texture, this crochet rose not only adds a splash of color to any space but also makes for a thoughtful handmade gift. Whether you’re decorating your home, creating a unique bouquet, or embellishing a gift, this crochet rose will surely impress. This pattern is suitable for crocheters with a basic understanding of stitches, making it an ideal choice for both beginners and experienced crafters looking to create stunning floral appliques.

    Crochet Flower Pattern Overview

    • Skill Level: Beginner to Intermediate
    • Finished Flower Size: Approximately 4-5 inches
    • Crochet Hook Size: 4.0 mm (G)
    • Yarn Type: Worsted weight cotton yarn
    • Yarn Weight: Medium (Weight 4)
    • Main Colors: Red, green, and yellow (customizable)
    • Petal Construction: Layered petals
    • Flower Center Construction: Separate center piece
    • Stems or Leaves Included: Yes, optional leaves
    • Construction Method: Constructed in rounds
    • Approximate Completion Time: 2-3 hours
    • Beginner-Friendly: Yes, with some prior knowledge
    • Flower Worked In: Rounds for petals and center, possibly separate pieces for leaves

    Materials You’ll Need

    • Worsted weight cotton yarn in desired colors
    • 4.0 mm (G) crochet hook
    • Yarn needle for weaving ends
    • Scissors
    • Stitch markers (optional)
    • Floral wire (if desired for stability)
    • Green yarn for leaves (optional)

    Crochet Abbreviations

    • MR = magic ring
    • ch = chain
    • sc = single crochet
    • hdc = half double crochet
    • dc = double crochet
    • sl st = slip stitch
    • inc = increase
    • st = stitch
    • sp = space
    • rep = repeat

    Before You Start

    Before diving into this gorgeous rose crochet project, it’s essential to familiarize yourself with the pattern’s construction. This tutorial uses a magic ring to begin, allowing for a neat center. You’ll be creating layered petals, so keeping your tension consistent is key to achieving a beautiful finish. Also, have your yarn colors ready for a seamless transition between petals and leaves.

    Free Crochet Flower Pattern

    Foundation or Magic Ring

    1. Make a magic ring.
    2. Ch 3 (this counts as your first dc), then work 11 dc into the ring. Pull the tail to close the ring.

    Flower Center

    1. Join with a sl st to the top of the beginning ch-3.
    2. Ch 1, sc in the same st, then 2 sc in the next st around (12 sts).

    First Petal Round

    1. Ch 3 (counts as first dc), work 1 dc in the same st.
    2. Skip next st, [2 dc, ch 2, sl st in the same ch-2 space], repeat from * to * around (6 petals total).
    3. Join with sl st to the top of the beginning ch-3.

    Additional Petal Rounds

    1. For each petal, work 2 dc in the ch-2 space from the previous round. Continue the pattern as above.
    2. Repeat for additional petals to achieve desired fullness.

    Individual Petals

    • Shape petals as desired while stitching into the ch-2 spaces from previous rounds for a fuller look.

    Assembling the Flower

    • Layer petals, ensuring they overlap slightly. Attach with a yarn needle, weaving securely through layers.

    Flower Construction and Assembly

    To assemble your beautiful crochet rose, stack the petals around the flower center. Secure each petal with the yarn needle, ensuring to hide the ends for a polished look. Attach any leaves you wish to include by sewing them to the base of the flower.

    Petal Shaping and Finishing Details

    To achieve a stunning finish, gently shape your petals by curling the edges inward. This gives your crochet rose a more natural and appealing look. Adjust their placement for symmetry and balance.

    How to Use Your Crochet Flowers

    Your finished roses can be utilized in various ways:

    • Create a stunning handmade flower bouquet
    • Use as home décor or table centerpiece
    • Embellish gifts with a lovely crochet flower
    • Make hair accessories or bag decorations
    • Design seasonal decorations for holidays

    Tips for a Better Result

    • Maintain even tension when crocheting petals.
    • Keep petals symmetrical by measuring as you go.
    • Avoid twisting petals by working with consistent stitches.
    • Shape petals gently for a more natural effect.
    • Secure your yarn ends carefully for a polished finish.

    Crochet Flower Customization Ideas

    To personalize your crochet roses, consider:

    • Experimenting with different yarn colors, like pastels for a spring bouquet.
    • Adding contrasting flower centers for a unique touch.
    • Using textured yarn for added interest.
    • Mixing sizes for a dynamic bouquet display.

    Common Problems and Troubleshooting

    If you encounter issues, here are some solutions:

    • Uneven petals: Check tension and refer to stitch counts.
    • Curling petals: Stiffen with floral wire or lightly steam them.
    • Loose stitches: Consider a smaller hook size to maintain shape.
    • Difficulty attaching petals: Use a yarn needle for secure fastening.

    Care and Maintenance

    To maintain the beauty of your crochet flowers, refer to the yarn manufacturer’s washing instructions. For delicate petals, gentle surface cleaning is best. Store in a cool, dry place to preserve their shape.

    Frequently Asked Questions

    • Is this crochet flower pattern beginner-friendly?
      Yes, it is suitable for beginners with basic stitch knowledge.

    • What yarn is best for crochet flowers?
      Worsted weight cotton yarn works beautifully for structure and detail.

    • How long does it take to crochet this flower?
      Approximately 2-3 hours depending on your speed and experience.

    • Can I make the flower larger or smaller?
      Yes, adjust the number of rounds and petal layers as needed.

    • How do I keep crochet petals in shape?
      Use floral wire for stability or steam them lightly.

    • Can I use different yarn colors?
      Absolutely! Experiment with color combinations for unique results.

    • How do I attach a stem to a crochet flower?
      Use a yarn needle to sew in a floral wire or yarn stem securely to the base.

    Conclusion

    The Rose Crochet Tutorial is an exciting way to bring the beauty of flowers into your crafting regimen. With its layered petals and stunning detail, this crochet rose is sure to brighten any space or gift. We hope you enjoy crafting this lovely project as much as we do!


    SEO Title: Stunning Rose Crochet Tutorial for Beautiful Bloom

    Meta Description: Explore this easy Rose Crochet Tutorial to create beautiful floral decorations. Perfect for beginners, this free pattern adds charm to any project!

    URL Slug: rose-crochet-tutorial

    Primary Keyword: Rose Crochet Tutorial

    Secondary Keywords: crochet flower pattern, crochet rose pattern, easy crochet flower, handmade crochet flowers, crochet floral decoration, DIY crochet flowers

    Image 1 Alt Text: Crochet rose flower in vibrant red yarn with layered petals.

    Image 2 Alt Text: Finished crochet rose next to various color yarns and tools.

Easy Crochet Flower

Your free crochet ebook

Leave your email address to request your free crochet ebook.

Your email address will be used to handle your ebook request.