Tag: crochet flower

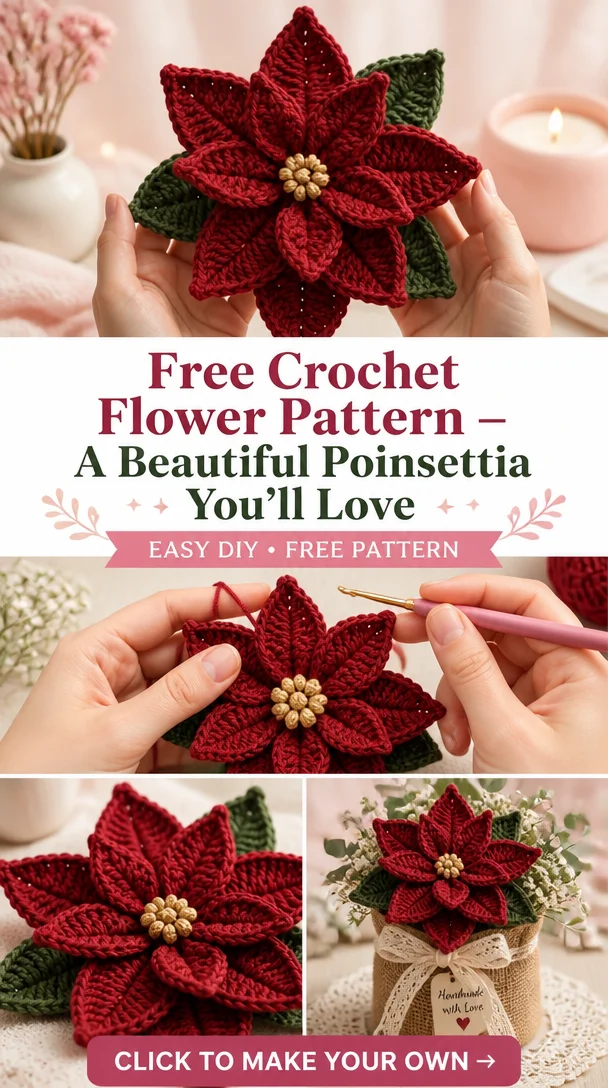
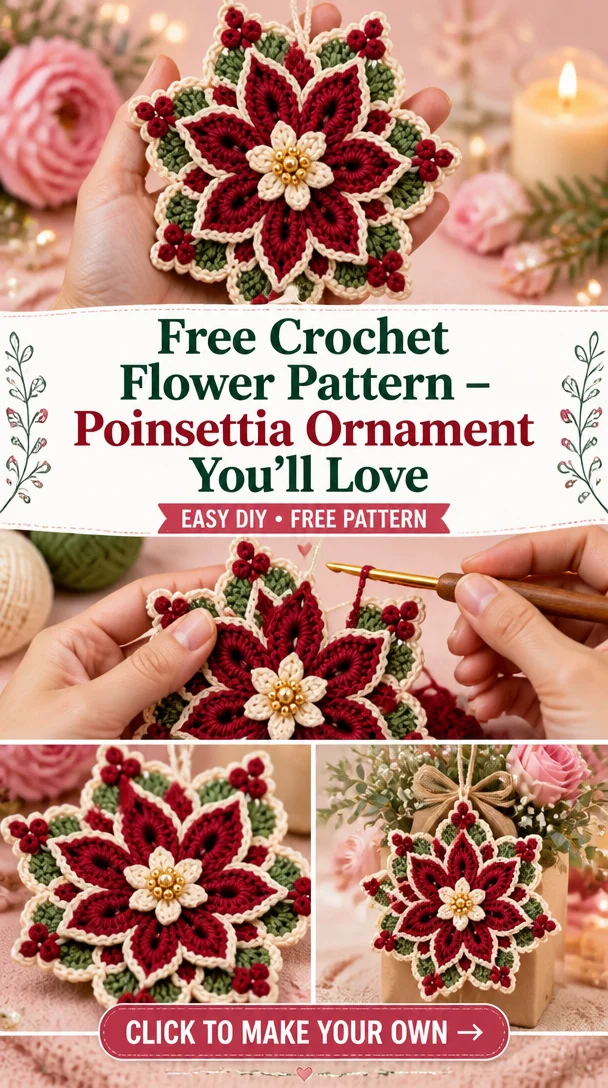
  • Free Crochet Flower Pattern – Poinsettia Ornament You’ll Love

    Free Crochet Flower Pattern – Poinsettia Ornament You’ll Love

    Crochet Poinsettia Christmas Ornament | Holiday Crochet Pattern

    Add a festive touch to your holiday decor with this beautiful Crochet Poinsettia Christmas Ornament. Featuring layered red petals, vibrant green leaves, and delicate cream edging, this ornament is a true embodiment of the season. The addition of elegant gold bead details gives it an extra sparkle that’s perfect for capturing the warmth and joy of Christmas. This ornament is not just a captivating decoration for your Christmas tree; it also makes a thoughtful handmade gift for loved ones. Whether you’re a seasoned crocheter or a beginner eager to learn, this pattern provides a delightful and rewarding project.

    Crochet Flower Pattern Overview

    • Skill Level: Intermediate
    • Finished Size: Approximately 5 inches in diameter
    • Crochet Hook Size: G (4.0 mm)
    • Yarn Type: Acrylic yarn
    • Yarn Weight: Medium
    • Main Colors: Red, green, cream, gold
    • Petal Construction: Layered design
    • Flower Center Construction: Beaded detailing
    • Includes Leaves: Yes
    • Construction Method: Worked in rounds
    • Approximate Completion Time: 3-4 hours
    • Beginner-Friendly: Some experience recommended
    • Work structure: Rounds for petals and leaves

    Materials You’ll Need

    • Red acrylic yarn
    • Green acrylic yarn
    • Cream acrylic yarn
    • Gold beads (for decoration)
    • G (4.0 mm) crochet hook
    • Yarn needle
    • Scissors
    • Stitch markers (optional)

    Crochet Abbreviations

    • MR = magic ring
    • ch = chain
    • sc = single crochet
    • hdc = half double crochet
    • dc = double crochet
    • sl st = slip stitch
    • inc = increase
    • dec = decrease
    • st = stitch
    • sp = space
    • rep = repeat

    Before You Start

    Before diving into this project, ensure you’re comfortable with basic crochet stitches, including single and double crochet. This pattern involves working in rounds and layering sections, so maintaining even tension is crucial for the petals to lay flat and symmetrical. It’s also helpful to familiarize yourself with the color changes between the red petals and cream edging to achieve the best visual effect.

    Free Crochet Flower Pattern

    Foundation or Magic Ring

    1. Start with a magic ring.
    2. Ch 2 (does not count as a stitch), then work 10 dc into the ring. Pull the ring tight and join with a sl st to the top of the first dc.

    Flower Center

    1. Round 1: Ch 1, then work 2 sc in each st around (20 sc). Join with a sl st.
    2. Cut a long tail for sewing the flower center to the petals.

    First Petal Round

    1. Round 2: Attach red yarn to any stitch. Ch 3 (counts as first dc), then work 2 more dc in the same st for the first petal.
    2. Skip 1 st, sl st in the next. Repeat for 5 petals.

    Additional Petal Rounds

    1. Round 3: For each petal made, work a petal (3 dc, ch 1, 3 dc) into the top of each petal from the previous round. Join with a sl st.

    Individual Petals

    • Repeat for a total of 5 petals.

    Shaping the Petals

    1. Gently shape the petals by pinching them at the base and curling the ends slightly for a more natural look.

    Leaves

    1. Attach green yarn.
    2. Work a small leaf by chaining 6, hdc in the second chain from the hook, dc in the next 2 chains, hdc in the last chain, then sl st to the starting point. Leave a long tail for sewing.

    Flower Assembly

    1. Sew the flower center to the base of the petals.
    2. Attach the leaves on either side of the flower.

    Finishing Details

    • Add gold beads to the flower center for a festive touch.
    • Secure all ends and weave in any loose yarn tails.

    How to Use Your Crochet Flowers

    This Crochet Poinsettia Christmas Ornament can be beautifully displayed as:

    • A stunning addition to your Christmas tree.
    • A unique, handmade gift for family and friends.
    • Decorative accents for holiday table settings.
    • An eye-catching piece for seasonal wreaths or garlands.

    Tips for a Better Result

    • Maintain even tension throughout to avoid uneven petals.
    • When layering petals, ensure they are evenly spaced for a balanced look.
    • Secure all pieces tightly to ensure the flower holds its shape.

    Crochet Flower Customization Ideas

    • Experiment with different yarn colors for a unique twist.
    • Create contrasting centers using beads of various colors.
    • Adjust the size of the petals and leaves for a dynamic bouquet.

    Common Problems and Troubleshooting

    • Uneven petals: Ensure the same stitch count in each petal round.
    • Petals curling: Use slightly larger yarn to create a looser weave.
    • Difficulty attaching leaves: Use matching thread to secure them effectively without visible stitches.

    Care and Maintenance

    To keep your handmade crochet poinsettia ornament looking its best, gently hand wash it in cold water. Lay flat to dry and avoid direct sunlight to prevent fading. Ensure to store it in a dry place after the holiday season.

    Frequently Asked Questions

    • Is this crochet flower pattern beginner-friendly?
      While the pattern is more suitable for intermediates, beginners with basic skills may find it approachable.

    • What yarn is best for crochet flowers?
      Medium-weight acrylic yarn works beautifully for vibrant colors and flexibility.

    • How long does it take to crochet this flower?
      Expect to spend approximately 3-4 hours completing this ornament.

    • Can I make the flower larger or smaller?
      Yes, simply adjust your hook size or use thicker yarn for a larger effect.

    • How do I keep crochet petals in shape?
      Shape them gently and ensure they are securely attached to maintain their form.

    • Can I use different yarn colors?
      Absolutely! Different color palettes can yield stunning and unique results.

    • How do I attach a stem to a crochet flower?
      Sew a green yarn piece for a stem or create a floral wire wrapped in yarn for added sturdiness.

    Conclusion

    This Crochet Poinsettia Christmas Ornament is not only an eye-catching decoration, but it also makes a heartfelt handmade gift that embodies the festive spirit of the holidays. With its layered petals and sparkling details, this ornament is sure to bring joy to your holiday celebrations and create lasting memories for years to come.


    SEO Title: Crochet Poinsettia Christmas Ornament Pattern
    Meta Description: Create a stunning crochet poinsettia ornament with layered petals and elegant details! Ideal for holiday decor and gifts.
    URL Slug: crochet-poinsettia-christmas-ornament
    Primary Keyword: Crochet Poinsettia Christmas Ornament
    Secondary Keywords: Crochet Christmas Ornaments, Christmas Crochet Patterns, Crochet Flower Ornament, DIY Christmas Ornaments, Crochet Holiday Decorations
    Image 1 Alt Text: A vibrant red crochet poinsettia ornament with green leaves and gold beads.
    Image 2 Alt Text: Detailed close-up of layered crochet petals with cream edging and gold bead embellishments.
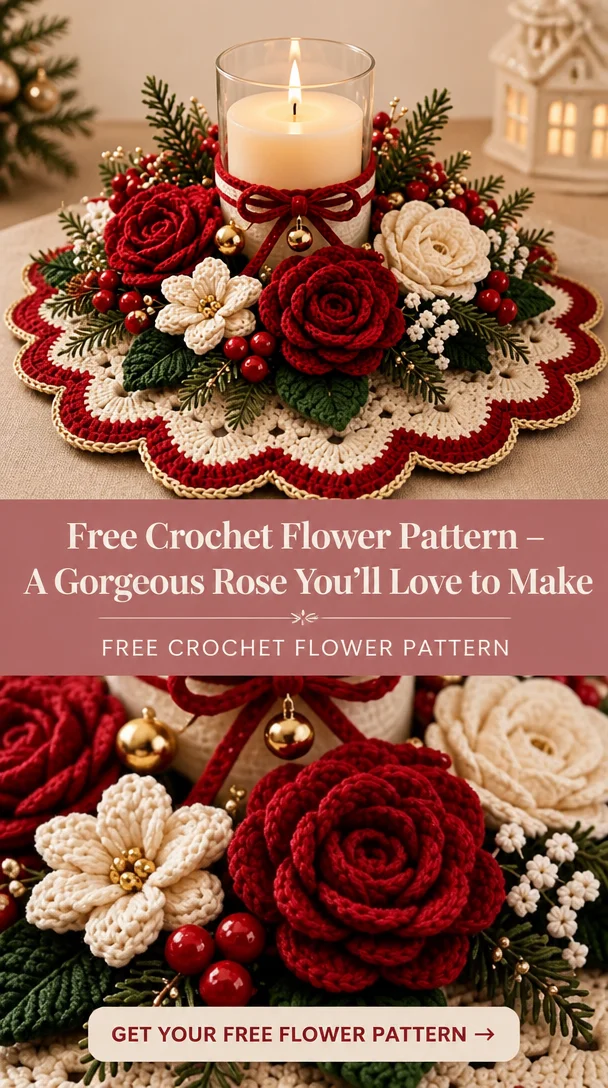
  • Free Crochet Flower Pattern – A Gorgeous Rose You’ll Love to Make

    Free Crochet Flower Pattern – A Gorgeous Rose You’ll Love to Make

    45K views · 886 reactions | free pattern down in the cоʍʍеոτs👇👇

    ❤️🎄 Turn simple yarn into this stunning Christmas crochet centerpiece with beautiful handmade roses! ✨

    If you’re looking to add a touch of elegance to your holiday decor, this stunning Christmas crochet centerpiece featuring handmade roses is just the project for you! This delightful floral design captures the beauty and spirit of the season, making it a perfect decoration for your table or a thoughtful gift for loved ones. The intricate petals and vibrant colors create a captivating centerpiece that will surely impress anyone who sees it. Suitable for crocheters of various skill levels, this project allows you to explore your creativity while crafting a lovely accessory for your home.

    Crochet Flower Pattern Overview

    • Skill level: Easy to Intermediate
    • Finished flower size: Approximately 3 inches in diameter
    • Crochet hook size: 5.0 mm (H-8)
    • Yarn type: Cotton or acrylic yarn
    • Yarn weight: Medium (worsted)
    • Main colors: Red, green (or your preferred colors)
    • Petal construction: Worked in rounds with layered petals
    • Flower center construction: Simple circular center
    • Leaves included: Yes
    • Completion method: Assembled in layers
    • Approximate completion time: 2-3 hours
    • Petals construction: Worked in rounds

    Materials You’ll Need

    • Medium weight yarn in primary colors (e.g., red, green)
    • 5.0 mm (H-8) crochet hook
    • Yarn needle
    • Scissors
    • Floral wire (optional, for structural support)
    • Floral stems (if required)
    • Stuffing (if desired for a 3D effect)

    Crochet Abbreviations

    • MR = magic ring
    • ch = chain
    • sc = single crochet
    • hdc = half double crochet
    • dc = double crochet
    • tr = treble crochet
    • sl st = slip stitch
    • inc = increase
    • dec = decrease
    • st = stitch
    • sp = space

    Before You Start

    Before diving into this crochet flower project, familiarize yourself with basic crochet stitches and techniques, particularly working in rounds. It may be helpful to have your yarn tension even throughout to maintain a consistent look for the petals. Make sure to plan your color changes if you decide to use multiple colors for your flower.

    Free Crochet Flower Pattern

    Foundation or Magic Ring

    1. Start by creating a magic ring.
    2. Secure with a slip stitch.

    Flower Center

    1. Round 1: 6 sc in the magic ring.
    2. Round 2: 2 sc in each st around (12 sts).
    3. Round 3: 1 sc in the next st, 2 sc in the next st; repeat around (18 sts).
    4. Fasten off, leaving a long tail.

    First Petal Round

    1. Attach yarn to any stitch from the center.
    2. Round 1: (ch 4, sl st in 2nd ch from hook, hdc in next ch, dc in last ch, sl st in same base st); repeat 5 times for 6 petals.
    3. Fasten off and weave in ends.

    Additional Petal Rounds

    1. Round 2: In each petal, work dc, hdc, ch 1, sl st at the base of each petal to create a layered effect. Repeat around.
    2. Fasten off and weave in ends.

    Leaves

    1. For each leaf, ch 10, then work into the chain: sc, hdc, dc, dc, hdc, sc down the other side before fasten off.

    Joining the Pieces

    1. Position petals around the flower center; sew them securely with the tail left from the center.
    2. Attach leaves on either side of the flower, using the same yarn.

    Assembling the Flower

    Carefully secure all pieces together, ensuring petals are evenly spaced around the center for a balanced look.

    Petal Shaping and Finishing Details

    Gently shape the petals by curving them outward for a more natural look. You can secure the shape with a bit of yarn or floral wire if needed. For added detail, consider adding a decorative button or bead to the center.

    How to Use Your Crochet Flowers

    These beautiful crochet roses can be used in many ways, including as:

    • A stunning centerpiece for your holiday table
    • An elegant addition to a handmade bouquet
    • A lovely applique on bags or garments
    • A delightful gift for any occasion

    Tips for a Better Result

    • Maintain even tension throughout to ensure consistent petal shapes.
    • Match the number of stitches as you create petals to keep your flower looking symmetrical.
    • Use floral wire for a more structured stem if you want to elevate your design.

    Crochet Flower Customization Ideas

    Feel free to customize your crochet roses by experimenting with:

    • Different yarn colors for each petal
    • Varied yarn textures for a unique look
    • Multiple flowers of different sizes to create a vibrant bouquet
    • Seasonal color palettes, especially for Christmas!

    Common Problems and Troubleshooting

    • Uneven petals: Check your stitch count for consistency.
    • Curling petals: Try adjusting your tension or blocking the finished flower.
    • Loose stitches: Review your technique to keep all stitches equally tight.

    Care and Maintenance

    To maintain the beauty of your handmade crochet flowers, consider spot-cleaning with a damp cloth. Always refer to the yarn manufacturer’s washing instructions, as it will vary based on the yarn type used.

    Frequently Asked Questions

    • Is this crochet flower pattern beginner-friendly?
      Yes, although a bit of experience helps, beginners can certainly try it out with patience.

    • What yarn is best for crochet flowers?
      Both cotton and acrylic yarns work wonderfully for durability and ease in shaping.

    • How long does it take to crochet this flower?
      Approximately 2-3 hours, depending on your skill level.

    • Can I make the flower larger or smaller?
      Yes, adjusting the hook size or using thicker yarn can help achieve different sizes.

    • How do I keep crochet petals in shape?
      Use floral wire or stuffing to help maintain the structure.

    • Can I use different yarn colors?
      Absolutely! Feel free to get creative with colors.

    • How do I attach a stem to a crochet flower?
      You can sew it directly to the base of the flower or use floral wire for stability.

    • Can I use this crochet flower in a bouquet?
      Yes, these roses are perfect for creating a charming bouquet!

    Conclusion

    This stunning Christmas crochet centerpiece is a joyful project that captures the magic of the holiday season. With its beautiful handmade roses, it’s not just a decoration; it’s a heartfelt gesture that can brighten any space. We hope this pattern inspires you to create your own unique pieces and fill your home with warmth and beauty.


    SEO Title: Easy Christmas Crochet Flower Centerpiece Pattern

    Meta Description: Create a beautiful Christmas crochet centerpiece with lovely handmade roses using our easy, free pattern. Perfect for any holiday decor!

    URL Slug: christmas-crochet-flower-centerpiece-pattern

    Primary Keyword: Christmas crochet flower centerpiece

    Secondary Keywords: crochet flower pattern, easy crochet flower, handmade crochet flowers, crochet roses, free crochet pattern

    Image 1 Alt Text: Handmade crochet roses in a Christmas centerpiece decoration.

    Image 2 Alt Text: Colorful crochet flowers arranged as part of a festive decoration.

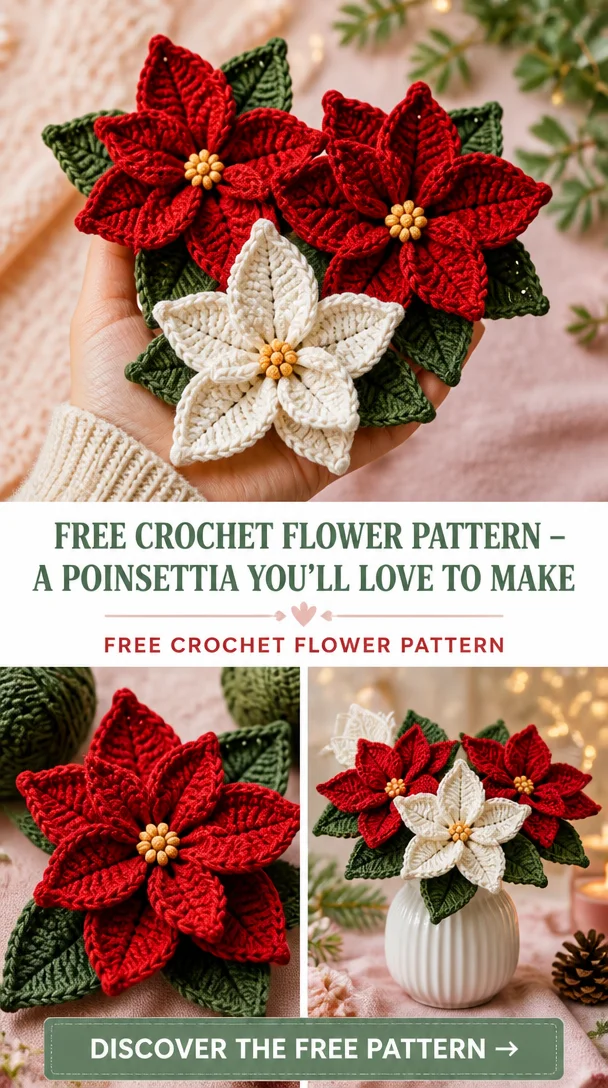
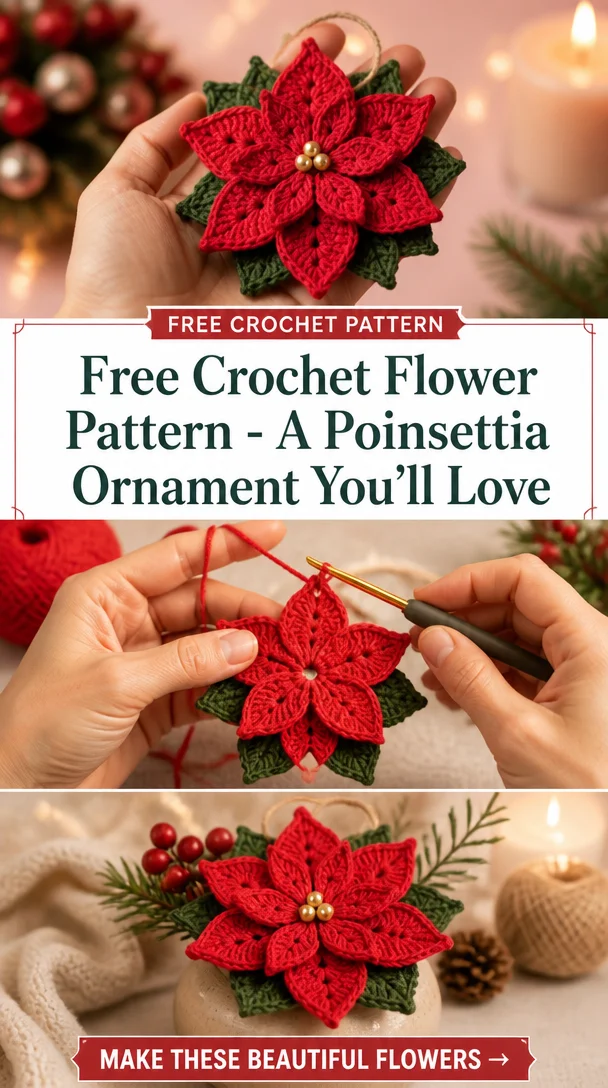
  • Free Crochet Flower Pattern – A Poinsettia Ornament You’ll Love

    Free Crochet Flower Pattern – A Poinsettia Ornament You’ll Love

    9.8K views · 125 reactions | 🌺🎄 Stunning Crochet Poinsettia Christmas Ornaments! ❤️🤍💚 | Easy Handmade Christmas DIY

    Embrace the spirit of the holiday season with our stunning Crochet Poinsettia Christmas Ornaments! This delightful project combines creativity and craftsmanship to produce beautiful ornaments that can embellish your home or serve as thoughtful handmade gifts. With three gorgeous colors—red, white, and green—along with delicate, layered petals and tiny golden pearls, these ornaments not only look fantastic but also add a personalized touch to your holiday décor. Suitable for crocheters of all skill levels, you can use these crochet flowers to beautify holiday wreaths, adorn gift-wrapped presents, or create a charming centerpiece. Dive into this festive pattern and add a handcrafted element to your celebrations!

    Crochet Flower Pattern Overview

    • Skill Level: Easy
    • Finished Flower Size: Approximately 4 inches across
    • Crochet Hook Size: 4.0 mm (G)
    • Yarn Type: Medium-weight acrylic yarn
    • Yarn Weight: #4
    • Main Colors: Red, white, green, and tiny golden beads for embellishment
    • Petal Construction: Layered petals for a dimensional look
    • Flower Center Construction: Includes a decorative bead
    • Stems/Leaves Included: Optional leaves
    • Construction Method: Worked in rounds
    • Approximate Completion Time: 2-3 hours
    • Beginner-Friendly: Yes
    • Worked in Rounds, Rows, or Separate Pieces: Worked in rounds

    Materials You’ll Need

    • Red, white, and green medium-weight acrylic yarn
    • 4.0 mm (G) crochet hook
    • Yarn needle
    • Stitch markers
    • Scissors
    • Tiny golden beads for embellishment
    • Wire (optional, for stems)

    Crochet Abbreviations

    • MR = magic ring
    • ch = chain
    • sc = single crochet
    • dc = double crochet
    • sl st = slip stitch
    • inc = increase
    • st = stitch
    • rep = repeat

    Before You Start

    Before you begin crocheting your poinsettia ornaments, consider the following tips:

    • Magic Ring: Start with a magic ring to create a tight center for your flower.
    • Petal Repeats: Keep track of your petal repeats to maintain uniformity in size and shape.
    • Yarn Tension: Be consistent with your yarn tension to ensure even petals.
    • Color Changes: Plan where you want your color changes if you choose to add layers.
    • Petal Assembly: Prepare each petal separately before joining them together for easier assembly.

    Free Crochet Flower Pattern

    Foundation or Magic Ring

    1. Create a magic ring.
    2. Round 1: Ch 3 (counts as 1 dc), work 11 dc into the ring. Pull the ring tight and join with a sl st to the top of the ch 3. (12 dc)

    Flower Center

    1. Round 2: Ch 1, sc in the same st, then *2 sc in the next st; repeat from * around. Join with sl st. (18 sc)

    First Petal Round

    1. Round 3: Ch 2 (counts as 1 hdc), work 1 hdc in the same st, then *skip 1 st, in the next st work (2 hdc, ch 1, 2 hdc); repeat from * around. Join with sl st.

    Additional Petal Rounds

    1. Round 4: *Ch 2, sc in the ch-1 space of the previous round; repeat from * around. Join with sl st.

    Individual Petals

    1. Each petal is formed by creating a shell: Skip the next stem, work (5 dc) in the ch 1 space; skip the next stem, sl st in the next st; repeat for all petals formed.

    Shaping the Petals

    • Gently shape each petal by pulling at the edges to create a more natural flower formation.

    Leaves (Optional)

    1. Make 2 leaves: Ch 10, in the 2nd ch from the hook, sc, hdc, dc in the next 3 chs, hdc in the next, sc in the last.
    2. Fasten off.

    Assembling the Flower

    • Layer the petals over the flower center and sew securely. Attach leaves if desired.

    Petal Shaping and Finishing Details

    • Arrange petals for a rounded look and adjust them as needed.
    • Attach golden beads in the center for added elegance.
    • Secure all yarn ends carefully to enhance durability.

    How to Use Your Crochet Flowers

    These beautiful poinsettia ornaments can be used in various ways:

    • Create a handmade flower bouquet to liven up any room.
    • Use as a holiday decoration for wreaths and table settings.
    • Adorn gifts for a personal touch.

    Tips for a Better Result

    • Keep working tension consistent to prevent uneven petals.
    • Ensure petals are positioned evenly for a balanced flower.
    • Secure attachments tightly to prevent separation.

    Crochet Flower Customization Ideas

    Consider personalizing your poinsettias by:

    • Using alternative yarn colors for vibrant or pastel effects.
    • Experimenting with different textures for a unique touch.
    • Creating bouquets with varying sizes or color combinations.

    Common Problems and Troubleshooting

    • Uneven Petals: Adjust tension during crocheting.
    • Petals Curling: Block them gently after finishing.
    • Flower Losing Shape: Craft with tighter stitches for compactness.

    Care and Maintenance

    To maintain your crochet flowers, gently hand wash and air dry following the yarn manufacturer’s care instructions. Be cautious with embellishments like beads or wire.

    Frequently Asked Questions

    • Is this crochet flower pattern beginner-friendly?
      Yes, it’s suitable for all skill levels, including beginners.

    • What yarn is best for crochet flowers?
      Medium-weight acrylic yarn works well for durability and color.

    • How long does it take to crochet this flower?
      Approximately 2-3 hours, depending on your skill level.

    • Can I make the flower larger or smaller?
      Yes, adjust your hook size and yarn weight for different sizes.

    • How do I keep crochet petals in shape?
      Consider blocking them after your final round to maintain form.

    Conclusion

    Crafting these stunning Crochet Poinsettia Christmas Ornaments is not just satisfying but adds a heartwarming touch to your holiday décor. With their vibrant colors and intricate design, they can elevate any festive display or bring joy as thoughtful gifts. Grab your materials and start your crochet journey today!


    SEO Title: Stunning Crochet Poinsettia Ornaments – Free Pattern

    Meta Description: Discover our easy crochet Poinsettia ornament pattern. Perfect for Christmas decorations and gifts—great for all skill levels!

    URL Slug: crochet-poinsettia-ornaments

    Primary Keyword: crochet poinsettia ornaments

    Secondary Keywords: free crochet flower pattern, easy crochet flower, handmade crochet flowers, DIY crochet flowers

    Image 1 Alt Text: Beautiful crochet poinsettia ornament in red, white, and green with golden beads.

    Image 2 Alt Text: Close-up of crochet poinsettia showing layered petals and decorative bead center.

  • Free Crochet Flower Pattern – A Beautiful Poinsettia You’ll Love

    Free Crochet Flower Pattern – A Beautiful Poinsettia You’ll Love

    Crochet Poinsettia Flowers That Look Almost Real 🌺🎄

    Crocheting a poinsettia flower is not just an engaging project; it’s a way to bring the beauty of the holidays into your home. This particular pattern features lovely layered petals that create an exquisite full shape, reminiscent of real-life poinsettias. With two rows of sharply pointed petals, these crochet creations make stunning decorations, unique appliques, or heartfelt handmade gifts for friends and family. Suitable for crocheters who already have basic skills, this pattern is a delightful challenge for anyone looking to enhance their craft. Whether you’re decorating for the holiday season or simply brightening up your space, these crochet poinsettias are sure to impress!

    Crochet Flower Pattern Overview

    • Skill Level: Intermediate
    • Finished Flower Size: Approximately 6 inches in diameter
    • Crochet Hook Size: 4.0 mm (G)
    • Yarn Type: Acrylic or cotton yarn
    • Yarn Weight: Worsted weight (category 4)
    • Main Colors: Red, green, or colors of your choice
    • Petal Construction: Layered petals in rounds
    • Flower Center Construction: Multiple layers for dimension
    • Stems or Leaves: Optional leaves included
    • Construction Method: Worked in rounds for petals and center
    • Approximate Completion Time: 2-3 hours
    • Beginner-Friendly: Not suitable for complete beginners
    • Working Method: Petals are worked in rounds, stems and leaves separately if included

    Materials You’ll Need

    • Yarn: Red and green (or colors of your choice)
    • Crochet hook: 4.0 mm (G)
    • Yarn needle
    • Stitch markers
    • Scissors
    • Floral wire (if stems are desired)
    • Flower stems (if applicable)
    • Stuffing (optional for added dimension)
    • Glue (for securing decorative elements, if needed)

    Crochet Abbreviations

    • MR = magic ring
    • ch = chain
    • sc = single crochet
    • hdc = half double crochet
    • dc = double crochet
    • tr = treble crochet
    • sl st = slip stitch
    • inc = increase
    • st = stitch
    • sp = space
    • rep = repeat

    Before You Start

    Before you dive into this pattern, it’s essential to familiarize yourself with working in rounds, especially for the layered petals. Make sure to maintain even yarn tension throughout the project; this will help keep your petals symmetrical. Planning for color changes in the center and petals will also enhance the overall appearance of your flower. Pay close attention to the stitch counts as you work through the rounds, and if you’re creating individual petals, be sure to prepare and shape them before assembly.

    Free Crochet Flower Pattern

    Foundation or Magic Ring

    Start by creating a magic ring.

    Flower Center

    Round 1: Ch 2, work 12 dc into the magic ring. Pull tight and join with a sl st.

    Round 2: Ch 2, *2 dc in next st, rep from * around. Join with a sl st (24 dc).

    First Petal Round

    Round 3: Ch 2, *[dc, hdc, sc] in next st, skip 1, rep from * around. Join with a sl st.

    Additional Petal Rounds

    Round 4: Ch 1, *[sc, hdc, dc, tr, dc, hdc, sc] in next st, skip 1, rep from * around. Join and fasten off.

    Individual Petals

    Make 5 additional petals the same way as above.

    Shaping the Petals

    Gently curl the tips of each petal for a more natural look. You can use a curling method by slightly bending the tips around a pencil.

    Leaves (Optional)

    Round 1: Ch 10, in the 2nd ch from hook, sc, hdc, dc, dc, hdc, sc in the last chain. Fasten off.

    Make 2 leaves.

    Stem (Optional)

    Using floral wire, cut a 12-inch piece. Wrap with yarn, securing as you go.

    Assembling the Flower

    1. Attach the petals to the flower center by stitching them carefully to ensure stability.
    2. If using leaves, attach them beneath the petals.
    3. Secure the stem by inserting it into the flower base and stitching it into place.

    Petal Shaping and Finishing Details

    To achieve the final look of your flower, ensure each petal is shaped properly by adjusting their positions. Consider adding a decorative center to enhance the flower’s appearance, such as beads or a contrasting yarn to make it pop. Be mindful to secure all loose yarn ends to maintain a neat finish.

    How to Use Your Crochet Flowers

    Your finished crochet poinsettias can be used in various ways, including:

    • As part of a handmade flower bouquet
    • Home decorations for winter or holiday displays
    • Enhancing gift wrapping for special presents
    • Adding flair to hair accessories or bags
    • Brightening up a seasonal table centerpiece

    Tips for a Better Result

    • Maintain even tension throughout your crochet work to prevent uneven petals.
    • Keep your petals symmetrical by counting stitches carefully.
    • Use a variety of colors for a more vibrant and layered flower.
    • Ensure the floral wire is secured properly to hold the shape of the stem.

    Crochet Flower Customization Ideas

    Consider customizing your poinsettias using different:

    • Yarn colors for petal variations
    • Textures for the flower center
    • Sizes by adjusting your stitch counts
    • Seasonal palettes to fit different occasions

    Common Problems and Troubleshooting

    • Uneven petals: Ensure you’re counting your stitches closely.
    • Curling petals: Steam or lightly block the petals to shape them.
    • Loose stitches: Maintain consistent tension.
    • Flower losing its shape: Make sure the stem is well-secured.

    Care and Maintenance

    Cleaning your crochet flowers depends on the yarn used. Refer to the yarn manufacturer’s instructions for washing. For delicate petals, gentle hand washing is recommended. Keep in mind how any floral wire or decorative elements may affect the durability of your flower.

    Frequently Asked Questions

    • Is this crochet flower pattern beginner-friendly?
      No, it’s suitable for intermediate crocheters.

    • What yarn is best for crochet flowers?
      Acrylic or cotton yarns in worsted weight work well.

    • How long does it take to crochet this flower?
      Expect about 2-3 hours.

    • Can I make the flower larger or smaller?
      Yes, by adjusting the stitch counts.

    • How do I keep crochet petals in shape?
      Shape them as you work and consider light blocking after completion.

    • Can I use different yarn colors?
      Absolutely! Feel free to mix colors based on your preference.

    • How do I attach a stem to a crochet flower?
      Insert a floral wire stem and secure it with stitching.

    Conclusion

    Crocheting poinsettias is a rewarding and festive way to bring seasonal charm into your crafting repertoire. With their layered design and charming colors, these flowers are perfect for decorations or gifts. Challenge yourself with this beautiful pattern and enjoy the satisfaction of creating these lifelike flowers!


    SEO Title: Beautiful Crochet Poinsettia Flowers Pattern
    Meta Description: Learn how to crochet stunning poinsettia flowers with this easy pattern. Perfect for holiday decorations or unique handmade gifts!
    URL Slug: crochet-poinsettia-flowers
    Primary Keyword: crochet poinsettia flowers
    Secondary Keywords: free crochet flower pattern, crochet flowers, crochet floral decoration, easy crochet flower, handmade crochet flowers
    Image 1 Alt Text: Finished crochet poinsettia flower in red
    Image 2 Alt Text: Close-up of layered petals in crochet poinsettia flower

  • Free Crochet Flower Pattern – A Poinsettia You’ll Love to Make

    Free Crochet Flower Pattern – A Poinsettia You’ll Love to Make

    Crochet Poinsettia Pattern – Large Christmas Flower Decoration — Free Crochet Pattern | amigurumi | Tricot gratuit phildar, Décoration noel fait main, Et crochet

    This delightful Crochet Poinsettia pattern offers a beautiful and festive creation perfect for the holiday season. Its striking red and green hues make it an eye-catching decoration that can brighten up any home during Christmas. Whether you want to create a stunning centerpiece, a charming bouquet, or a unique gift for a loved one, this crochet poinsettia flower serves as a versatile and lovely option. Suitable for crocheters of various skill levels, this pattern allows enthusiasts to craft a timeless piece that not only showcases their creativity but also adds a warm touch to holiday celebrations.

    Crochet Flower Pattern Overview

    • Skill level: Intermediate
    • Finished flower size: Approximately 8 inches in diameter
    • Crochet hook size: G/6 (4.0 mm)
    • Yarn type: Worsted weight yarn (medium)
    • Yarn weight: 4
    • Main colors: Red, green, and yellow
    • Petal construction: Worked in rounds
    • Flower center construction: Created separately
    • Includes stems or leaves: Yes, with leaves
    • Construction method: Assemble petals, leaves, and center
    • Approximate completion time: 4-5 hours
    • Beginner-friendly: No, recommended for those with some experience
    • Flower worked in rounds: Yes

    Materials You’ll Need

    • Yarn: Red, green, and yellow worsted weight yarn
    • Crochet hook: G/6 (4.0 mm)
    • Yarn needle: For weaving in ends
    • Scissors: For cutting yarn
    • Stitch markers: To mark rounds
    • Floral wire: For structuring the stems (optional)
    • Stuffing: If a 3D effect is desired

    Crochet Abbreviations

    • MR = magic ring
    • ch = chain
    • sc = single crochet
    • hdc = half double crochet
    • dc = double crochet
    • sl st = slip stitch
    • inc = increase
    • st = stitch
    • sp = space
    • rep = repeat

    Before You Start

    Before diving into the crochet pattern, ensure you are comfortable with basic crochet stitches and understand how to work in rounds. Familiarize yourself with the pattern’s petal repeats, and maintain even yarn tension for a professional finish. As you prepare to make the poinsettia, plan your color changes for a striking visual appeal, and set aside some time to create the flower’s leaves and stems.

    Free Crochet Flower Pattern

    Foundation or Magic Ring

    Round 1: Start with a magic ring, ch 2 (this counts as your first dc). Work 12 dc into the ring. Pull the ring tight and sl st to the top of the ch 2 to close the round.

    Flower Center

    Round 2: Ch 3 (counts as 1st dc), dc in the same st. Work 2 dc in each st around (24 dc total). Sl st to join.

    Additional Petal Rounds

    For the petals:

    Round 3: Ch 3 (counts as first dc again), dc in the next st, *ch 1, skip 1 st, dc in next st; repeat from * around. Sl st to join.

    Individual Petals

    Note: Repeat these steps for each of the five petals.

    Round 4: Ch 3, dc in the base of the previous dc, *ch 1, skip ch 1 space, dc in next dc; repeat from * away from the center. Sl st to join.

    Shaping the Petals

    Shape petals by folding them slightly inward. Adjust with your fingers for the desired dimensional effect.

    Leaves

    • Ch 14: Work into the 2nd ch from the hook. Sc in next 13 st (13 sc).
    • Round 1: Ch 1, dc in first st, hdc in next, 2 dc in next, hdc in next, sc in last 2. Fasten off.

    Stem

    Cut a length of floral wire to your desired stem length. Attach to the flower base or secure with additional yarn if a more detailed appearance is desired.

    Assembling the Flower

    Arrange the petals around the center, attaching with slip stitches where necessary. Position the leaves near the base for a natural look, ensuring an even layout.

    Petal Shaping and Finishing Details

    When shaping the final flower, carefully arrange the petals to ensure symmetry. Adjust the layers by adding or removing stitches as necessary, and secure all pieces together using hidden stitches. Complete your flower with any decorative elements, such as beads or buttons at the center.

    How to Use Your Crochet Flowers

    Your beautifully crafted crochet poinsettia can serve many purposes including:

    • A stunning centerpiece for holiday tables
    • A part of a vibrant handmade bouquet
    • A unique gift decoration
    • An eye-catching crochet applique for bags or garments
    • A festive hair accessory for holiday parties

    Tips for a Better Result

    • Maintain an even tension throughout each petal to avoid uneven shapes.
    • Ensure petals are symmetrical for a balanced final piece.
    • Secure all yarn ends to keep the flower neat.
    • Adjust and shape petals as needed to achieve the desired aesthetic.

    Crochet Flower Customization Ideas

    • Experiment with different shades of red or add multi-colored petals.
    • Use contrasting yarn for the flower’s center for visual interest.
    • Create a bouquet of varied sizes or colors for special occasions.
    • Consider different yarn textures to enhance the floral look.

    Common Problems and Troubleshooting

    • If petals appear uneven, check your tension and stitch counts.
    • For curled edges, block the petals gently when you finish.
    • Misalignment can be corrected by adjusting the connection points during assembly.

    Care and Maintenance

    To maintain the freshness of your crochet poinsettia, consider the type of yarn used. Generally, handwashing and air-drying are recommended based on the care instructions from the yarn manufacturer. Be mindful of delicate components, and if you used floral wire, ensure it’s securely tucked away.

    Frequently Asked Questions

    1. Is this crochet flower pattern beginner-friendly?
      No, it’s ideal for intermediate crocheters.

    2. What yarn is best for crochet flowers?
      Worsted weight yarn works best for structure and durability.

    3. How long does it take to crochet this flower?
      About 4-5 hours, depending on your skill level.

    4. Can I make the flower larger or smaller?
      Yes, adjust the hook size and yarn accordingly.

    5. How do I keep crochet petals in shape?
      Block them after finishing, and use stiff yarn if desired.

    6. Can I use different yarn colors?
      Absolutely! Use any color to match your decor.

    7. How do I attach a stem to a crochet flower?
      Use floral wire or yarn to secure the stem to the base during assembly.

    Conclusion

    Creating your own Crochet Poinsettia is a rewarding project that can bring a handmade charm to your holiday decorations. With its vibrant colors and intricate design, this crochet flower not only serves as a beautiful decoration but also as a heartfelt gift for loved ones. So gather your materials, follow the pattern closely, and enjoy the process of crafting this festive focal point!


    SEO Title: Crochet Poinsettia Pattern – Free Christmas Flower Guide
    Meta Description: Create a stunning crochet poinsettia for Christmas with this free pattern! Perfect for decoration, gifts, or as a cozy addition to your home.
    URL Slug: crochet-poinsettia-pattern
    Primary Keyword: crochet poinsettia pattern
    Secondary Keywords: free crochet flower pattern, crochet flower tutorial, crochet flowers, easy crochet flower, handmade crochet flowers
    Image 1 Alt Text: Finished crochet poinsettia flower in vibrant colors
    Image 2 Alt Text: Close-up of crochet flower petals and leaves

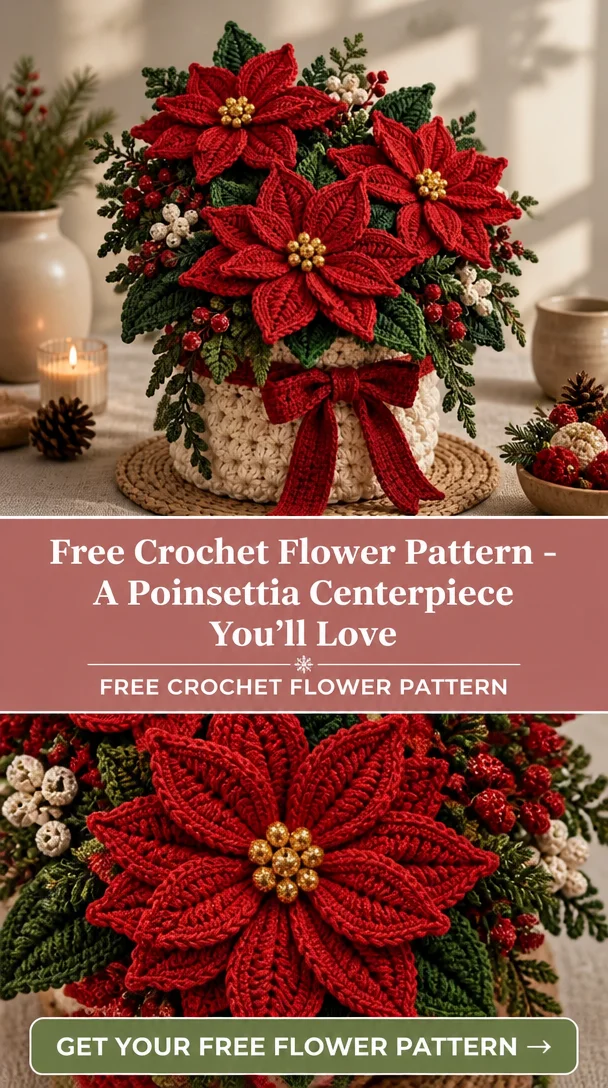
  • Free Crochet Flower Pattern – A Poinsettia Centerpiece You’ll Love

    Free Crochet Flower Pattern – A Poinsettia Centerpiece You’ll Love

    Crochet Christmas Poinsettia Centerpiece — Free Crochet Pattern | amigurumi

    Welcome to our delightful crochet project, the Crochet Christmas Poinsettia Centerpiece! This stunning creation captures the essence of holiday festivities with its vibrant red petals and lush green leaves. Crocheting this poinsettia adds a festive touch to your home décor and makes for an unforgettable handmade gift for loved ones. Its intricate yet manageable design is a fantastic project for crocheters of all skill levels. Whether you choose to place it in a decorative vase, use it as a table centerpiece, or turn it into a beautiful bouquet, this poinsettia will undoubtedly brighten your holidays!

    Crochet Flower Pattern Overview

    • Skill Level: Intermediate
    • Finished Flower Size: Approximately 6 inches in diameter
    • Crochet Hook Size: 3.5 mm (E/4)
    • Yarn Type: Acrylic or cotton yarn
    • Yarn Weight: Worsted weight (medium)
    • Main Colors: Red for petals, green for leaves
    • Petal Construction: Worked in rounds
    • Flower Center Construction: Stuffed center for a 3D effect
    • Stems or Leaves Included: Yes, leaves are included
    • Construction Method: Completed in separate pieces and then assembled
    • Approximate Completion Time: 3-5 hours
    • Beginner-Friendly: Not ideal for complete beginners; some experience recommended
    • Working Method: Worked in rounds

    Materials You’ll Need

    • Red yarn (worsted weight)
    • Green yarn (worsted weight)
    • 3.5 mm crochet hook
    • Yarn needle
    • Scissors
    • Stitch markers
    • Floral wire (for added stability)
    • Optional: Stuffing (for the flower center)

    Crochet Abbreviations

    • MR = magic ring
    • ch = chain
    • sc = single crochet
    • hdc = half double crochet
    • dc = double crochet
    • sl st = slip stitch
    • inc = increase
    • dec = decrease
    • st = stitch
    • sp = space
    • rep = repeat

    Before You Start

    Before you begin crocheting the Christmas Poinsettia, keep in mind the following practical tips:

    • Working in Rounds: Familiarize yourself with crocheting in rounds as this technique will be essential for forming the petals and flower center.
    • Even Tension: Maintain consistent yarn tension throughout the project to ensure the petals are symmetrical.
    • Petal Repeats: Pay attention to the petal repeats while crocheting; this will help keep your petals evenly spaced and uniform.

    Free Crochet Flower Pattern

    Foundation or Magic Ring

    1. Start with a magic ring.
    2. Chain 3 (this counts as your first double crochet).
    3. Work 11 double crochets into the magic ring. Pull tight to close the ring.
    4. Join with a slip stitch to the top of the first double crochet.

    Flower Center

    1. Round 2: Chain 3, then in the same stitch, work 2 double crochets. *In the next stitch, work 3 double crochets. Repeat from * around. Join.
    2. Round 3: Slip stitch into the first space, chain 1, and work 2 single crochets in the same space. *Work 4 single crochets in the next space. Repeat from * around. Join.

    First Petal Round

    1. Round 1: Attach red yarn to the first stitch. Chain 3, then work 2 double crochets in the same stitch. *In the next stitch, work 3 double crochets. Repeat from * around for a total of 6 petals.

    Additional Petal Rounds

    1. Round 2: Continue adding rows in the same petal formation, ensuring you maintain the 3 double crochets in the same stitches for each petal.

    Assembling the Flower

    1. Begin by attaching your petals around the flower center, evenly spacing them for a balanced appearance.
    2. Secure each petal with stitch markers as needed, and sew them to the center using a yarn needle.

    Flower Construction and Assembly

    After your petals are crocheted, follow these steps for assembly:

    • Align the petals around the flower center, ensuring they are evenly distributed.
    • Use your yarn needle to stitch each petal securely to the flower center.
    • If you’ve chosen to create leaves, attach them to the base of the flower, ensuring a natural look.
    • For a more realistic appearance, insert floral wire into the stem for support.

    Petal Shaping and Finishing Details

    To complete the poinsettia, consider the following:

    • Gently shape each petal by curving the edges slightly outward.
    • Optionally, add decorative beads or embroidery to the center for added detail.
    • Ensure all yarn ends are secured and trimmed neatly.

    How to Use Your Crochet Flowers

    This festive crochet poinsettia can be used in many creative ways:

    • Create a stunning handmade flower bouquet for a friend or family member.
    • Use it as a charming table centerpiece during holiday gatherings.
    • Incorporate it into your regular home decor as an eye-catching decoration.
    • Attach it to gifts for a unique, personalized touch.

    Tips for a Better Result

    • Ensure your petals have consistent shapes for a cohesive look.
    • Avoid tight stitching to prevent curling of the petals.
    • Make any color changes smoothly, following the yarn strands to avoid uneven patches.

    Crochet Flower Customization Ideas

    Feel free to personalize your Christmas Poinsettia in the following ways:

    • Experiment with various shades of red and green for a unique twist.
    • Use sparkly yarn for an extra festive shine.
    • Mix and match different sizes of flowers to create a more dynamic arrangement.

    Common Problems and Troubleshooting

    If you encounter challenges, consider these troubleshooting tips:

    • Uneven Petals: Ensure you are maintaining consistent stitch counts and tension.
    • Curling Petals: Block your finished flower to help shape the petals properly.
    • Difficulty Attaching Stems: If stems are bending or falling off, secure them with additional yarn or floral wire.

    Care and Maintenance

    To keep your crochet flowers looking their best:

    • Store them away from direct sunlight to prevent fading.
    • Clean using a soft brush or hand wash according to yarn care instructions, avoiding harsh chemicals.

    Frequently Asked Questions

    • Is this crochet flower pattern beginner-friendly?

      • While the pattern is manageable, some crochet experience is recommended to achieve the best results.
    • What yarn is best for crochet flowers?

      • Acrylic or cotton yarn works well for durability and ease of care.
    • How long does it take to crochet this flower?

      • Expect to spend around 3-5 hours completing the project.
    • Can I make the flower larger or smaller?

      • Yes, you can adjust the size by using different yarn weights and hook sizes.
    • How do I keep crochet petals in shape?

      • Blocking your finished flower will help maintain the petal shape.

    Conclusion

    Creating your Crochet Christmas Poinsettia Centerpiece is a joyful endeavor that will undoubtedly enhance your holiday spirit. With its intricate design and vibrant colors, this flower will add a memorable touch to your festive decor. We encourage you to try out this pattern and share your creations with family and friends!


    SEO Title: Crochet Christmas Poinsettia Centerpiece — Free Pattern
    Meta Description: Brighten your holidays with this beautiful Crochet Christmas Poinsettia Centerpiece! A fun, free crochet pattern for all skill levels.
    URL Slug: crochet-christmas-poinsettia-centerpiece
    Primary Keyword: crochet christmas poinsettia centerpiece
    Secondary Keywords: free crochet flower pattern, crochet flower pattern, handmade crochet flowers, DIY crochet flowers
    Image 1 Alt Text: Vibrant crochet Christmas poinsettia centerpiece in red and green
    Image 2 Alt Text: Close-up of crochet flower petals and center detailing

  • Free Crochet Flower Pattern – Poinsettia Doily You’ll Love to Make

    Free Crochet Flower Pattern – Poinsettia Doily You’ll Love to Make

    Poinsettia Doily Free Crochet Patterns and Ideas

    Bring a festive touch to your holiday decorations with beautiful Poinsettia doilies crocheted by hand! These vibrant crochet flowers not only capture the essence of the season but also add a charming element to your home decor. The intricate design of a crocheted Poinsettia can transform any ordinary space into a festive wonderland, perfect for gifting or sprucing up your holiday tablescape. With this free crochet pattern, you can create unique floral appliques, standalone decorations, or even a stunning handmade bouquet. This project is suitable for crocheters of various skill levels, making it an enjoyable craft for everyone.

    Crochet Flower Pattern Overview

    • Skill Level: Easy to Intermediate
    • Finished Flower Size: Approximately 8 inches in diameter
    • Crochet Hook Size: 3.5mm (E)
    • Yarn Type: Medium weight acrylic or cotton yarn
    • Yarn Weight: Worsted (weight category 4)
    • Main Colors: Red, green, and yellow (for center detail)
    • Petal Construction: Layered petal rounds
    • Flower Center Construction: Worked separately
    • Included Elements: Can include stems and leaves if desired
    • Construction Method: Worked in rounds
    • Approximate Completion Time: 2-3 hours
    • Beginner-friendly: Suitable for beginners with basic crochet skills
    • Work Method: Mainly in rounds

    Materials You’ll Need

    • Yarn (in red, green and yellow)
    • 3.5mm (E) crochet hook
    • Yarn needle
    • Scissors
    • Stitch markers (optional)
    • Floral wire (if making stems)
    • Glue (for securing details)

    Crochet Abbreviations

    • MR = magic ring
    • ch = chain
    • sc = single crochet
    • hdc = half double crochet
    • dc = double crochet
    • sl st = slip stitch
    • inc = increase
    • dec = decrease
    • st = stitch

    Before You Start

    Before diving into the crochet pattern, ensure you have a clear understanding of how to make the magic ring, and practice maintaining consistent tension for an even finish. Familiarize yourself with the construction of the petals, which are created in rounds, and prepare your materials for easy access as you work through each stage. Plan your color pattern for the petals and center to achieve a beautiful visual effect.

    Free Crochet Flower Pattern

    Foundation or Magic Ring

    1. Create a magic ring.
    2. Chain 3 (counts as your first double crochet).

    Flower Center

    1. In the magic ring, make 11 dc.
    2. Pull the ring tight and sl st into the top of the initial ch-3 to close.

    First Petal Round

    1. Ch 3.
    2. In the same space, make 2 dc.
    3. *Skip 1 st, in the next st make 3 dc. Repeat from * two more times. Join.

    Additional Petal Rounds

    1. Repeat round 1 two more times, increasing the number of dc per petal as needed.
    2. To finish, sl st in the initial ch-3 space.

    Individual Petals

    1. For each petal, chain 3, 2 dc in the same space, make additional stitches as per the previous rounds until full.

    Shaping the Petals

    1. Use your fingers or a shaping tool to create gentle curves in the petals for a more natural look.

    Leaves

    1. For leaves, use green yarn and create a smaller magic ring. Follow a simple petal construction method similar to the flower.

    Stem

    1. If desired, use floral wire and wrap it in yarn, securing it with glue.

    Joining the Pieces

    1. Attach the center to the petals by sewing or gluing securely with yarn.

    Assembling the Flower

    1. Position flowers atop leaves and attach the stems for a complete look.

    Finishing Details

    1. Weave in all loose ends and ensure all pieces are securely attached.

    Flower Construction and Assembly

    Once you’ve constructed each component, begin the assembly by aligning the petals around the center and securely stitching or gluing them in place. Carefully attach any leaves and stems to complete your Poinsettia. Take your time to position everything evenly for a beautiful final arrangement.

    Petal Shaping and Finishing Details

    To enhance the appearance of your Poinsettia, gently bend the petals to create a natural shape. Ensure that each petal remains symmetrically positioned and secure any glues or knots before displaying or gifting.

    How to Use Your Crochet Flowers

    These lovely crocheted Poinsettias can serve multiple purposes, making them ideal for various uses:

    • Create a beautiful handmade bouquet for gifting
    • Use them as tabletop decorations during festivities
    • Incorporate them into hair accessories or bag decorations
    • Display them as part of seasonal home decor

    Tips for a Better Result

    • Maintain even tension throughout your project for uniform petals.
    • Carefully shape and layer petals to avoid unevenness.
    • Be mindful of your color changes for a harmonious final look.

    Crochet Flower Customization Ideas

    • Experiment with different yarn colors for unique presents.
    • Combine multiple shades of red and green to create depth.
    • Explore different textures of yarn for an appealing variation.

    Common Problems and Troubleshooting

    • Uneven petals: Check your stitch counts and tension.
    • Curling petals: Gently reshape them following assembly.
    • Loose stitches: Make sure to secure your ends firmly.

    Care and Maintenance

    Handling and cleaning your crochet flowers can vary based on the yarn used. Always check the manufacturer’s care instructions for washing and drying. Be gentle with delicate petals, especially if adorned with additional decorative elements.

    Frequently Asked Questions

    • Is this crochet flower pattern beginner-friendly?
      Yes, while some experience is preferred, beginners will find it manageable.

    • What yarn is best for crochet flowers?
      Medium weight acrylic or cotton yarn works beautifully.

    • How long does it take to crochet this flower?
      Approximately 2-3 hours.

    • Can I make the flower larger or smaller?
      Adjust the yarn weight or hook size for a different flower size.

    • How do I keep crochet petals in shape?
      Gently shape them after assembly and avoid over-stretching.

    • Can I use different yarn colors?
      Absolutely! Color variety adds a personal touch.

    • How do I attach a stem to a crochet flower?
      Securely sew or glue the stem to the base of the flower.

    Conclusion

    Crocheting your own Poinsettia doilies is a delightful way to enrich your holiday decor while enjoying a fulfilling crafting experience. The intricate details and vibrant colors make these flowers a fantastic addition to your seasonal festivities. Grab your yarn and hook, and let your creativity blossom!


    SEO Title: Poinsettia Doily Free Crochet Pattern for Festive Decor
    Meta Description: Brighten your holiday decor with this free Poinsettia doily crochet pattern. Perfect for gifts, decor, or festive bouquets!
    URL Slug: poinsettia-doily-crochet-pattern
    Primary Keyword: Poinsettia Doily Free Crochet Patterns
    Secondary Keywords: free crochet flower pattern, easy crochet flower, crochet floral decoration, handmade crochet flowers
    Image 1 Alt Text: Crocheted Poinsettia doily in festive colors
    Image 2 Alt Text: Close-up of crochet flower petals and center

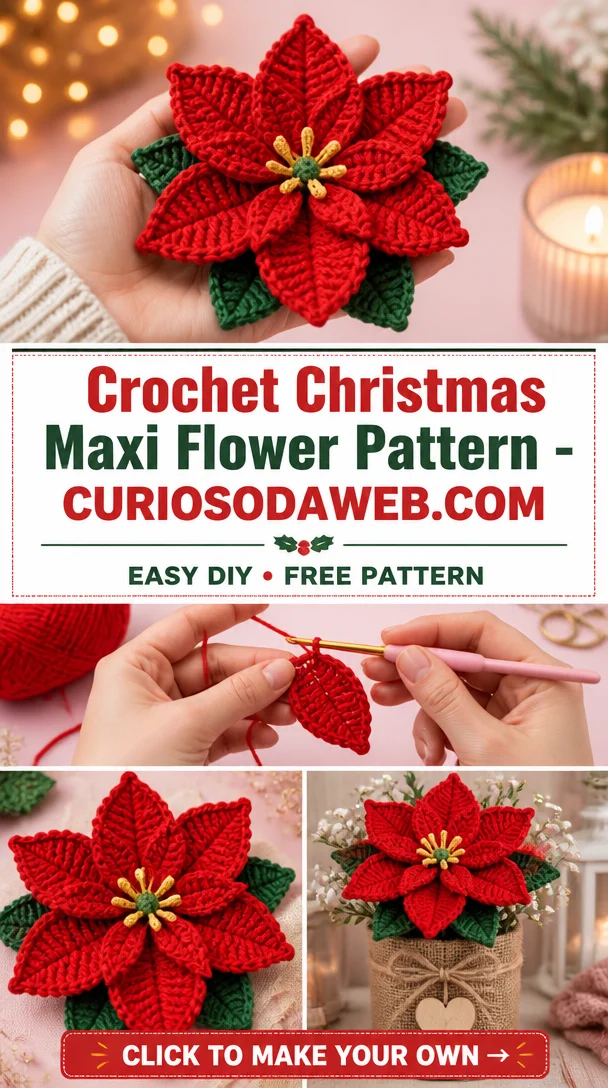
  • Crochet Christmas Maxi Flower Pattern – CURIOSODAWEB.COM

    Crochet Christmas Maxi Flower Pattern – CURIOSODAWEB.COM

    Crochet Christmas Maxi Flower Pattern – CURIOSODAWEB.COM

    Welcome to the delightful world of crochet! The Crochet Christmas Maxi Flower Pattern is a stunning project that adds a handmade touch of warmth and charm to your holiday decorations. This pattern features a beautiful design, incorporating traditional holiday colors that can brighten up any space. Whether you are looking to create a festive bouquet, add a unique applique to a gift, or use it as a standalone decoration, this maxi flower can do it all. Perfect for crocheters of various skill levels, this flower is not just a joy to make, but also a wonderful gift idea for friends and family during the holidays.

    Crochet Flower Pattern Overview

    • Skill Level: Intermediate
    • Finished Flower Size: Approximately 6-8 inches in diameter
    • Crochet Hook Size: H/8 (5.0 mm)
    • Yarn Type: Worsted weight yarn
    • Yarn Weight: Medium
    • Main Colors: Red, green, and white (holiday-themed)
    • Construction Method: The flower is worked in rounds.
    • Estimated Completion Time: 2-3 hours
    • Includes Leaves or Stems: Leaves are included.
    • Suitable for Beginners: This pattern is tailored for those with some crochet experience.

    Materials You’ll Need

    • Worsted weight yarn in red, green, and white
    • Crochet hook: H/8 (5.0 mm)
    • Yarn needle
    • Stitch markers
    • Scissors
    • Floral wire (optional for stems)
    • Stuffing (optional, if desired for petal shaping)

    Crochet Abbreviations

    • MR = magic ring
    • ch = chain
    • sc = single crochet
    • hdc = half double crochet
    • dc = double crochet
    • tr = treble crochet
    • sl st = slip stitch
    • inc = increase
    • dec = decrease
    • st = stitch
    • rep = repeat

    Before You Start

    To ensure a successful crochet experience, it’s important to read through the entire pattern before beginning. Maintain even tension for consistent petal shaping and check your stitch counts carefully after each round. Color changes can enhance the visual appeal of the flower, so it’s worth planning those in advance. Prepare the petals separately before joining them together to create a more dimensional flower.

    Free Crochet Flower Pattern

    Foundation or Magic Ring

    1. Begin with a magic ring.
    2. Round 1: Ch 3 (counts as dc), 11 dc in the ring. Pull the ring tight, and join with a sl st to the top of the ch 3. (12 dc)

    Flower Center

    1. Round 2: Ch 1, 2 sc in each dc around. Join with a sl st to the first sc. (24 sc)

    First Petal Round

    1. Round 3: Ch 1, *5 dc in the next st, skip 2 st, sl st in the next st. Repeat from * around. Join with sl st to close. (12 petals)

    Additional Petal Rounds

    1. Round 4: Ch 3, sl st in the first st of the previous round, repeat until reaching the start again for a layered effect.

    Individual Petals

    1. Round 5: Work into the 5-dc petal groups from Round 3, crochet additional stitches to give depth.

    Shaping the Petals

    • Gently bend and shape each petal by lightly pulling on the yarn while holding the base.

    Leaves

    • Use the same yarn to make small leaves to attach at the base of the flower, following similar techniques.

    Assembling the Flower

    1. Align petals and leaves.
    2. Sew together using a yarn needle through the base stitches to secure.

    Petal Shaping and Finishing Details

    • After assembling, ensure all petals are evenly spaced and shaped to embody a natural floral look. Add any decorative elements you desire, like beads or contrasting centers.

    How to Use Your Crochet Flowers

    The finished Crochet Christmas Maxi Flower can be utilized in various ways, including:

    • Creating a festive holiday bouquet
    • Enhancing home decoration
    • As a centerpiece for holiday tables
    • Adorning gifts as a unique decoration
    • Making hair accessories or bag embellishments

    Tips for a Better Result

    • Maintain consistent yarn tension across petals for uniformity.
    • Carefully secure all ends and stitches to avoid unraveling.
    • Add final touches with decorative edging if desired.

    Crochet Flower Customization Ideas

    Feel free to customize your flower in various ways:

    • Experiment with different color combinations.
    • Use contrasting or textured yarns for a unique look.
    • Create a variety of flower sizes by adjusting the number of stitches.

    Common Problems and Troubleshooting

    • Uneven petals: Check your tension and make sure each petal is shaped evenly.
    • Curling petals: Gently block the flower to maintain shape.
    • Difficulty attaching stems: Ensure that the base is secured properly and use floral wire for support if needed.

    Care and Maintenance

    Depending on yarn type, cleaning methods may vary. Check yarn manufacturer’s instructions for washing and care. Delicate petals may require gentle steam blocking for the best appearance.

    Frequently Asked Questions

    • Is this crochet flower pattern beginner-friendly?

      • No, this pattern is more suitable for those with intermediate skills.
    • What yarn is best for crochet flowers?

      • Worsted weight yarn is ideal for creating a sturdy flower.
    • How long does it take to crochet this flower?

      • The estimated time is about 2-3 hours.
    • Can I make the flower larger or smaller?

      • Yes, adjusting the stitch count can help size the flower accordingly.
    • Can I use different yarn colors?

      • Absolutely! Feel free to customize with your favorite colors.
    • How do I attach a stem to a crochet flower?

      • Use floral wire and secure it to the base of the flower for added stability.
    • Can I use this crochet flower in a bouquet?

      • Yes, multiple flowers can be arranged beautifully in a bouquet.

    Conclusion

    The Crochet Christmas Maxi Flower Pattern is an exciting project that invites creativity into your holiday decor. By following this pattern, you can create stunning handmade flowers that are sure to impress. Gather your materials and start crocheting your way to a festive celebration!


    SEO Title: Crochet Christmas Maxi Flower Pattern for Festive Decor
    Meta Description: Create beautiful Crochet Christmas Maxi Flowers with this easy-to-follow pattern! Perfect for decorations, gifts, and holiday cheer.
    URL Slug: crochet-christmas-maxi-flower
    Primary Keyword: Crochet Christmas Maxi Flower Pattern
    Secondary Keywords: free crochet flower pattern, crochet flowers, easy crochet flower, crochet floral decoration
    Image 1 Alt Text: Crochet Christmas Maxi Flower in festive colors
    Image 2 Alt Text: Close-up of decorative crochet flower petals

  • Free Crochet Flower Pattern – A Beautiful Poinsettia for Seasonal Decor

    Free Crochet Flower Pattern – A Beautiful Poinsettia for Seasonal Decor

    Crochet Poinsettia Home Decor Free Patterns That Look Elegant & Seasonal

    The crochet poinsettia is a stunning floral piece perfect for seasonal decorations and handmade gifts. With its intricate petals and rich colors, this flower captures the essence of the holidays, making it an appealing project for both beginner and experienced crocheters. Not only does it serve as an elegant addition to your home decor, but it can also be used in various creative ways, such as decorative appliques, centerpieces, or as part of a beautiful bouquet. Whether you’re looking to brighten up a festive gathering or create a heartfelt gift, the crochet poinsettia is a delightful choice that can be enjoyed year-round.

    Crochet Flower Pattern Overview

    • Skill Level: Easy
    • Finished Flower Size: Approximately 6 inches in diameter
    • Crochet Hook Size: 4mm (G)
    • Yarn Type: Worsted weight acrylic yarn
    • Yarn Weight: Medium (4)
    • Main Colors: Red, green, and yellow (for the center)
    • Petal Construction: Worked in rounds
    • Flower Center Construction: Includes a simple round
    • Leave Included: Yes
    • Construction Method: Multiple rounds joined together
    • Approximate Completion Time: 2-3 hours
    • Beginner-Friendly: Yes

    Materials You’ll Need

    • Worsted weight acrylic yarn (red, green, and yellow)
    • 4mm crochet hook
    • Yarn needle
    • Stitch markers
    • Scissors
    • Floral wire (optional for sturdiness)
    • Floral tape (optional for stems)
    • Glue (if using decorative elements)

    Crochet Abbreviations

    • MR = magic ring
    • ch = chain
    • sc = single crochet
    • hdc = half double crochet
    • dc = double crochet
    • sl st = slip stitch
    • inc = increase
    • st = stitch
    • sp = space
    • rep = repeat

    Before You Start

    Before diving into your crochet poinsettia, here are some tips to help you navigate the project successfully:

    • Work in Rounds: The petals and flower center are both constructed using rounds, so familiarize yourself with this method.
    • Understand Petal Construction: Pay attention to the number of petals you will create; this pattern typically features multiple layers for fullness.
    • Even Tension: Maintain consistent tension throughout your work to ensure that petals are evenly shaped.
    • Color Planning: Decide on your color scheme before starting to streamline your project and avoid any mid-work changes.

    Free Crochet Flower Pattern

    Flower Center

    1. Round 1: Start with a magic ring, ch 3 (counts as first dc), then work 11 dc into the ring. Pull tight to close the ring. (12 dc)
    2. Round 2: Ch 3, dc in same space, 2 dc in next st, repeat from * around. Join with sl st. (24 dc)

    First Petal Round

    1. Round 3: Ch 1, sc in the same stitch as join, ch 2, sk 2 dc, sc in next dc., Repeat from * around. (12 ch-2 spaces)

    Additional Petal Rounds

    1. Round 4: In each ch-2 sp work a [hdc, dc, tr, dc, hdc] to create a petal shape. Join when complete.

    Individual Petals

    • Repeat the additional petal construction around the flower center.

    Shaping the Petals

    • Gently shape the petals using your fingers or blocking techniques to create a natural look.

    Leaves

    • Leaf Pattern: Ch 10, hdc in 3rd ch from hook, dc in next 4 ch, hdc in next 3 ch. Fasten off. Make 2 leaves.

    Flower Construction and Assembly

    1. Joining Petals: Attach the petals to the flower center using a yarn needle, sewing securely.
    2. Attaching Leaves: Position the leaves behind the flower and sew in place.
    3. Securing Ends: Weave in all yarn ends for a neat finish.

    Petal Shaping and Finishing Details

    • Adjust the shape of the petals to ensure they sit evenly.
    • If desired, add embellishments or a decorative bead at the center for added flair.

    How to Use Your Crochet Flowers

    • Create a stunning handmade bouquet for seasonal decor.
    • Use them as decorative table centerpieces for holiday gatherings.
    • Incorporate into a wreath or as an applique on clothing and bags.

    Tips for a Better Result

    • Maintain consistent tension for symmetrical petals.
    • Shape the flower carefully to maintain its elegance.
    • Make neat color changes to avoid loose threads.

    Crochet Flower Customization Ideas

    • Experiment with different yarn colors to achieve unique looks.
    • Use textured yarn for a more tactile design.
    • Adjust the size by using different hook sizes or yarn weights.

    Common Problems and Troubleshooting

    • Uneven Petals: Ensure your tension is consistent and check your stitch counts.
    • Curling Petals: Block petals gently to shape them before final assembly.
    • Stems Not Holding Shape: Consider using floral wire for added support.

    Care and Maintenance

    To maintain the beauty of your crochet poinsettia, follow the care instructions based on the yarn manufacturer’s guidelines. Keep in mind materials such as floral wire and embellishments might require special care when cleaning.

    Frequently Asked Questions

    • Is this crochet flower pattern beginner-friendly? Yes, the pattern is easy to follow and perfect for beginners.
    • What yarn is best for crochet flowers? Worsted weight acrylic yarn works wonderfully for vibrant, durable flowers.
    • How long does it take to crochet this flower? Approximately 2-3 hours, depending on your skill level.
    • Can I make the flower larger or smaller? Yes, adjust your hook size or yarn weight for size customizations.
    • How do I keep crochet petals in shape? Gently block the petals after completion and adjust accordingly.
    • Can I use different yarn colors? Absolutely! Various colors enhance the flower’s appearance.
    • How do I attach a stem to a crochet flower? Sew or glue a decorative stem directly to the base of the flower.

    Conclusion

    Crochet poinsettias are a delightful way to add a personal touch to your holiday decorations or gifts. With their vibrant colors and elegant design, they are sure to bring joy and warmth to any space. Enjoy the process and let your creativity shine as you craft these beautiful flowers!


    SEO Title: Elegant Crochet Poinsettia Home Decor Pattern
    Meta Description: Discover this easy crochet poinsettia pattern—perfect for seasonal décor and handmade gifts. Create beautiful crochet flowers today!
    URL Slug: crochet-poinsettia-pattern
    Primary Keyword: crochet poinsettia
    Secondary Keywords: free crochet flower pattern, crochet flower, easy crochet flower, crochet flower for beginners, crochet floral decoration

    Image 1 Alt Text: Finished crochet poinsettia flower in vibrant red and green colors
    Image 2 Alt Text: Step-by-step crochet tutorial image showing the flower assembly process

  • Free Crochet Flower Pattern – A Poinsettia You’ll Love to Make

    Free Crochet Flower Pattern – A Poinsettia You’ll Love to Make

    Crochet Poinsettia Flowers – Christmas Decoration Pattern — Free Crochet Pattern | amigurumi

    Bring the spirit of the holidays into your home with these exquisite crochet poinsettia flowers! This beautiful pattern allows you to create stunning 3D poinsettias that make perfect decorations for your seasonal displays. The vibrant colors and intricate petal designs capture the essence of this classic winter flower, making them an ideal choice for DIY floral arrangements, holiday wreaths, or gifts for loved ones. Whether you’re a seasoned crocheter or a beginner looking to enhance your skills, this pattern is accessible to all levels. Add a touch of handmade charm to your festive decor with these lovely crochet poinsettia flowers!

    Crochet Flower Pattern Overview

    • Skill Level: Easy
    • Finished Flower Size: Approximately 5-6 inches in diameter
    • Crochet Hook Size: 4.0 mm (G/6)
    • Yarn Type: Worsted weight acrylic yarn
    • Yarn Weight: Medium (Category 4)
    • Main Colors: Red, green, and yellow (or colors of your choice)
    • Petal Construction: Worked in rounds
    • Flower Center Construction: Made separately
    • Stems and Leaves: Optional (guide provided)
    • Construction Method: Crocheted in separate pieces and assembled
    • Approximate Completion Time: 2-3 hours
    • Beginner-Friendly: Yes, suitable for beginners and experienced crocheters
    • Working Method: Petals are worked in rounds

    Materials You’ll Need

    • Worsted weight acrylic yarn in red, green, and yellow
    • 4.0 mm (G/6) crochet hook
    • Yarn needle
    • Scissors
    • Floral wire (optional for stems)
    • Green floral tape (optional for stems)
    • Glue (for securing flower centers, if needed)

    Crochet Abbreviations

    • MR = magic ring
    • ch = chain
    • sc = single crochet
    • hdc = half double crochet
    • dc = double crochet
    • sl st = slip stitch
    • inc = increase
    • st = stitch
    • sp = space
    • rep = repeat

    Before You Start

    Before diving into your crochet poinsettia pattern, consider the following tips:

    • Familiarize Yourself with the Pattern: Read through the entire pattern first to understand the flow and construction.
    • Practice Working in Rounds: Ensure you are comfortable working in rounds, as this is essential for creating the petals.
    • Maintain Tension: Keep an even tension throughout your stitches for a polished look.
    • Color Planning: Choose your colors for petals and the center before starting; feel free to experiment with different color combinations!
    • Petal Assembly: Each petal is made separately and then attached, allowing for flexibility in positioning.

    Free Crochet Flower Pattern

    Flower Center

    1. Make a Magic Ring:
      • Round 1: Make 6 sc in the ring. Pull tight to close. (6)
      • Round 2: Inc in each st around. (12)
      • Round 3: sc in next st, inc in next st repeat around. (18)
      • Fasten off and leave a long tail for sewing later.

    First Petal Round

    1. Begin Petal Construction:
      • Using red yarn, make a magic ring.
      • Round 1: Ch 2 (counts as first dc), make 2 dc in the ring. Chain 2, then close with a sl st. Repeat for a total of 5 petals.
      • Round 2: Ch 2, 2 dc in next sp, repeat around.
      • Fasten off and weave in ends.

    Additional Petal Rounds

    1. Create Detail on the Petals:
      • Attach a new color if desired or continue with red for an additional round of detail.
      • Round 3: Work dc in each st for the length of each petal, adjusting for desired height.
      • Fasten off and cut yarn.

    Assembling the Flower

    1. Joining Petals:
      • Arrange the petals around the flower center.
      • Use the long tail from the center to stitch each petal to the center securely.
      • Make sure to spread them evenly for a full look.

    Finishing Details

    • Secure all yarn ends neatly.
    • Shape petals gently by hand to enhance the overall appearance.

    Flower Construction and Assembly

    • Position the attached petals evenly around the center.
    • Using the yarn needle and tail from the flower center, securely stitch the petals into place.
    • If creating leaves, use green yarn to crochet and attach them as desired.
    • Optionally, you may attach floral wire to create stems, securing the ends with green floral tape.

    Petal Shaping and Finishing Details

    • To shape petals, you may adjust height by gently blocking them with steam or shaping them with your fingers.
    • Secure any loose yarn ends meticulously.
    • Place leaves underneath the petals for a fuller effect.

    How to Use Your Crochet Flowers

    These crochet poinsettia flowers can be used in various ways:

    • Form a stunning handmade bouquet for your holiday table.
    • Add them to wreaths for a festive touch.
    • Use as embellishments on gift wrapping or holiday cards.
    • Create a centerpiece to brighten up your holiday gatherings.

    Tips for a Better Result

    • Maintain even tension throughout the petals for uniformity.
    • Easy transitions between rows will ensure symmetry in your flowers.
    • Attach leaves using a slip stitch for a seamless appearance.
    • Adjust colors to match your home decor or seasonal themes.

    Crochet Flower Customization Ideas

    • Change yarn colors to match your decor scheme.
    • Experiment with different yarn textures (e.g., soft cotton blends or shiny metallics).
    • Try creating mini or larger versions of the flower by adjusting your hook size and yarn use.
    • Add decorative elements like beads or sequins to the flower center for extra sparkle.

    Common Problems and Troubleshooting

    • Uneven Petals: Check your stitch counts and tension consistency throughout.
    • Curling Petals: Block the petals gently to shape them appropriately.
    • Loose Stitches: Tighten the yarn as you go to maintain overall structure.
    • Difficulty Attaching Stems: Use a strong thread and secure with glue if necessary.

    Care and Maintenance

    For maintaining your crochet poinsettia flowers:

    • Follow the yarn manufacturer’s cleaning instructions; most acrylic yarns can be spot cleaned.
    • Check carefully for detachable parts; use minimal water and gentle treatment on delicate floral wire.

    Frequently Asked Questions

    Is this crochet flower pattern beginner-friendly?
    Yes, it’s structured with clear instructions making it accessible for beginners.

    What yarn is best for crochet flowers?
    Worsted weight acrylic yarn is ideal, but feel free to experiment with different types.

    How long does it take to crochet this flower?
    The average time is about 2-3 hours, depending on your skill level.

    Can I make the flower larger or smaller?
    Yes, adjusting your hook size and yarn can modify the finished size.

    How do I keep crochet petals in shape?
    Blocking your petals gently with steam can help maintain their shape.

    Can I use different yarn colors?
    Absolutely! Mix and match colors to suit your style.

    How do I attach a stem to a crochet flower?
    A floral wire or a sturdy yarn tail can be sewn into the base of the flower.

    Conclusion

    Crocheting your own poinsettia flowers is a delightful way to usher in the holiday season. The beauty of this project lies in its versatility—these flowers can be gifted, displayed, or used in festive decorations. Engage your creative spirit and enjoy making these lovely crochet flowers that will surely brighten up your celebrations!


    SEO Title: Free Crochet Poinsettia Flower Pattern for Holidays
    Meta Description: Discover a free crochet pattern to create beautiful poinsettia flowers. Perfect for holiday decorations, DIY bouquets, and gifts!
    URL Slug: crochet-poinsettia-flowers
    Primary Keyword: Crochet Poinsettia Flowers
    Secondary Keywords: free crochet flower pattern, crochet flowers, DIY crochet flowers
    Image 1 Alt Text: Beautifully crocheted red poinsettia flower
    Image 2 Alt Text: Close-up view of crochet flower arrangement in a holiday setting

Easy Crochet Flower

Your free crochet ebook

Leave your email address to request your free crochet ebook.

Your email address will be used to handle your ebook request.